DxUpload Class
A control that allows users to upload files to a web server.
Namespace: DevExpress.Blazor
Assembly: DevExpress.Blazor.v25.2.dll
NuGet Package: DevExpress.Blazor
Declaration
public class DxUpload :
    DxControlComponent<UploadBaseJSInteropProxy>,
    IUploadViewOwner
Remarks
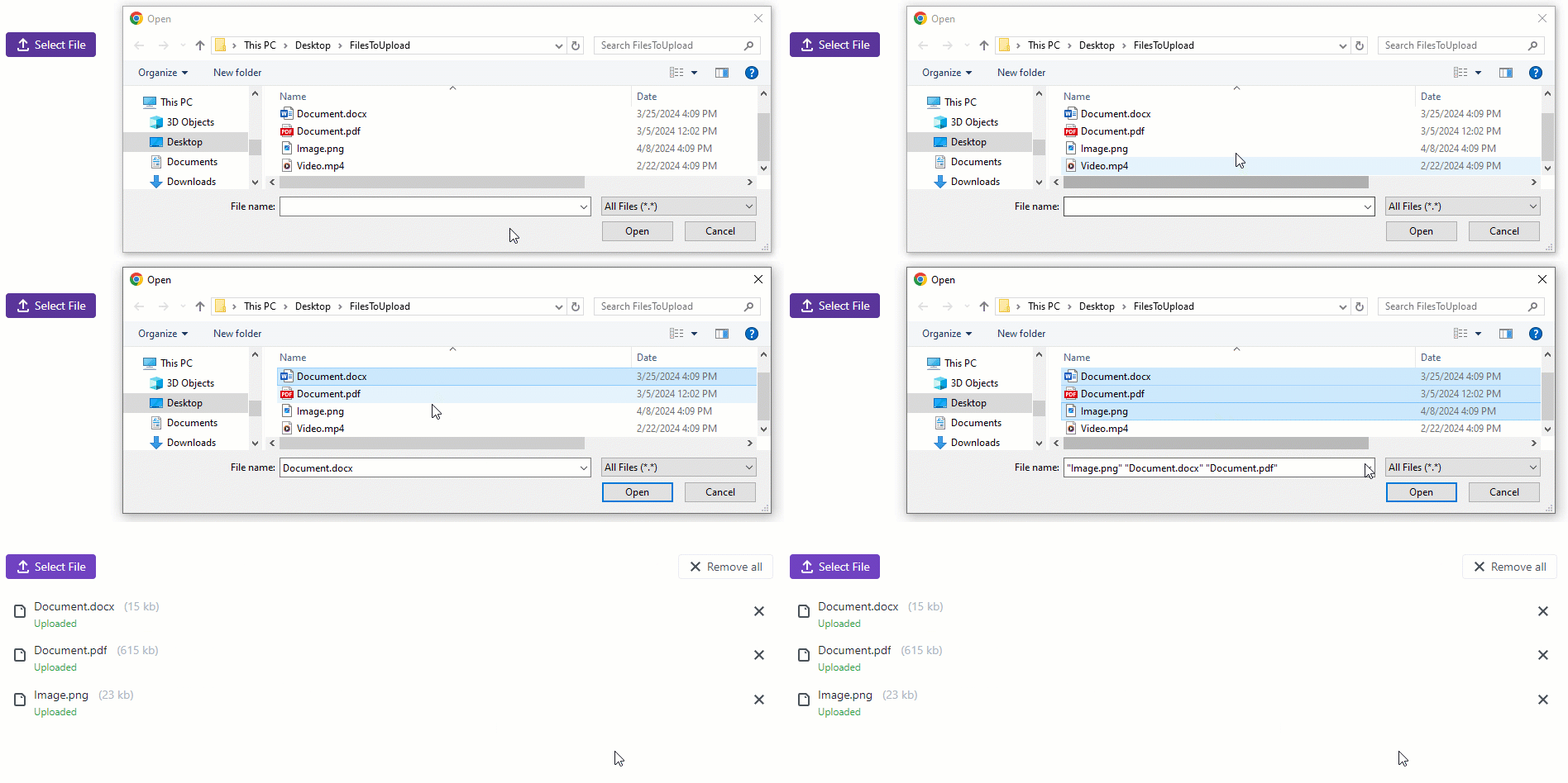
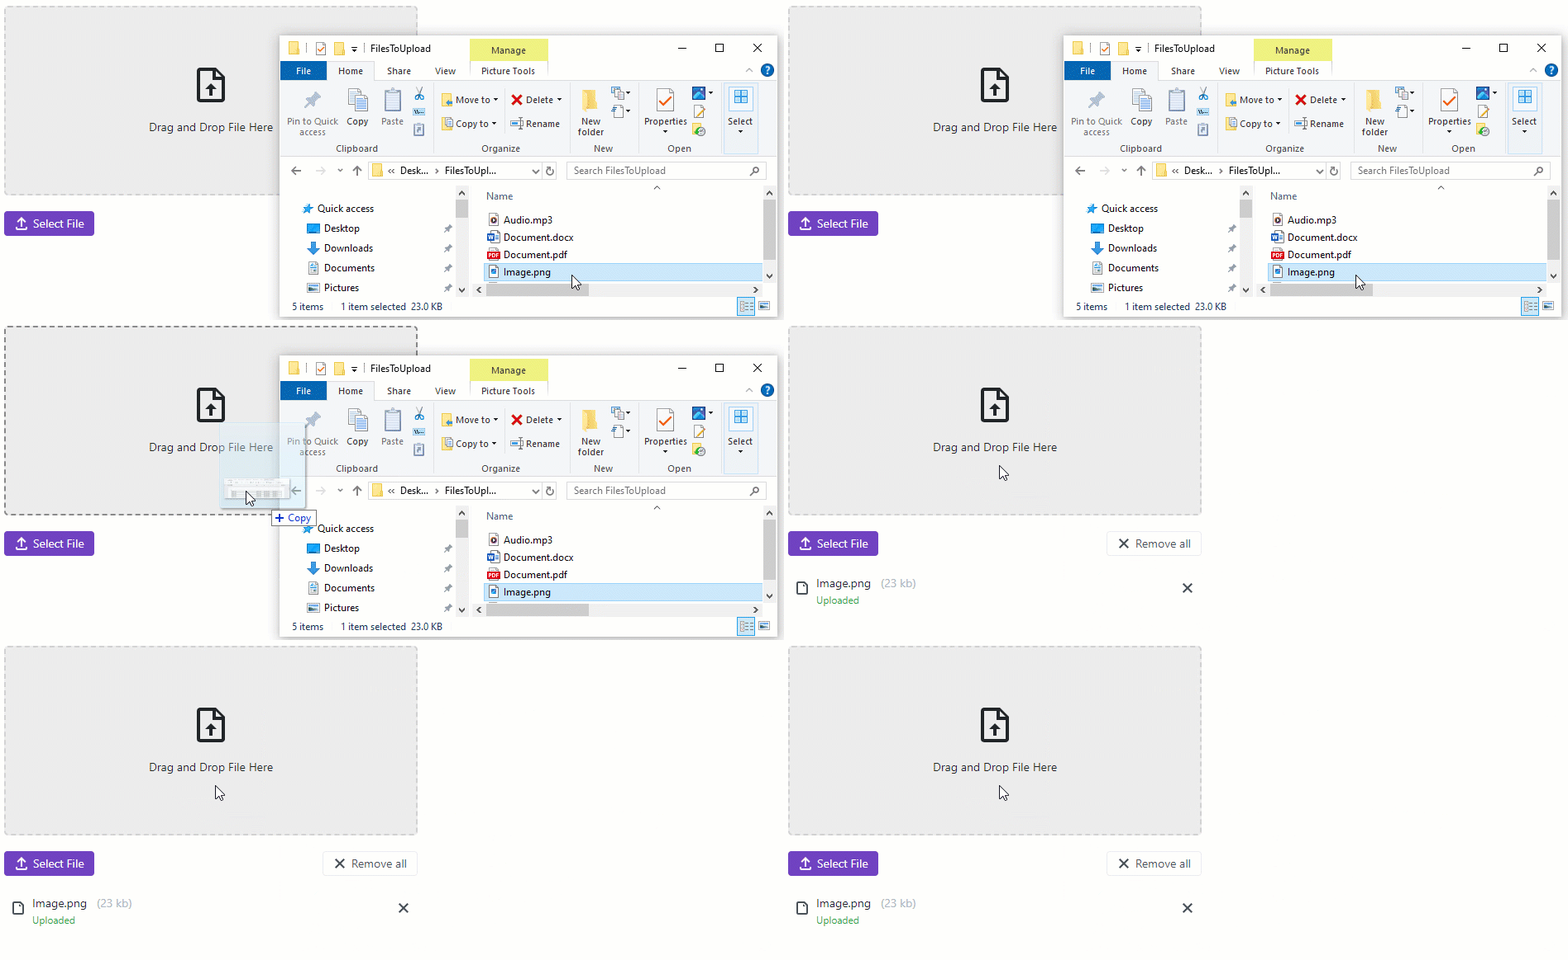
The DevExpress Upload component for Blazor (<DxUpload>) allows users to upload files to a server. Users can select files in the open file dialog or drag and drop files to the appropriate drop zone.

Upload vs. File Input
DevExpress Blazor UI Component Library includes two components that allow you to handle file upload. The key differences between these components are outlined below:
DxUpload- This component requires that you create a web API controller in your application project or separate web API project. Once a user selects a file, the Upload component packs the file into an Ajax request and sends this request to the controller that processes the file.
- DxFileInput
- This component allows you to access and process contents of selected files directly in razor code. To configure the component, you should implement file upload in the FilesUploading event handler.
Add an Upload to a Project
To add an Upload component to an application, you should:
- Create a Blazor Server or Blazor WebAssembly application.
- Add the
<DxUpload>...</DxUpload>markup to your application. - Connect the Upload component to the server.
- Create a controller on the server.
- Specify other Upload options (see the sections below).
API Reference
Refer to the following list for the component API reference: DxUpload Members.
Static Render Mode Specifics
Blazor Upload does not support static render mode. Enable interactivity to use the component in your application. Refer to the following topic for more details: Enable Interactive Render Mode.
How File Upload Works
Once a user selects a file, the Upload control packs the file into an Ajax request and sends this request to the server (the upload controller).

The controller’s upload action processes this file and sends a response to the Upload control. The Upload control displays the response result (for instance, shows the Uploaded text if the file was uploaded successfully).

Users can click the cancel button to interrupt file upload operations and remove files from the list. To hide the cancel button, set the AllowCancel property to false.
The SelectedFilesChanged event occurs each time the file list changes. You can also handle other events to respond to file upload operations. Set the ShowFileList property to false to hide the file list.
Connect the Upload Component to the Server
- Specify the Upload component’s Name property. Its value is required to access uploaded files on the server.
- Set the UploadUrl property to a path of a server-side controller’s action that processes upload requests.
<DxUpload Name="myFile" UploadUrl="https://localhost:10000/api/Upload/Upload/">
</DxUpload>
Create an Upload Controller on the Server
Follow the steps below to create an Upload controller:
If you use a Blazor Server project, you can add a controller to the same project (see the next step).
If you use a Blazor WebAssembly project, create a separate Web API application.
- Add a controller and implement a controller action.
- Optional. Enable cross-origin requests (CORS). Do this for projects with a controller and Upload component on different servers.
Add a Controller and Implement a Controller Action
Create a controller action that accepts the uploaded file, checks it, and saves it to the target location on a server. Follow the steps below to implement a controller action:
- Add the Controllers folder to your project.
- Right-click on the Controllers folder and select Add | Controller.
- In the Add New Scaffolded Item wizard, select MVC Controller - Empty and click Add.
- On the next page, select API Controller - Empty, rename the controller (for example, UploadController), and click Add.
- Make sure that your Program.cs file contains the
MapControllersmethod call. Refer to the following topic for additional information: Attribute routing for REST APIs.
Use one of the following variants to access the uploaded file:
Create an action with a parameter whose name matches the
Nameproperty value.public ActionResult Upload(IFormFile myFile) { // ... }Use the
Nameproperty value to get the uploaded file from form variables.public ActionResult Upload() { // ... var myFile = Request.Form.Files["myFile"]; // ... }
The following example implements the upload controller:
using Microsoft.AspNetCore.Http;
using Microsoft.AspNetCore.Mvc;

namespace BlazorDemo.AspNetCoreHost;
[Route("api/[controller]")]
[ApiController]
public class UploadController : ControllerBase {
    [HttpPost("[action]")]
    public ActionResult Upload(IFormFile myFile) {
        try {
            // Write code that saves the 'myFile' file.
            // Don't rely on or trust the FileName property without validation.
        } catch {
            return BadRequest();
        }
        return Ok();
    }
}
To maintain the highest possible security posture, we do not include the full implementation of the Upload controller. To incorporate secure file upload operations in your web app, we recommend that you add different validation types to upload controller code as described in the following help section: Validation. For information on controller implementation code for different file upload scenarios, refer to the following Microsoft article: File Upload Scenarios.
Enable CORS for a Web API Application
For security reasons, browsers do not allow web pages to send requests to different domains (the same-origin policy). The Upload component and the Web API applications cannot communicate if you use them on different domains/servers.
To enable cross-origin requests, configure the Web API application as explained below. You can omit this step if the controller and Upload component reside on the same server.
In the Program.cs file, specify the CORS policy name and call the AddCors method to apply this policy. Call the UseCors method to add the CORS middleware.
// ...
var builder = WebApplication.CreateBuilder(args);
string MyAllowSpecificOrigins = "_myAllowSpecificOrigins";
// ...
builder.Services.AddCors(options => {
    options.AddPolicy(MyAllowSpecificOrigins,
    builder => {
        builder.AllowAnyOrigin();
    });
});

var app = builder.Build();
// ...
app.UseCors(MyAllowSpecificOrigins);
app.UseAuthorization();
// ...
Apply the EnableCors attribute to the Upload controller with the policy name specified above.
using Microsoft.AspNetCore.Cors;

[ApiController]
[EnableCors("_myAllowSpecificOrigins")]
[Route("api/[controller]")]
public class UploadController : ControllerBase {
    // ...
}
If you deploy your application on an IIS web server, enable CORS in the server’s web.config file:
<system.webServer>
<cors enabled="true" failUnlistedOrigins="true">
    <add origin="\*" />
</cors>
</system.webServer>
Upload Files
Common Information
Users can select files (to be uploaded) via the open file dialog or through drag and drop operations (drag/drop files to the appropriate drop zone).

To upload/reload files in code, use the methods below:
- UploadFile/ReloadFile - Uploads/reloads a specific file.
- UploadFiles/ReloadFiles - Uploads/reloads
multiple files. - UploadAllFiles/ReloadAllFiles - Uploads/reloads all files displayed in the Upload component except for canceled files.
Chunk Upload for Large Files
The Upload component can split large files into small packets and send them to the server in multiple requests (one by one). To enable chunk upload, set the ChunkSize property to a positive value that specifies packet size in bytes.
<DxUpload Name="myFile" UploadUrl="https://localhost:10000/api/UploadChunks/Upload/"
          ChunkSize="1000000">
</DxUpload>
You should configure your Upload controller to process file chunks. To access the uploaded file, use the Upload component’s Name property value. To get information about the file chunk, use chunk metadata serialized to a JSON object (see the ChunkMetadata class in the example below).
Use one of the following ways to access file and chunk metadata:
Create an action with two parameters. The first parameter’s name should match the Name property value. The second parameter should be a string that defines chunk metadata serialized to JSON.
using System.Text.Json;

public ActionResult Upload(IFormFile myFile, [FromForm] string chunkMetadata) {
    // ...
    var metaDataObject = JsonSerializer.Deserialize<ChunkMetadata>(chunkMetadata);
    // ...
}
Get the uploaded file and chunk metadata from form variables.
using System.Text.Json;

public ActionResult Upload() {
    // ...
    var myFile = Request.Form.Files["myFile"];
    var chunkMetadata = Request.Form["chunkMetadata"];
    var metaDataObject = JsonSerializer.Deserialize<ChunkMetadata>(chunkMetadata);
    // ...
}
In the upload action, merge chunks and save the resulting file to the target location.
using System;
using System.IO;
using System.Linq;
using System.Text.Json;
using Microsoft.AspNetCore.Hosting;
using Microsoft.AspNetCore.Http;
using Microsoft.AspNetCore.Mvc;

// Declare a class that stores chunk details.
public class ChunkMetadata {
    public int Index { get; set; }
    public int TotalCount { get; set; }
    public int FileSize { get; set; }
    public string FileName { get; set; }
    public string FileType { get; set; }
    public string FileGuid { get; set; }
}

[Route("api/[controller]")]
[ApiController]
public class UploadChunksController : ControllerBase {
    [HttpPost("[action]")]
    public ActionResult Upload(IFormFile myFile) {
        string chunkMetadata = Request.Form["chunkMetadata"];
        try {
            if(!string.IsNullOrEmpty(chunkMetadata)) {
                var metaDataObject = JsonSerializer.Deserialize<ChunkMetadata>(chunkMetadata);
                // Write code that appends the 'myFile' file chunk to the temporary file.
                // You can use the $"{metaDataObject.FileGuid}.tmp" name for the temporary file.
                // Don't rely on or trust the FileName property without validation.
                if(metaDataObject.Index == metaDataObject.TotalCount - 1) {
                    // Write code that saves the 'myFile' file.
                    // Don't rely on or trust the FileName property without validation.
                }
            }
        } catch {
            return BadRequest();
        }
        return Ok();
    }
}

In this mode, users can pause file upload operations within the UI. To hide the pause button, set the AllowPause property to false.
Multiple File Upload
Set the AllowMultiFileUpload property to true to enable users to upload multiple files at once (asynchronously). You can also use the MaxFileCount property to limit the number of files that can be uploaded.
<DxUpload Name="myFile" UploadUrl="https://localhost:10000/api/Upload/Upload/"
          AllowMultiFileUpload="true"
          MaxFileCount="500">
</DxUpload>
The MaxFileCount property’s default value is 1000. We recommend this limit to ensure correct operation of the DxUpload component. If you need to reset the limit and allow users to select any number of files, set the property to 0 (zero).

Upload Modes
The Upload component uploads files once a user selects or “drops” files (UploadMode.Instant). Set the UploadMode property to UploadMode.OnButtonClick to upload files after the user clicks the upload button.
<DxUpload Name="myFile" UploadUrl="https://localhost:10000/api/Upload/Upload/"
          UploadMode="UploadMode.OnButtonClick">
</DxUpload>

Respond to File Upload
Handle the following events to respond to actions during the file upload process:
Event | Description |
|---|---|
Fires when file upload is about to start. | |
Fires when file upload starts. | |
Fires when a file is uploaded successfully. | |
Fires when file upload is aborted. | |
Fires when file upload is paused. | |
Fires when an error occurs during file upload. | |
Fires when a file is reloaded. | |
Fires when upload progress changes. |
Cancel File Upload
Users can cancel file upload in the UI. To hide the cancel button, set the AllowCancel property to false.

Users can then reload or remove the file whose upload was canceled.

To cancel file upload or remove files from the file list in code, use the methods below:
- CancelFileUpload/RemoveFile - Cancels a specific file’s upload or removes a specific file from the file list.
- CancelFilesUpload/RemoveFiles - Cancels upload of multiple files or removes multiple files from the file list.
- CancelAllFilesUpload/RemoveAllFiles - Cancels upload of all files or removes all files from the file list.
Drag and Drop
To enable drag and drop in the Upload, implement an external zone where users can drop a file to upload. Use the following properties to define the drop zone UI:
- ExternalDropZoneCssSelector - Specifies the CSS selector of a container or HTML element wherein to drop the files.
- ExternalDropZoneDragOverCssClass - Specifies the CSS class of the drop zone when users drag files over it.
<div id="overviewDemoDropZone" class="card custom-drop-zone bg-light rounded-3 w-100 m-0">
    <span class="drop-file-icon mb-3"></span>
    <span>Drag and Drop File Here</span>
</div>
<DxUpload Name="myFile"
          UploadUrl="https://localhost:10000/api/Upload/Upload/"
          ExternalDropZoneCssSelector="#overviewDemoDropZone"
          ExternalDropZoneDragOverCssClass="bg-light border-secondary text-dark" >
</DxUpload>

Validation
Client-Side Validation
Use the following Upload properties to validate uploaded files on the client:
- AcceptedFileTypes
- Filters files in the Open File dialog and specifies MIME types that the Upload component can upload.
- ValidateByAcceptedFileTypes
- Specifies whether the component validates files against accepted file types before uploading them.
- AllowedFileExtensions
- Specifies file extensions that the Upload component can upload.
- MaxFileSize
- Specifies the maximum file size in bytes.
- MinFileSize
- Specifies the minimum file size in bytes.
<DxUpload Name="myFile" UploadUrl="https://localhost:10000/api/Upload/Upload/"
          AllowedFileExtensions="@(new List<string> { ".jpg", ".jpeg", ".gif", ".png" })"
          MaxFileSize="4000000">
</DxUpload>
If validation fails, the Upload component displays an error message.

Server-Side Validation
To introduce secure file upload operations to your application, we recommend that you add different validation types to upload controller code, for example:
Validate the file name: Use Path.GetFileName against the file name to obtain the actual file name.
Limit file name length and restrict allowed characters.
If using a real file system, check whether the file is within the expected root directory. Use Path.GetFullPath to resolve path information.
var rootDirectory = new Directorylnfo(".");
var resolvedPath = Path.GetFullPath(Path.Combine(rootDirectory.FullName, Path.GetFileName(userProvidedPath)));

if (!resolvedPath.StartsWith(rootDirectory.FullName + Path.DirectorySeparatorChar)) {
    throw new Exception();
}
Limit file size.
Validate file extensions and manage allowed extensions. Use Path.GetExtension against a file name to obtain the actual file name extension.
var extension = Path.GetExtension(myFile.FileName).ToUpperInvariant();
var isValidExtension = imageExtensions.Contains(extension);

if(!isValidExtension) throw new InvalidOperationException();
For additional information and examples, refer to the following documents:
The following code implements a simple upload controller and validates file extensions/file paths on the server side. You can also add implement other validation methods to further secure your solution.
using System;
using System.IO;
using System.Linq;
using Microsoft.AspNetCore.Http;
using Microsoft.AspNetCore.Mvc;

[Route("api/[controller]")]
[ApiController]
public class UploadValidationController : ControllerBase {
    const long MaxFileSize = 4_000_000;
    readonly string[] imageExtensions = { ".JPG", ".JPEG", ".GIF", ".PNG" };
    [HttpPost("[action]")]
    public ActionResult Upload(IFormFile myFile) {
        try {
            var extension = Path.GetExtension(myFile.FileName).ToUpperInvariant();
            var isValidExtension = imageExtensions.Contains(extension);
            var isValidSize = myFile.Length <= MaxFileSize;
            if(!isValidExtension || !isValidSize)
                throw new InvalidOperationException();
            // Write code that saves the 'myFile' file.
            // Don't rely on or trust the FileName property without validation.
        } catch {
            return BadRequest();
        }
        return Ok();
    }
}
Select Button Customization
Use the SelectButtonText property to change the Select File button’s text.
<DxUpload Name="myFile" UploadUrl="https://localhost:10000/api/Upload/Upload/"
          SelectButtonText="Select My File">
</DxUpload>

To hide the select button, set the ShowSelectButton property to false.
You can also implement an external select button that invokes the open file dialog. Use the ExternalSelectButtonCssSelector to specify the CSS selector of a button or another HTML element.
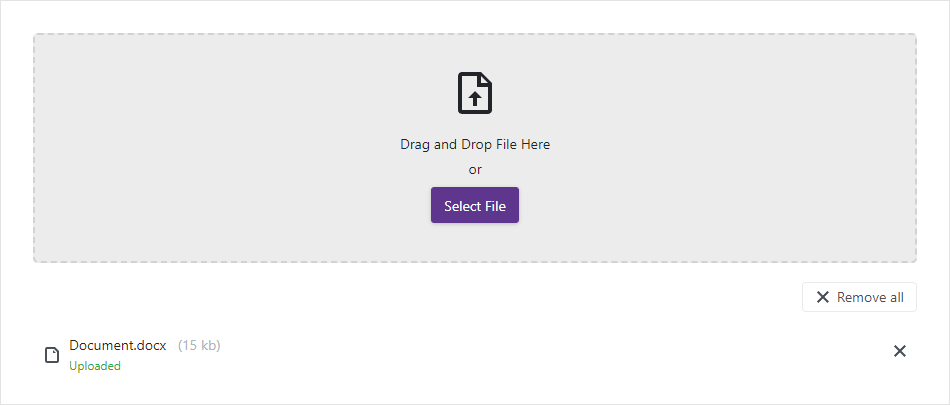
The following example implements the external Select File button and drop zone container. Handle the SelectedFilesChanged event and use the Visible property to hide the Upload when the file list is empty.
<div id="overviewDemoDropZone" class="card custom-drop-zone bg-light rounded-3 w-100 m-0">
    <span class="drop-file-icon mb-3"></span>
    <span>Drag and Drop File Here</span><span class="m-1">or</span>
    <button id="overviewDemoSelectButton" class="btn border-primary btn-primary m-1">Select File</button>
</div>
<DxUpload Name="myFile" UploadUrl="https://localhost:10000/api/Upload/Upload/"
          Visible="@UploadVisible"
          ExternalSelectButtonCssSelector="#overviewDemoSelectButton"
          ExternalDropZoneCssSelector="#overviewDemoDropZone"
          ExternalDropZoneDragOverCssClass="bg-light border-secondary text-dark"
          SelectedFilesChanged="@SelectedFilesChanged">
</DxUpload>

@code {
    bool UploadVisible { get; set; } = false;

    protected void SelectedFilesChanged(IEnumerable<UploadFileInfo> files) {
        UploadVisible = files.ToList().Count > 0;
        InvokeAsync(StateHasChanged);
    }
}

Keyboard Navigation
The DevExpress Blazor Upload component supports keyboard shortcuts that allow users to navigate between the component’s buttons. Keyboard navigation is implemented on the client and works seamlessly in Blazor Server apps with a slow connection.
Note
Keyboard support allows users to interact with application content in cases they cannot use a mouse or they rely on assistive technologies (like screen readers or switch devices). Refer to the Accessibility help topic for information on other accessibility areas that we address.
The following shortcut keys are available:
| Shortcut Keys | Description |
|---|---|
| Tab | Moves focus to the next button. |
| Shift + Tab | Moves focus to the previous button. |
| Enter, Space | Presses the focused button. |

Troubleshooting
If a Blazor application throws unexpected exceptions, refer to the following help topic: Troubleshooting.