Add DevExpress UI Components to an Existing Blazor App
- 3 minutes to read
The DevExpress Template Kit is the fastest way to create new Blazor apps with DevExpress UI. However, the Template Kit cannot integrate DevExpress components into an existing Blazor project. This topic explains how to install packages, register services and static resources, and add a DevExpress Blazor component to your existing app.
Create a Blank Blazor App
Note
This tutorial uses the default Visual Studio Blazor Web App template as the starting project. If you already have a Blazor project, skip to the next section.
- Open Visual Studio and click File → New → Project….
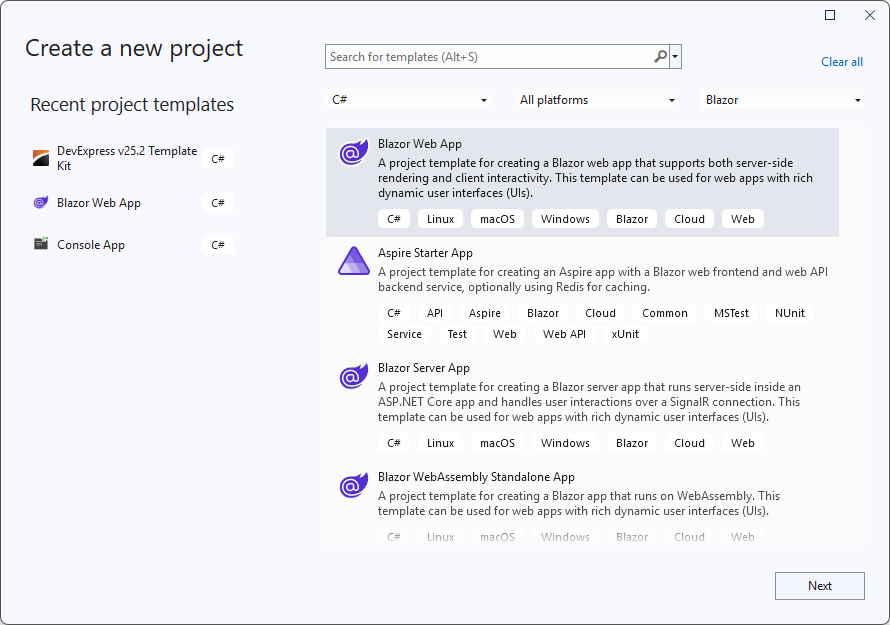
In the Create a new project dialog, select Blazor Web App.

Click the Next button.
- Specify the project name and location.
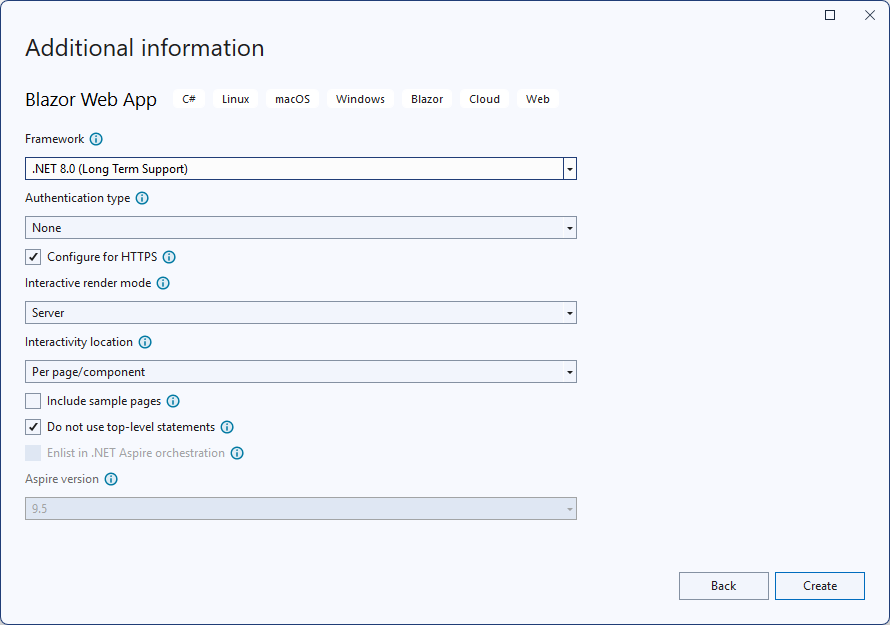
Configure the project. This tutorial creates a blank Blazor Server web application without sample pages.

Click the Create button.
Add the DevExpress Blazor Package
- Register the local or online DevExpress NuGet feed in Visual Studio.
- In the Solution Explorer, right-click your project and select Manage NuGet Packages… in the context menu.
Select the DevExpress NuGet feed as a package source.

Switch to the Browse tab and search for
DevExpress.Blazor.- Install the latest DevExpress.Blazor package.
Register DevExpress Blazor Resources
Register internal DevExpress Blazor services in the application’s startup file (Program.cs).
using MyBlazorApp.Components;
using DevExpress.Blazor;

namespace MyBlazorApp
{
    public class Program
    {
        public static void Main(string[] args)
        {
            var builder = WebApplication.CreateBuilder(args);
            builder.Services.AddRazorComponents()
                .AddInteractiveServerComponents();
            builder.Services.AddDevExpressBlazor();
            var app = builder.Build();
            /* ... */
            app.Run();
        }
    }
}
Register the
DevExpress.Blazornamespace in the Components\_Imports.razor file:@using System.Net.Http @using System.Net.Http.Json @using Microsoft.AspNetCore.Components.Forms @using Microsoft.AspNetCore.Components.Routing @using Microsoft.AspNetCore.Components.Web @using static Microsoft.AspNetCore.Components.Web.RenderMode @using Microsoft.AspNetCore.Components.Web.Virtualization @using Microsoft.JSInterop @using MyBlazorApp @using MyBlazorApp.Components @using DevExpress.BlazorApply the application-wide DevExpress Blazor theme and add client scripts in the Components\App.razor file.
<!DOCTYPE html>
<html lang="en">
<head>
    <meta charset="utf-8" />
    <meta name="viewport" content="width=device-width, initial-scale=1.0" />
    <base href="/" />
    @DxResourceManager.RegisterTheme(Themes.Fluent)
    @DxResourceManager.RegisterScripts()
    <link rel="stylesheet" href="app.css" />
    <link rel="stylesheet" href="MyBlazorApp.styles.css" />
    <HeadOutlet />
</head>
<body>
    <Routes />
    <script src="_framework/blazor.web.js"></script>
</body>
</html>
Add a DevExpress Blazor Component to the App
To get acquainted with the project structure, add a simple DevExpress Blazor component (Calendar) to the application’s home page and see it in action:
- Open the Components\Pages\Home.razor file.
The DevExpress Calendar for Blazor does not support static render mode. Enable interactivity:
@rendermode InteractiveServerAdd the DxCalendar component to the page. Bind the component to the
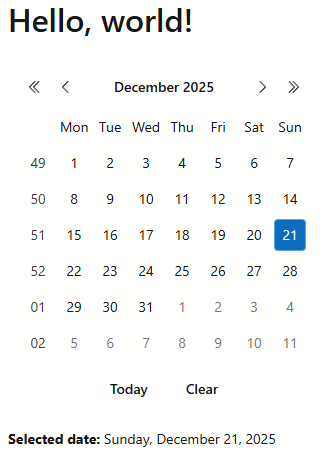
SelectedDatevariable to test interactivity.<DxCalendar @bind-SelectedDate="@SelectedDate" /> <p><b>Selected date:</b> @SelectedDate.ToLongDateString()</p> @code { DateTime SelectedDate { get; set; } = DateTime.Now; }Press F5 to run your application.

Full code:
@page "/"
@rendermode InteractiveServer
<PageTitle>Home</PageTitle>
<h1>Hello, world!</h1>
<DxCalendar @bind-SelectedDate="@SelectedDate" />

<p><b>Selected date:</b> @SelectedDate.ToLongDateString()</p>

@code {
    DateTime SelectedDate { get; set; } = DateTime.Now;
}