Formatting Changing Values
- 4 minutes to read
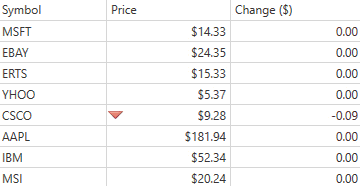
The Data Update conditional format allows you to visualize changing values in real time:
Note
Set the TableView.AllowDataUpdateFormatConditionMenu (or TreeListView.AllowDataUpdateFormatConditionMenu) property to true to enable creating the data update conditional formats.
This topic consists of the following sections:
- Adding Rules in Code
- Data Update Animation
- Adding Rules Using Conditional Formatting Menu
- Adding Rules Using Conditional Formatting Rules Manager
Adding Rules in Code
Create the DataUpdateFormatCondition class instance and specify the following settings to create the Data Update conditional format in code:
- Specify the data update rule, that determines when data update formatting should be applied, using the DataUpdateFormatCondition.Rule property. To define a custom logic, set the DataUpdateFormatCondition.Rule property to DataUpdateRule.Custom and handle the TableView.CustomDataUpdateFormatCondition (or TreeListView.CustomDataUpdateFormatCondition) event.
- Use the FormatConditionBase.FieldName property to specify the column’s field name to which to apply the conditional format.
Specify the target cells’ formatting:
- Use the FormatConditionBase.PredefinedFormatName property to specify the predefined format, or
- Set the custom format using the ExpressionConditionBase.Format property.
- Add the resulting DataUpdateFormatCondition instance to the TableView.FormatConditions (or TreeListView.FormatConditions) collection.
The following code sample illustrates how to define a conditional format in markup:
<dxg:TableView.FormatConditions>
   <dxg:DataUpdateFormatCondition Rule="Increase" FieldName="Change" PredefinedFormatName="GreenFillWithDarkGreenText"/>
</dxg:TableView.FormatConditions>
The code sample below illustrates how to define the same conditional format in code-behind:
var changeFormatCondition = new DataUpdateFormatCondition() {
   Rule = DataUpdateRule.Increase,
   FieldName = "Change",
   PredefinedFormatName = "GreenFillWithDarkGreenText"
};
view.FormatConditions.Add(changeFormatCondition);
Data Update Animation
The Data Update conditional format works with animation effects. To change animation effects, create the DataUpdateAnimationSettings class instance with required settings, and assign the resulting object to the DataUpdateFormatCondition.AnimationSettings property.
The following code sample illustrates how to change animation effects in markup:
<dxg:TableView.FormatConditions>
   <dxg:DataUpdateFormatCondition FieldName="DeltaPrice" Rule="Always" PredefinedFormatName="LightRedFillWithDarkRedText">
      <dxg:DataUpdateFormatCondition.AnimationSettings>
         <dx:DataUpdateAnimationSettings EasingMode="Linear" HideDuration="0:0:2" HoldDuration="0:0:6" ShowDuration="0:0:2" />
      </dxg:DataUpdateFormatCondition.AnimationSettings>
   </dxg:DataUpdateFormatCondition>
</dxg:TableView.FormatConditions>
The code sample below illustrates how to change animation effects in code-behind:
var deltaPriceFormatCondition = new DataUpdateFormatCondition() {
   FieldName = "DeltaPrice",
   Rule = DataUpdateRule.Always,
   PredefinedFormatName = "LightRedFillWithDarkRedText",
   AnimationSettings = new DataUpdateAnimationSettings() {
      EasingMode = AnimationEasingMode.Linear,
      HideDuration = new Duration(new TimeSpan(0, 0, 2)),
      HoldDuration = new Duration(new TimeSpan(0, 0, 6)),
      ShowDuration = new Duration(new TimeSpan(0, 0, 2))
   }
};
view.FormatConditions.Add(deltaPriceFormatCondition);
Use the following grid view properties to define animation duration for all data update conditional formats within the current grid’s view:
TableView.DataUpdateAnimationShowDuration (TreeListView.DataUpdateAnimationShowDuration) | Gets or sets the data update formatting show duration. |
TableView.DataUpdateAnimationHoldDuration (TreeListView.DataUpdateAnimationHoldDuration) | Specifies the data update formatting hold duration. |
TableView.DataUpdateAnimationHideDuration (TreeListView.DataUpdateAnimationHideDuration) | Gets or sets the data update formatting hide duration. |
Adding Rules Using Conditional Formatting Menu
- Select the Data Update Rules item in the Conditional Formatting Menu.
- In the invoked dialog, choose the data update rule (Change, Increase, or Decrease) to determine which cells should be formatted.
- Choose a format to define the applied rule’s visual appearance. The conditional formatting menu allows you to use only predefined formats stored within the TableView.PredefinedFormats (or TreeListView.PredefinedFormats) collection.
- Enable the apply format to the entire row option to apply a conditional format to the entire row, if necessary.

Adding Rules Using Conditional Formatting Rules Manager
- Click the New Rule… in the Conditional Formatting Rules Manager.
- Select the Format only changing values rule type in the invoked New Formatting Rule dialog.
- Choose the data update rule to determine which cells should be formatted (Changed, Increased, or Decreased). Specify the duration of time over which data update formatting is applied.
- To define the visual appearance of the applied rule, click the Format button, and specify the required settings in the invoked Format Cells dialog. See the Format Cells Dialog Window section of the Conditional Formatting Rules Manager topic to learn more.

Limitations
The Data Update conditional format is not supported in the multiple selection mode.