Calculate Discounted Price Tutorial
- 6 minutes to read
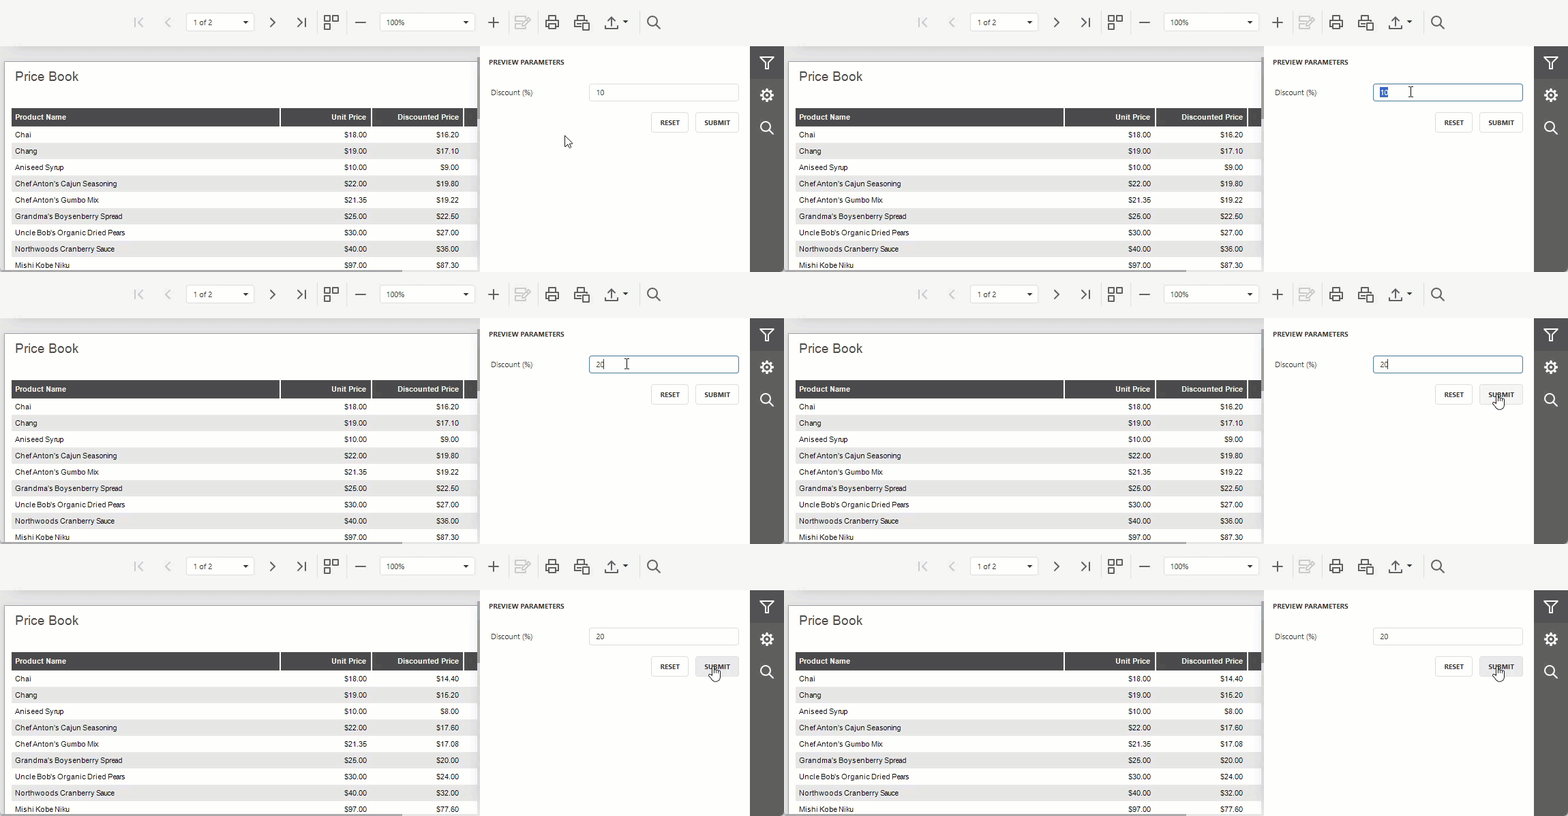
This tutorial creates a “Price Book” report bound to the Products table of the sample Northwind database. The report uses a calculated field to display a discounted price for each product, and a report parameter that allows users to change the discount rate at runtime without editing the calculated field’s expression.
Sample SQLite Database
This tutorial uses the following SQLite database shipped with compiled DevExpress VCL demos:
%PUBLIC%\Documents\DevExpress VCL Demos\MegaDemos\Product Demos\ExpressReports\Data\nwind.db
Step 1 — Create a Report Bound to the Products Table
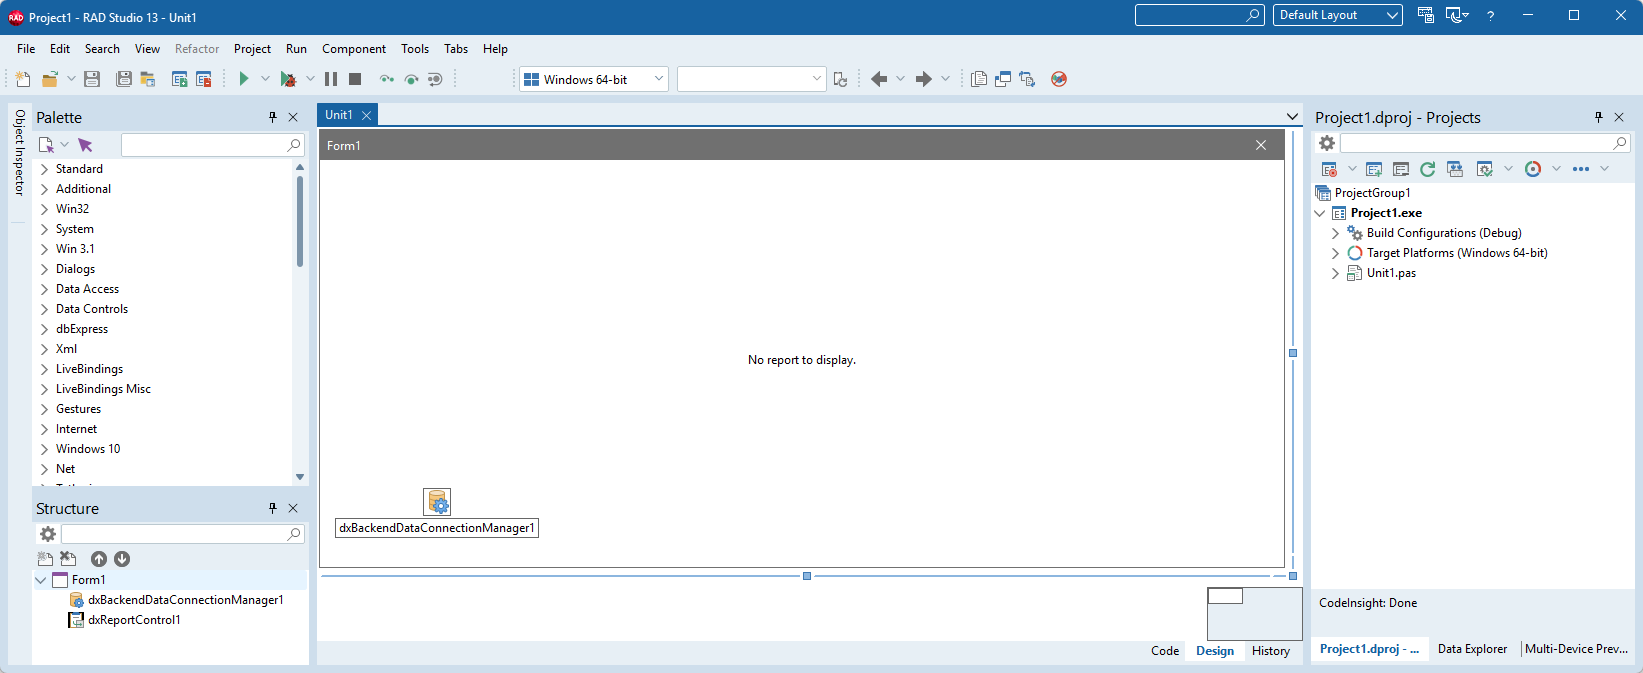
Create a new Delphi or C++Builder project and place TdxReportControl and TdxBackendDataConnectionManager components on a form:
Configure a Database (SQL) connection to use the sample SQLite database:
XpoProvider=SQLite;Data Source=C:\Users\Public\Documents\DevExpress VCL Demos\MegaDemos\Product Demos\ExpressReports\Data\nwind.dbRight-click the TdxReportControl component and select Designer… from the context menu.
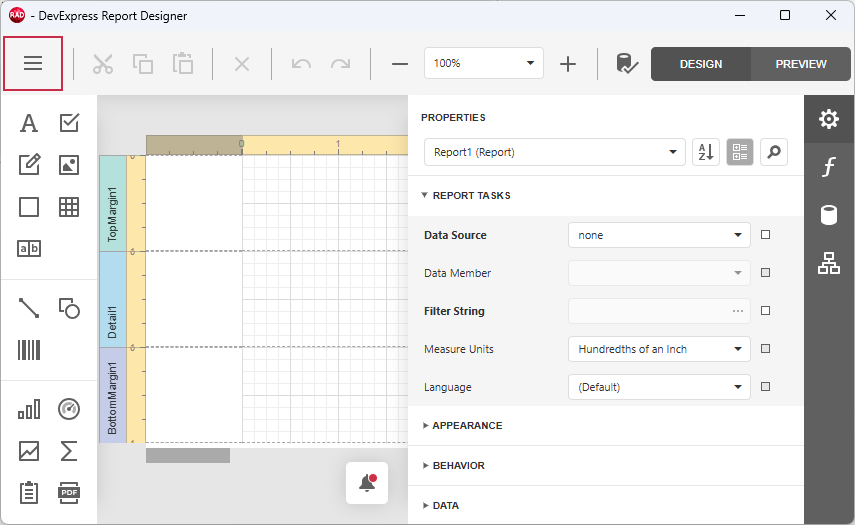
In the Report Designer window, click the hamburger button to display the component menu:
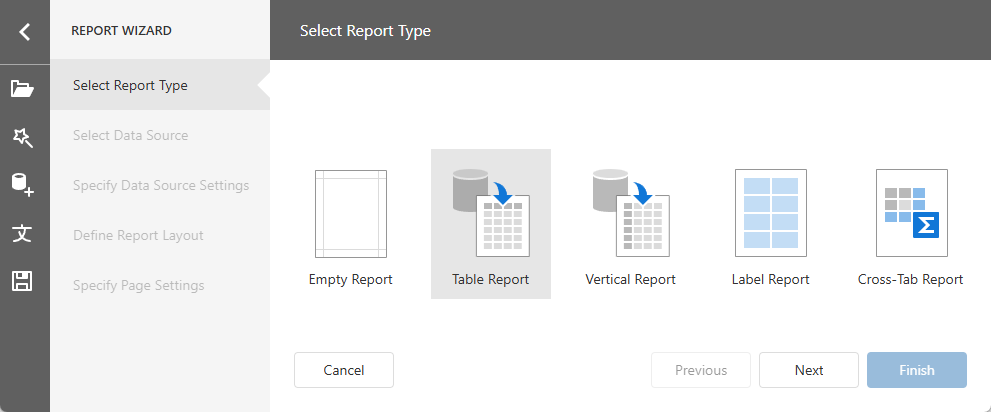
Select Design in the Report Wizard… and create a tabular report bound to the previously configured SQL Data Source.
Expand the Tables node and select the Products table:
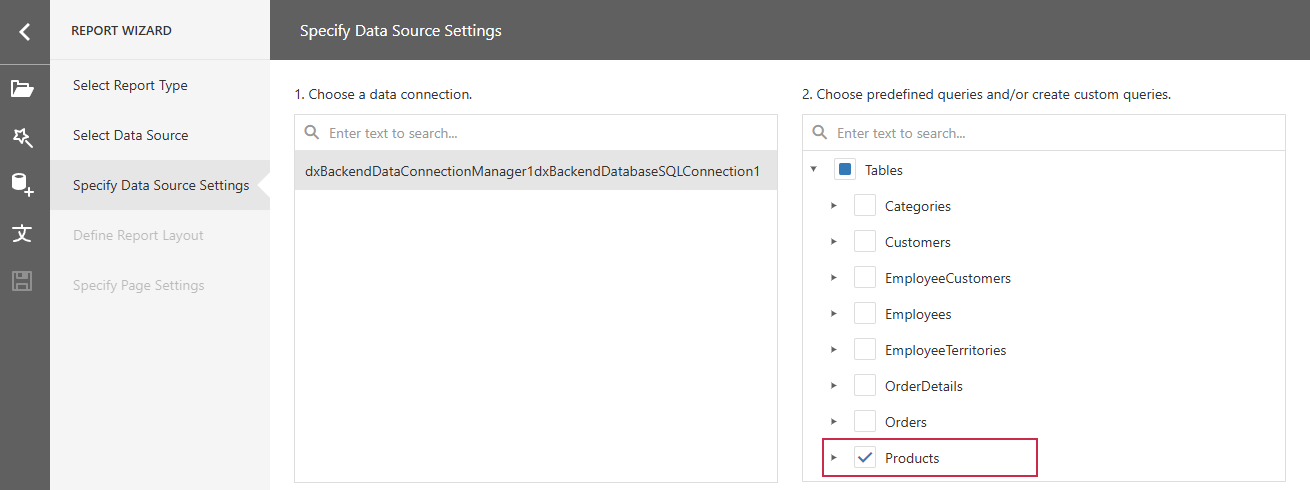
On the Define Report Layout step, select the following fields from the Products table:
ProductNameUnitPriceUnitsInStock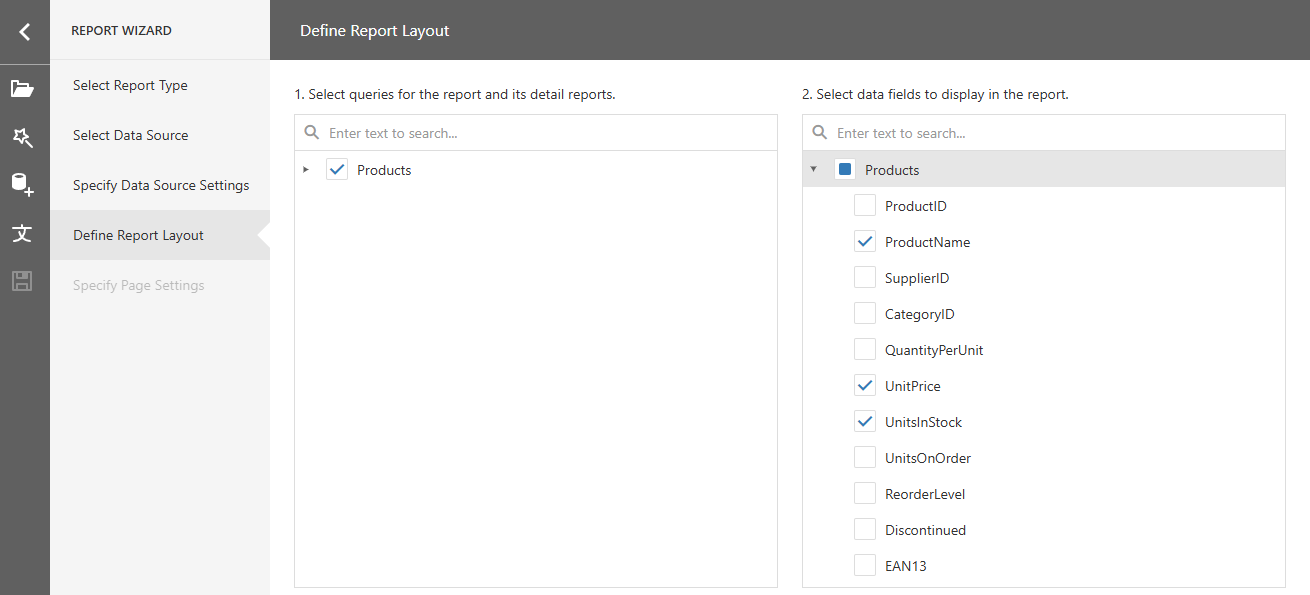
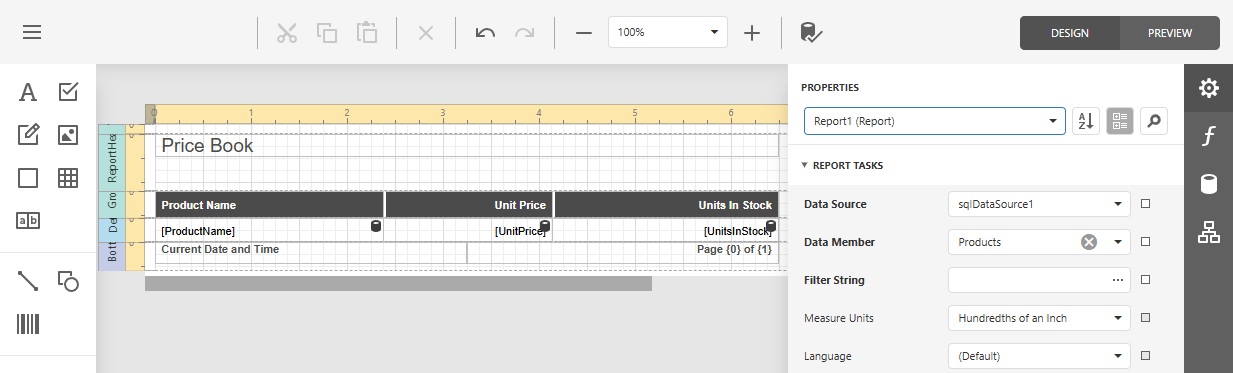
Click the Finish button to generate the report layout:
Tip
Refer to the following tutorial for detailed instructions on how to create a project, configure a SQL data source, and generate a table report using the Report Wizard:
Step 2 — Add a Report Parameter for the Discount Rate
In the FIELD LIST panel, click the Plus button next to Parameters to create a new report parameter:
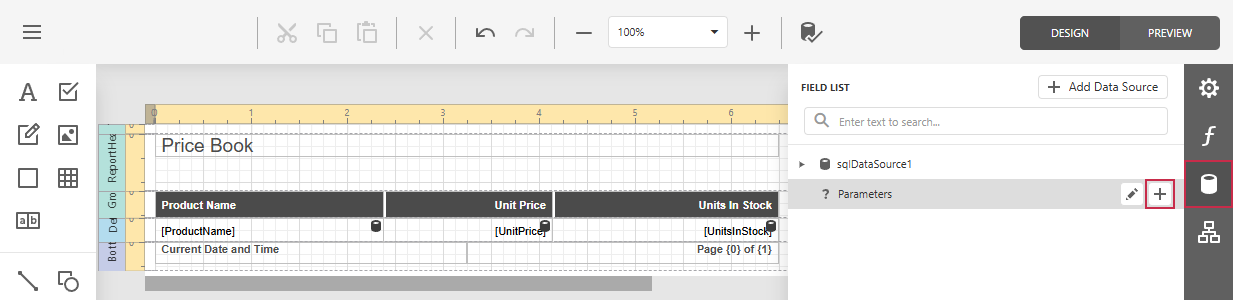
Specify the following parameter options:
- Name (1)
discountParameter- Description (2)
Discount (%)- Type (3)
Number (floating-point)- Value (4)
10(a default 10% discount)
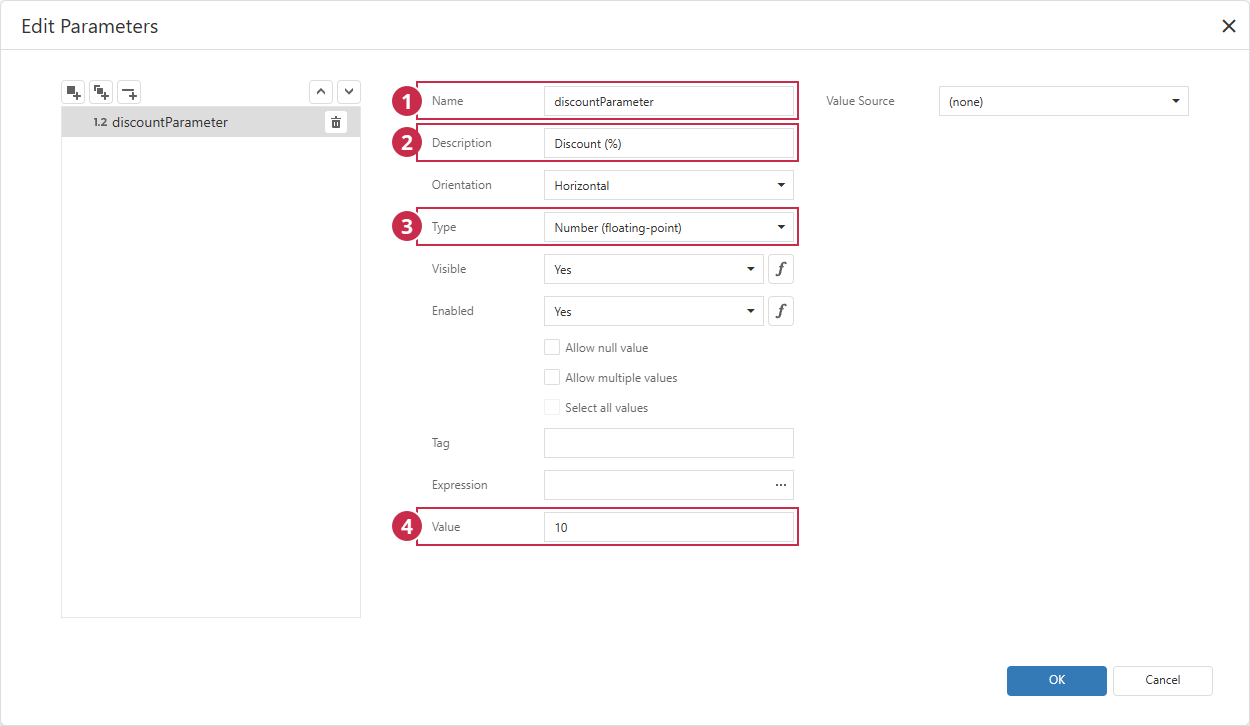
Click the OK button to create the parameter.
Step 3 — Add a Calculated Field for the Discounted Price
Select the Products data member (1) and click the Add calculated field button (2). Since the created field is scoped to the Products table, you can use the field to calculate a value for each row:
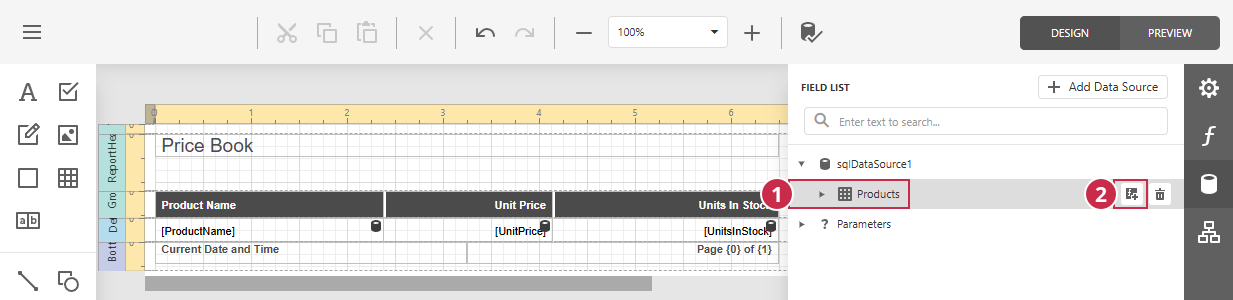
Click the Edit button next to the newly added field to display its properties:
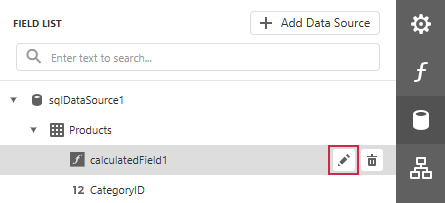
Specify the following calculated field options:
- Name
discountedPriceField- Display Name
Discounted Price- Field Type
Float- Expression
- Click the ellipsis button to open the Expression Editor and construct a field’s formula.
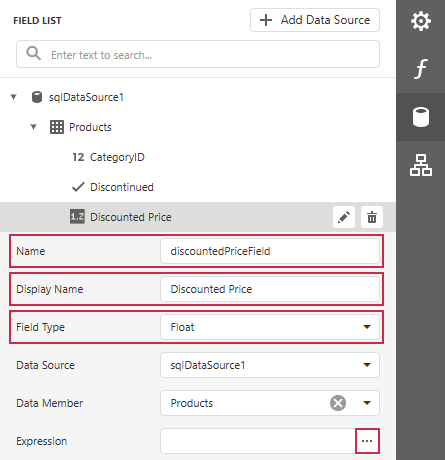
Calculated Field Formula
In the Expression Editor dialog, build a formula that calculates the value of the field from the product price and the report parameter:
- Double-click the Unit Price field to add it as an expression operand.
- Expand Parameters and double-click discountParameter to add it as an expression operand.
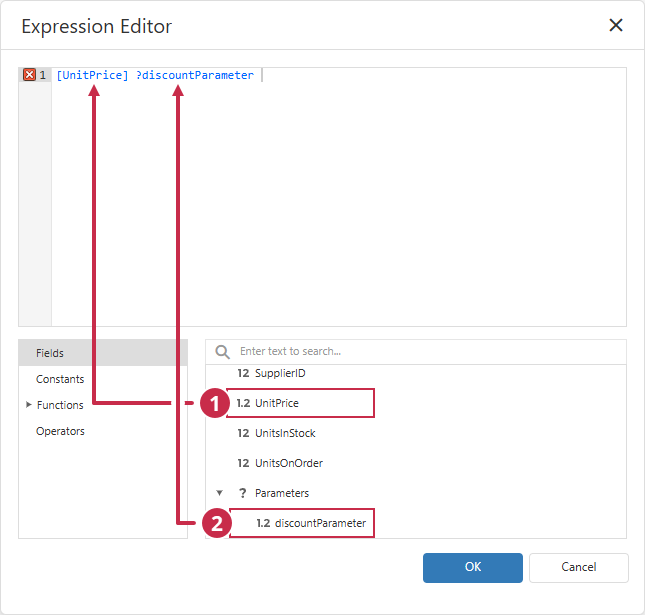
Add operators to subtract the discount from the unit price:
[UnitPrice] * (1 - ?discountParameter / 100)
Click the OK button to apply the created expression to the calculated field.
Step 4 — Display the Calculated Field in the Report
Insert a new Discounted Price column into report details:
 How to add a report column…
- Right-click the Unit Price cell in the group header and select Insert > Column to Right from the context menu.
- Double-click the newly added cell in the group header and rename the cell to
Discounted Price. - Right-click the [UnitPrice] cell in the details row and select Insert > Column to Right from the context menu.
- Resize the new cells and change their styles to match the rest of the report.
Drag the Discounted Price field from the FIELD LIST panel onto the detail band that is next to Unit Price and Units In Stock cells.
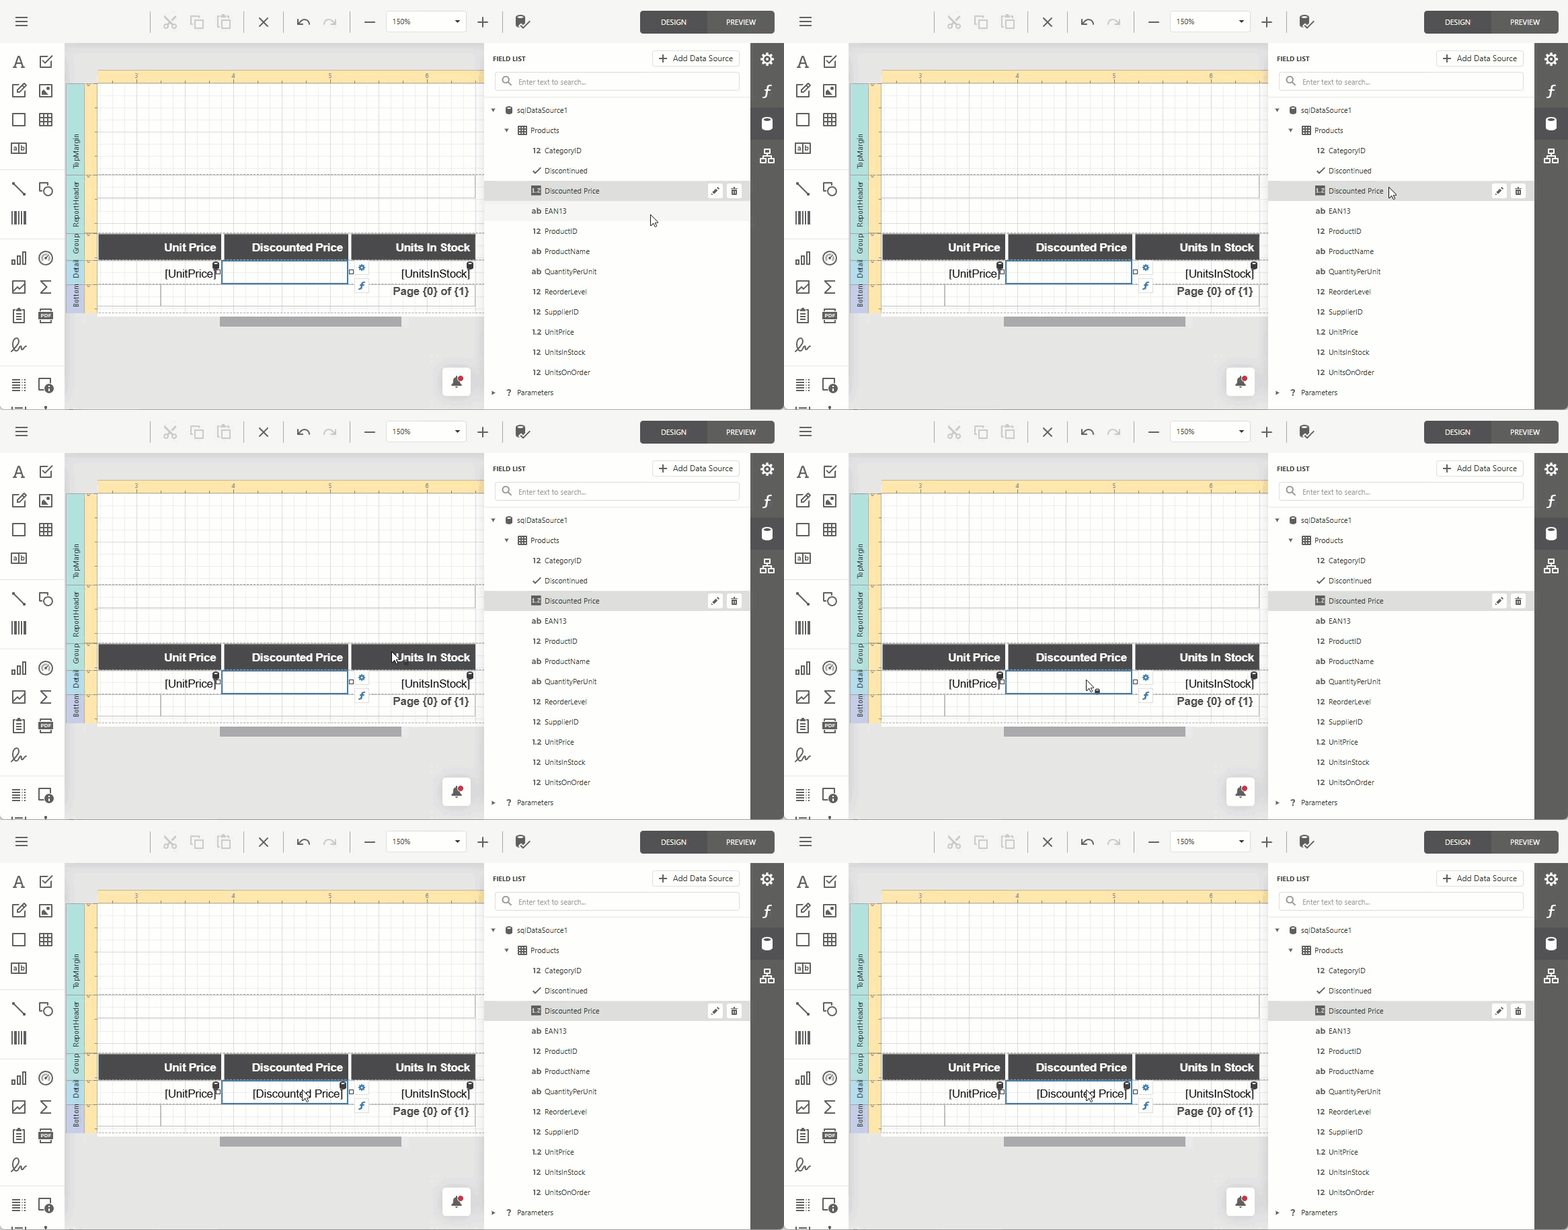
Tip
You can also reference the calculated field in the cell’s expression using the
[<field name>]or[<field display name>]syntax: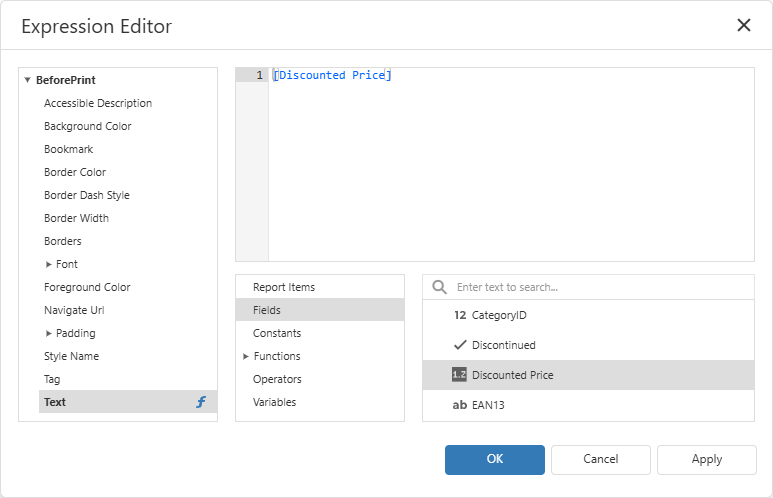
Change the field’s format to Currency:
How to change the field format…- Select the new Discounted Price cell in the details row.
- Switch to the PROPERTIES panel and expand TABLE CELL TASKS.
- Enter
{0:$0.00}in the Text Format String field to display prices with a dollar sign and two decimal places.
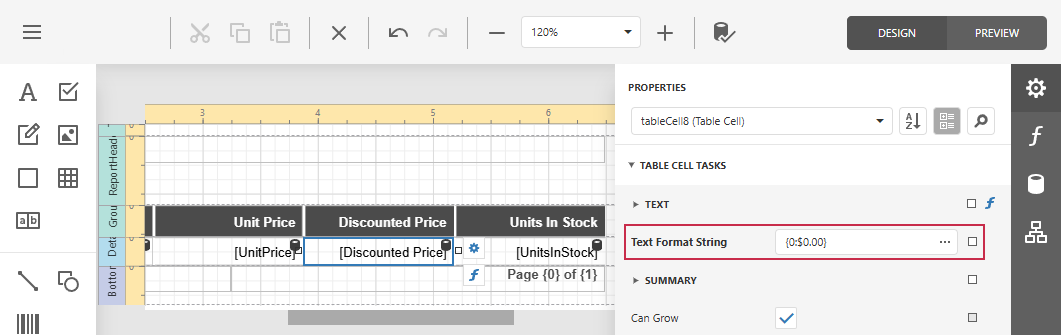
Step 5 — Preview the Report
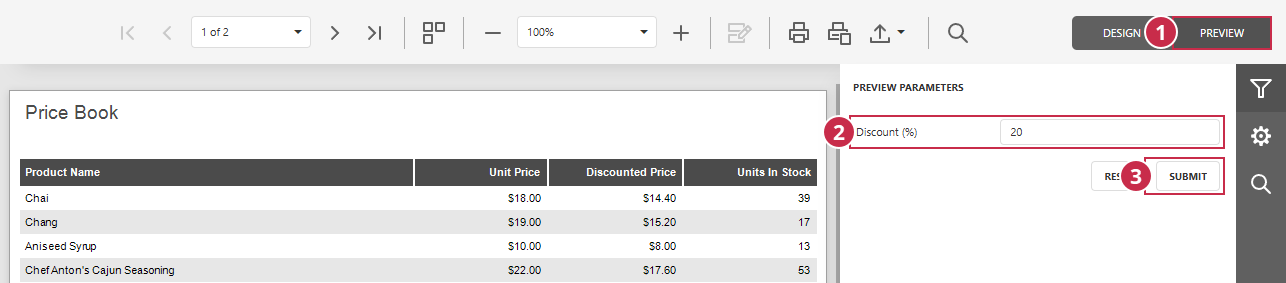
- Click the PREVIEW button in the upper-right corner of the Report Designer.
- Modify the Discount (%) parameter value.
- Click the Submit button to rebuild the report and display updated discounted prices.
Step 6 — Build & Test Your App
Post-Build Events for WebView2 Loader DLL Deployment
All applications that include the TdxReportControl component require the WebView2 Runtime as a dependency.
To automatically copy a 32- or 64-bit WebView2Loader.dll file to the target build folder, do the following:
- Open the Project Options dialog. Select the Project → Options… item in the RAD Studio menu or press Ctrl + Shift + F11).
Select Build → Build Events in the tree view pane on the left and select the following option in the Target combo box:
'All Configurations - All Platforms'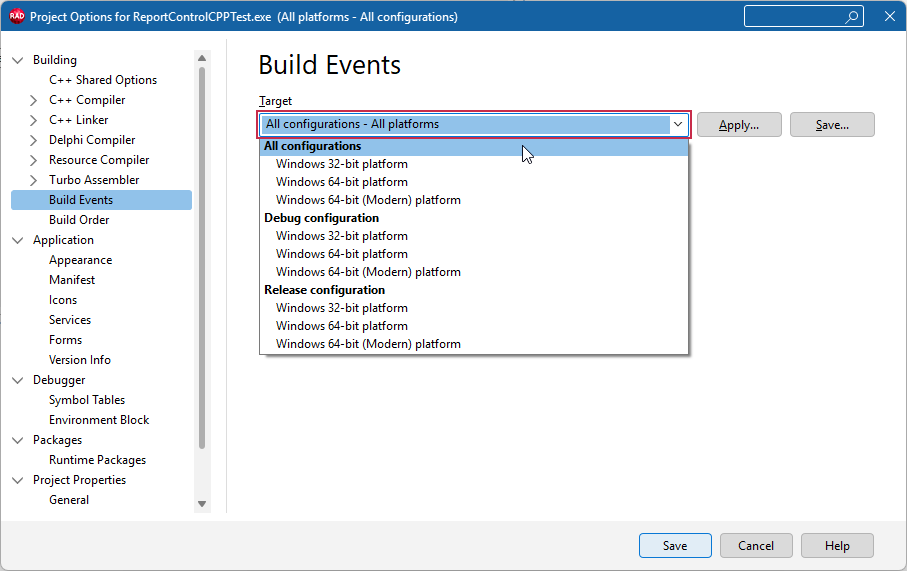
Copy the command line for the target compiler and platform:
copy /Y "$(BDS)\Redist\$(Platform)\WebView2Loader.dll" "$(OUTPUTDIR)"Paste the DLL deployment command line into the Commands box:
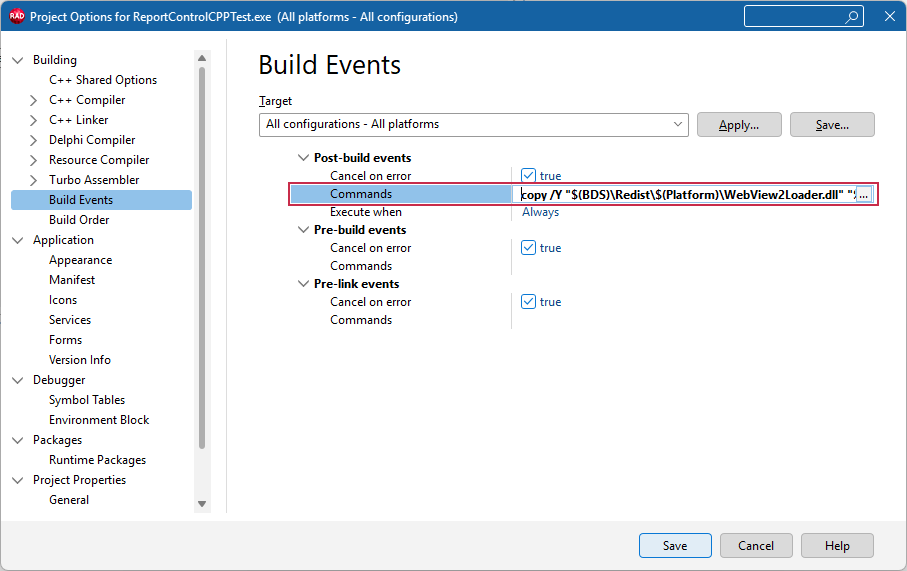
Optional. This step is required only for the Modern C++ RAD Studio compiler.
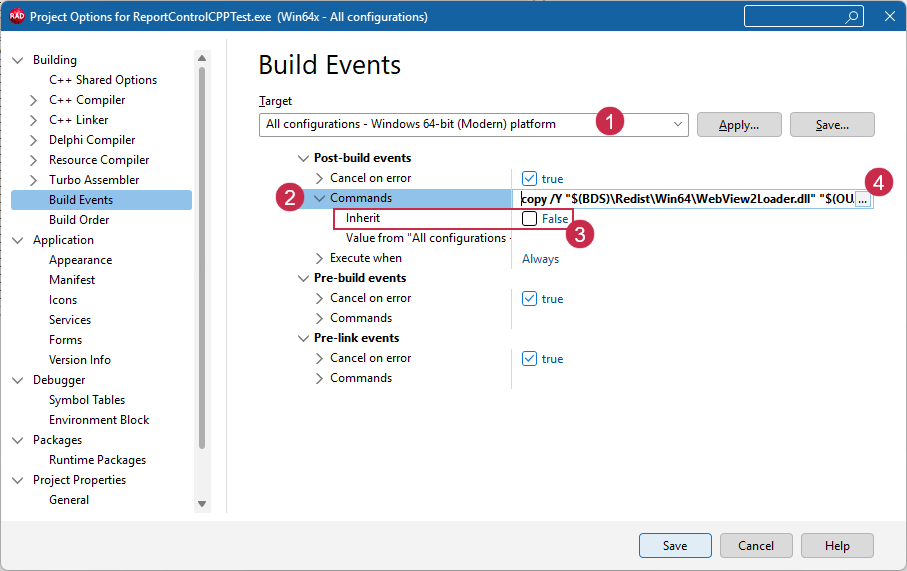
If you use Windows 64-bit (Modern) as a build target, select the Windows 64-bit (Modern) platform (1), expand the Post-build events → Commands node (2), uncheck the Inherit option (3), and paste the Modern compiler-specific command into the Commands box (4):
Click Save to apply pending changes and close the Project Options dialog.
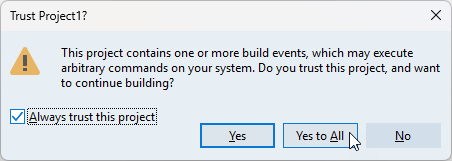
Build the project. Confirm that the configured post-build event is trusted in the following dialog:
All build operations in the current RAD Studio project now ensure that the platform-specific WebView2Loader.dll file version is available in the target build folder (for both Debug and Release configurations).
Run & Test the App
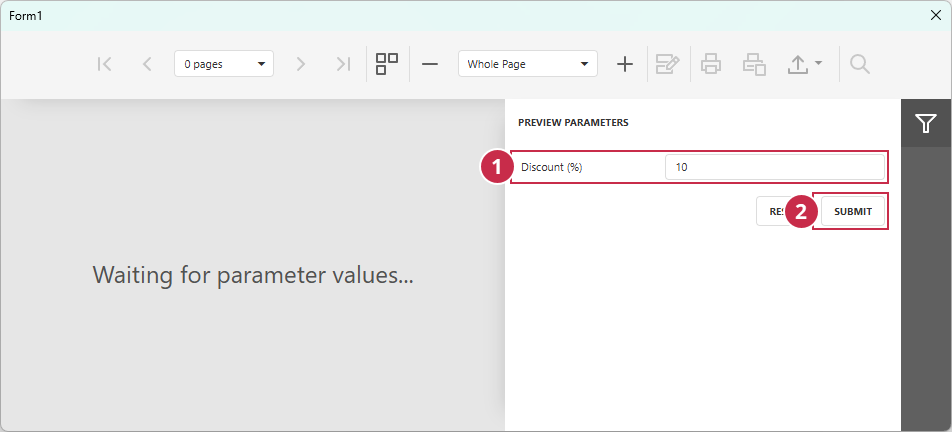
Run the app. Specify a discount percentage in the Discount (%) field (1) and click the SUBMIT button (2) to generate a Price Book with the specified discounted price.
Basic Tutorials
Load JSON data from a remote source, define the report layout, and bind the data to the report at design time using the Report Wizard dialog. Display the resulting report in a VCL application.
Featured Components: TdxReport | TdxBackendDataConnectionManager | TdxBackendInMemoryJSONConnection
Follow this tutorial to create a table report and bind it to data using standard FireDAC components (TFDQuery and TFDConnection) shipped with the RAD Studio IDE.
Featured Components: TdxReport | TdxBackendDataConnectionManager | TdxBackendDataSetJSONConnection