Embed a Report Viewer in a Non-Modal Form, Page, or User Control (Tabbed MDI) Using a SQL Database
- 11 minutes to read
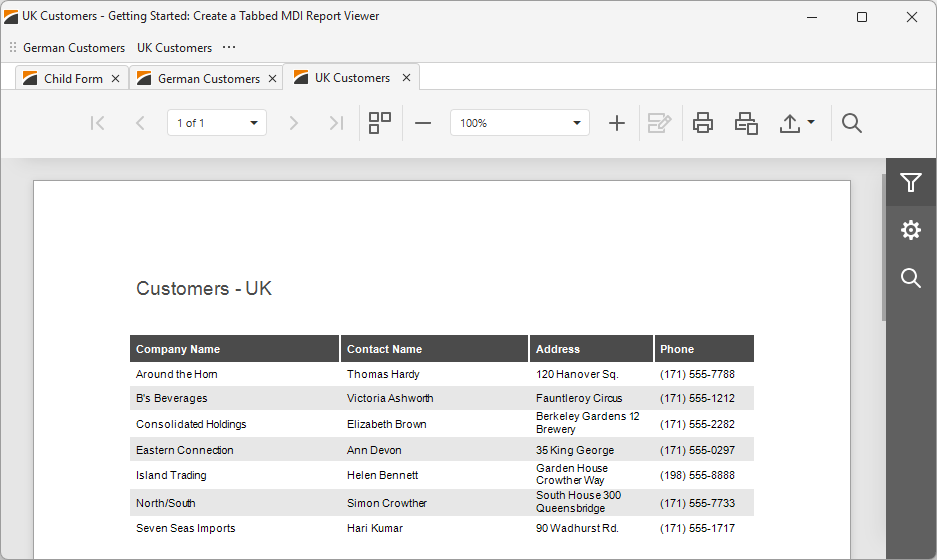
This tutorial creates a Tabbed MDI (multiple-document interface, similar to a modern browser UI) application where a VCL Report Viewer component (TdxReportControl) is placed on a non-modal child form. Different tabs allow users to preview the same report layout/template populated with different data from a sample SQLite database using a SQL Data connection component.
Tip
This tutorial uses a DevExpress XPO-based data connection component to load data from a sample SQLite database and filters data at the TdxReportControl component level.
The following related tutorial implements the same UI/UX with similar performance and demonstrates the same data loading/shaping scenario using standard FireDAC components shipped with the RAD Studio IDE:
Sample SQLite Database
This guide uses the following SQLite database shipped with compiled DevExpress VCL demos:
%PUBLIC%\Documents\DevExpress VCL Demos\MegaDemos\Product Demos\ExpressReports\Data\nwind.db
Step 1 — Create & Configure a RAD Studio Project
Create a new Delphi or C++Builder Project with two forms – main (for data connection and UI element management components) and child (for a TdxReportControl component).
Main Form
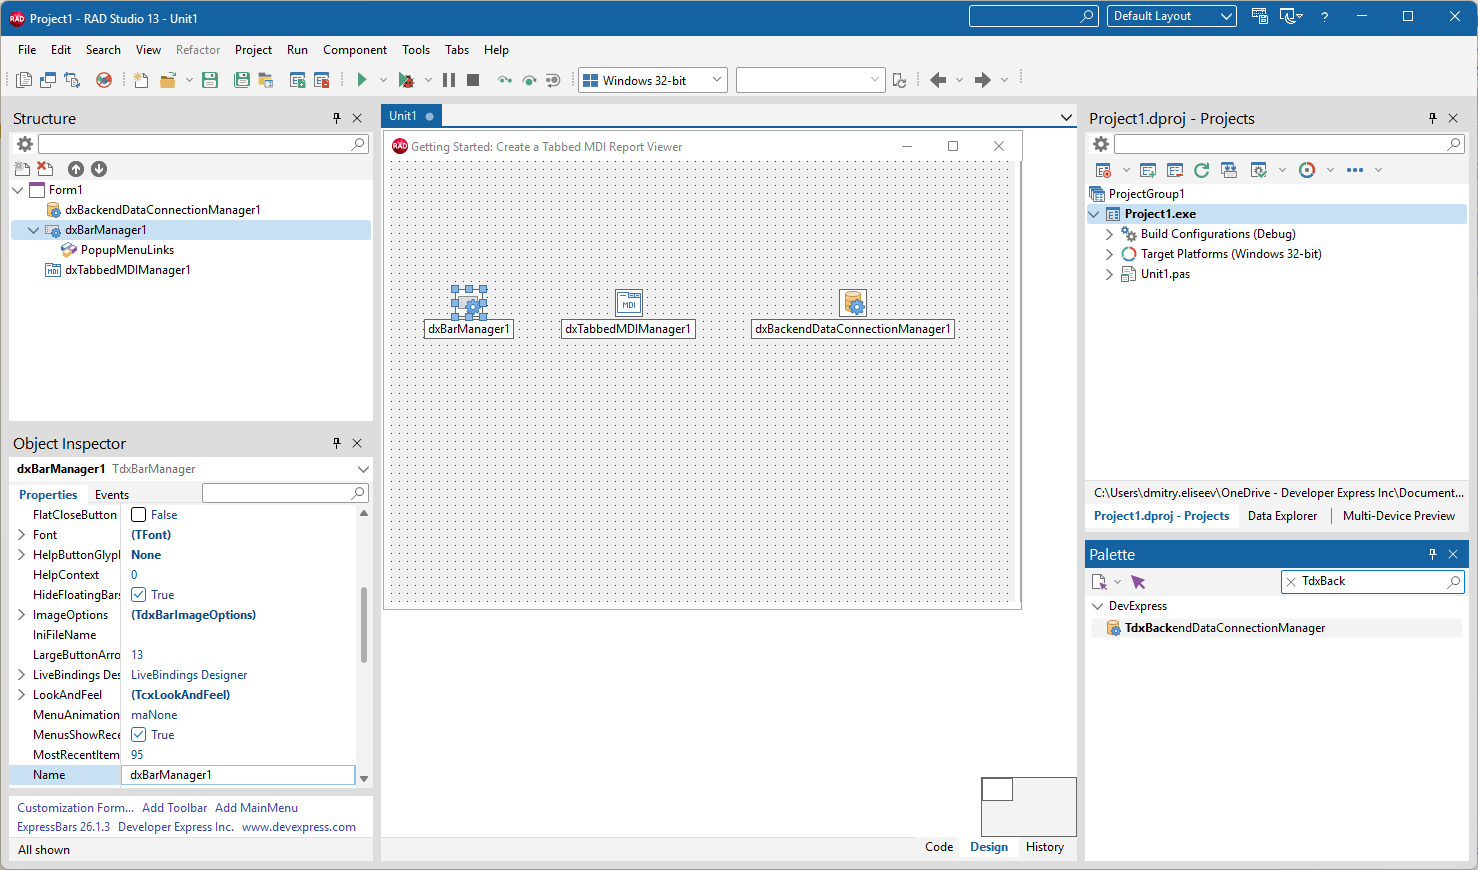
Use the Tool Palette to place the following DevExpress components on a form:
- TdxBarManager
- Creates and manages a Ribbon or Toolbar UI in an application.
- TdxTabbedMDIManager
- Allows you to arrange MDI child forms into a tabbed UI (similar to modern web browser apps).
- TdxBackendDataConnectionManager
- Manages all data sources for all reports in your application.
Child Form
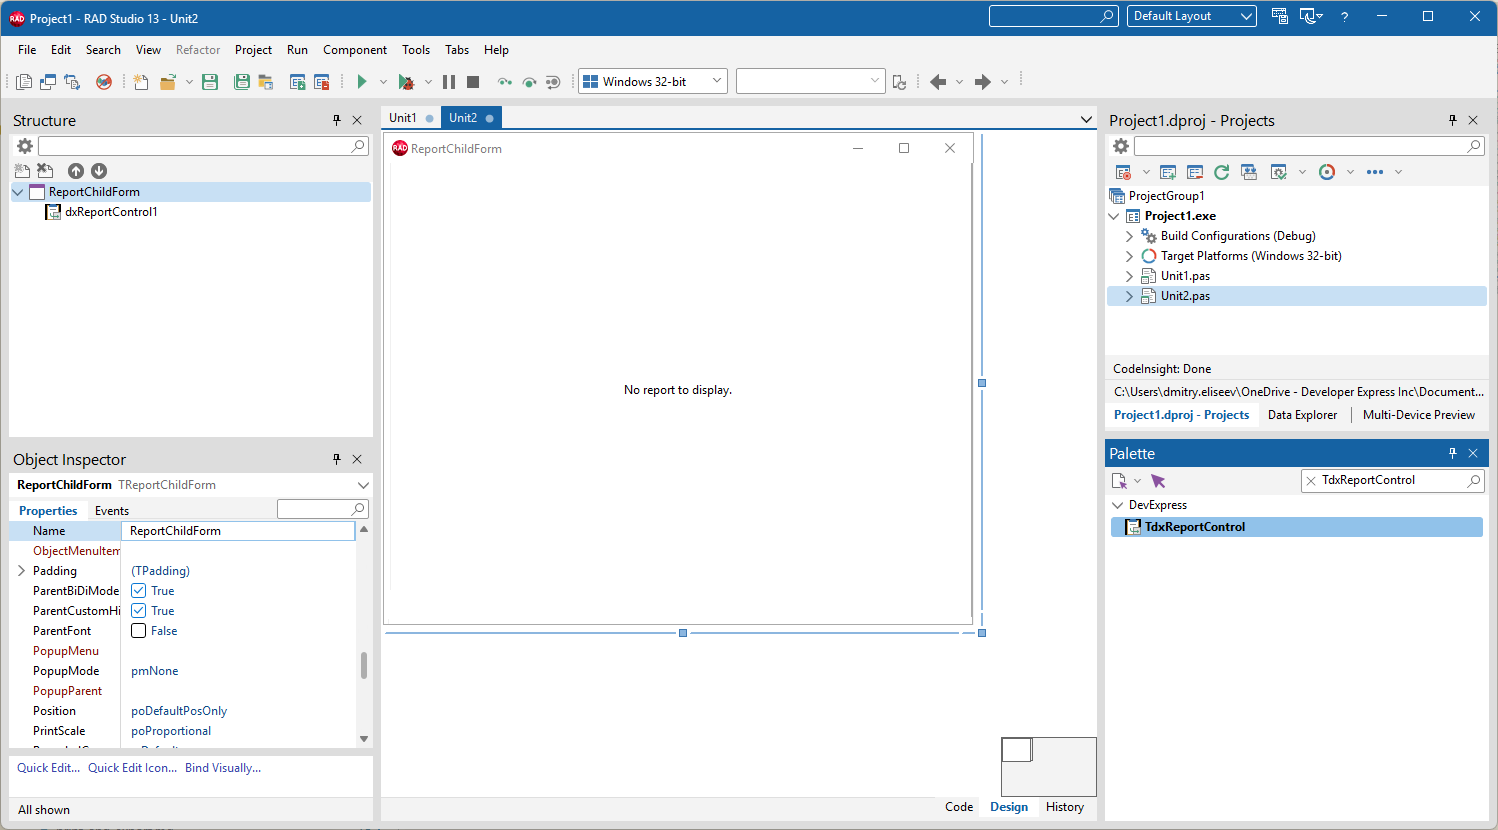
Add a child form, place a Report Viewer (TdxReportControl) component in this form, and set its Align property to alClient.
Create & Configure a SQL Data Source
Switch back to the main form and copy the following connection string[1] for the sample SQLite database:
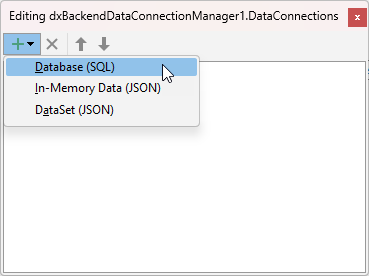
XpoProvider=SQLite;Data Source=C:\Users\Public\Documents\DevExpress VCL Demos\MegaDemos\Product Demos\ExpressReports\Data\nwind.dbDouble-click the TdxBackendDataConnectionManager component. In the Collection Editor dialog, select Add → Database (SQL). This menu item creates a TdxBackendDatabaseSQLConnection component designed to load data from a relational database and bind it to your report.
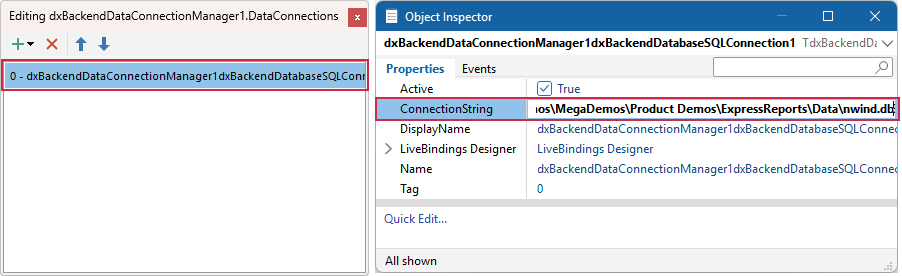
Select the created component in the Collection Editor dialog. Paste the copied string to the ConnectionString property editor[2] in the Object Inspector.
Step 2 — Configure Data & Report Layout Using the Report Wizard
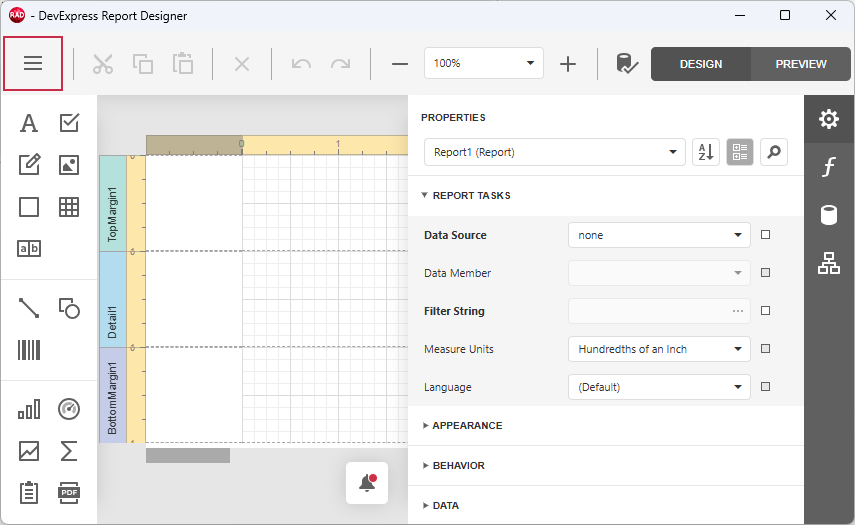
Switch to the child form and right-click the TdxReportControl component and select the Designer… option[3] to display the Report Designer dialog. Click the hamburger button to display the Report Designer menu.
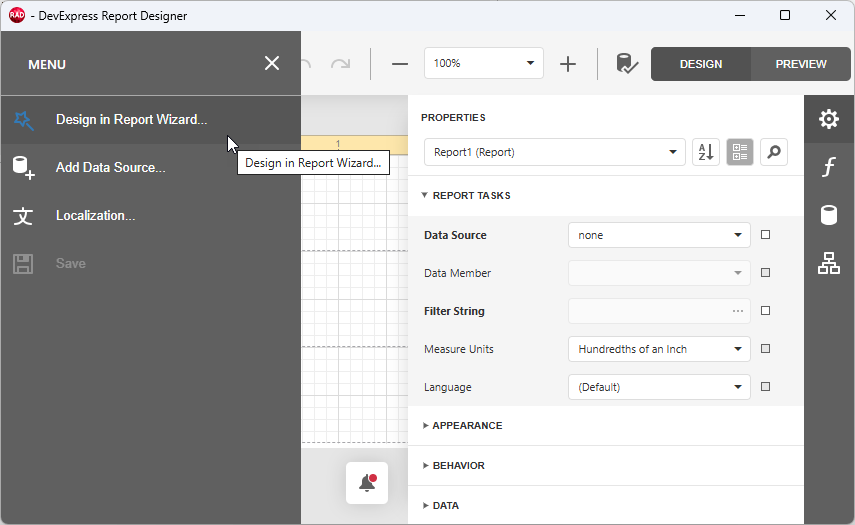
Select Design in Report Wizard… to display available report types:
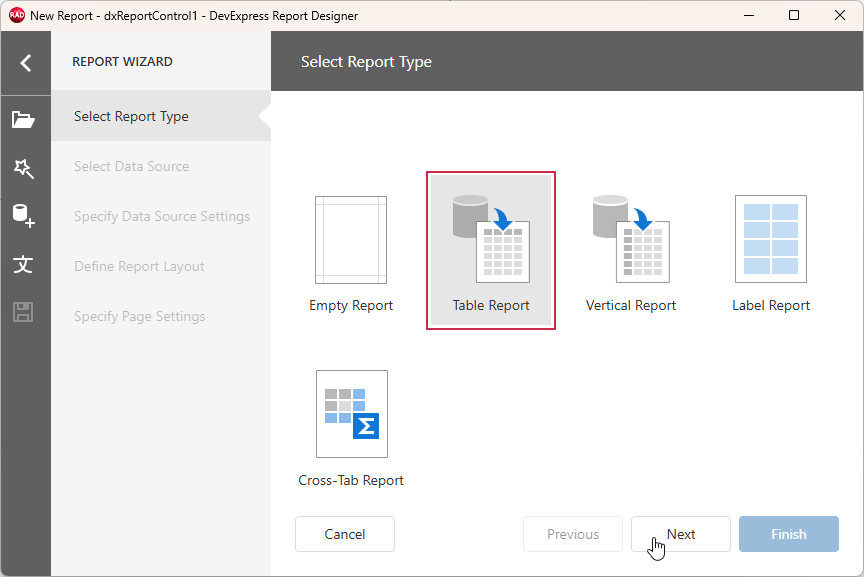
Select Table Report on the Select Report Type page to create a tabular report and click Next.
Select Database[2] on the Select Data Source page to use the previously configured SQL Data Source component and click Next.
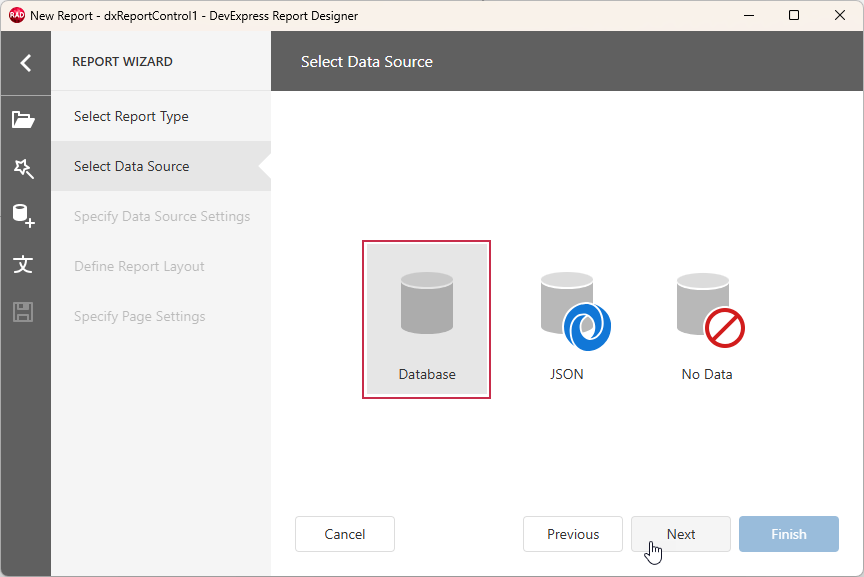
Expand the Customers table node (1), all required fields within it (2) – CompanyName, ContactName, Address, and Phone – and click Next (3).
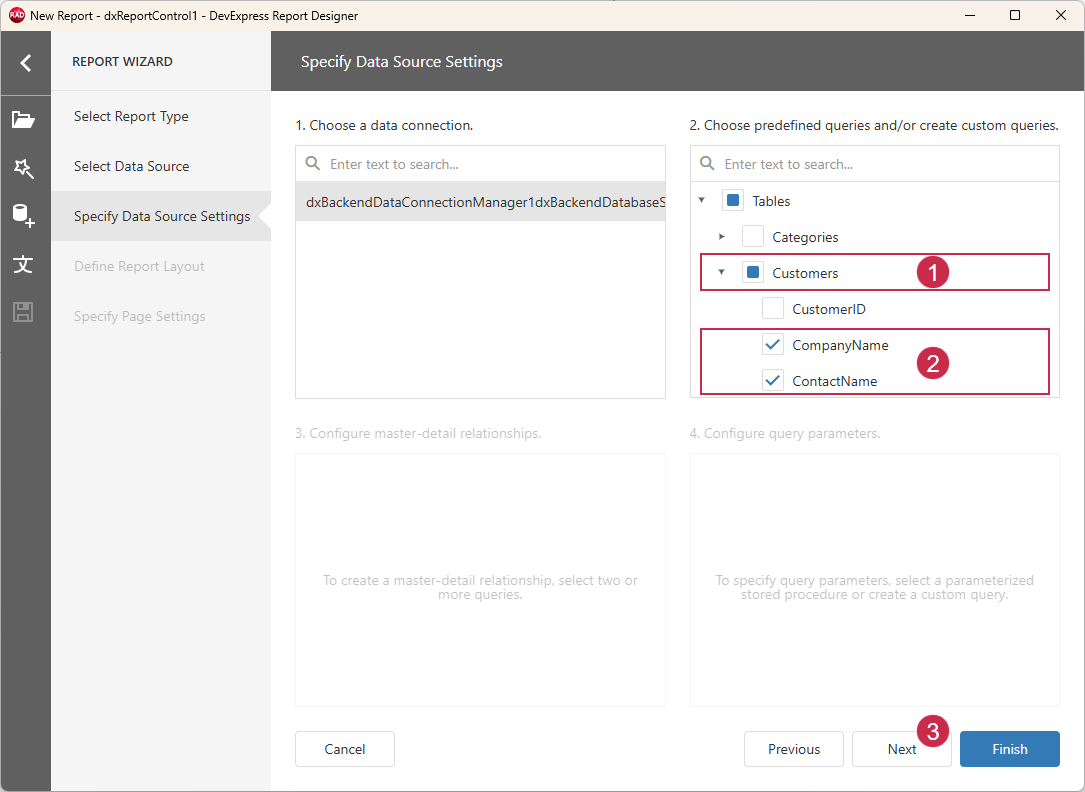
Select the Customers query in panes 1 and 2, and click Finish (3).
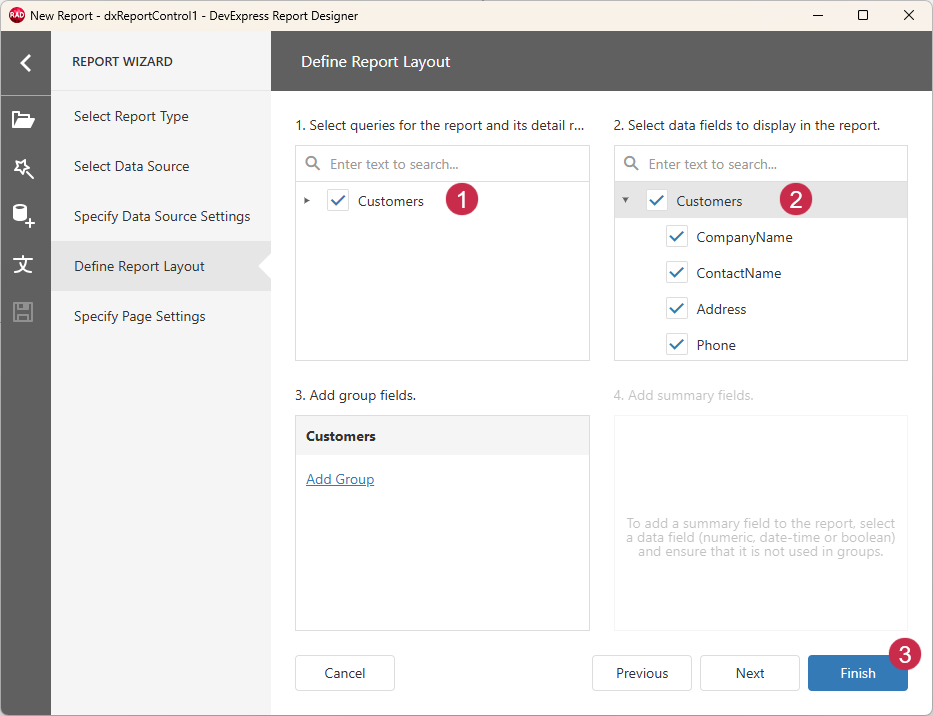
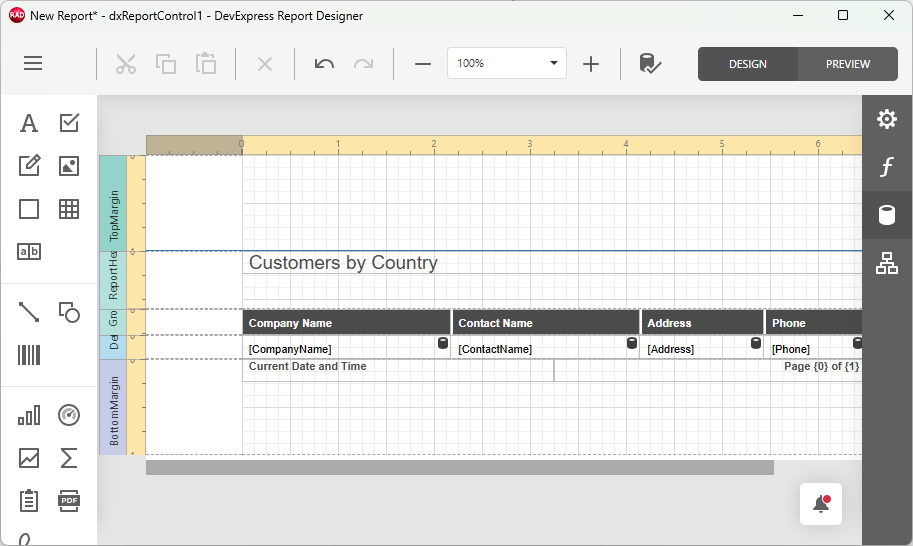
Review and modify the generated report layout as necessary.
Tip
Refer to the following section for detailed information on report layout customization options:
Step 3 — Create & Configure SQL Queries and Parameters
Create a Report Parameter
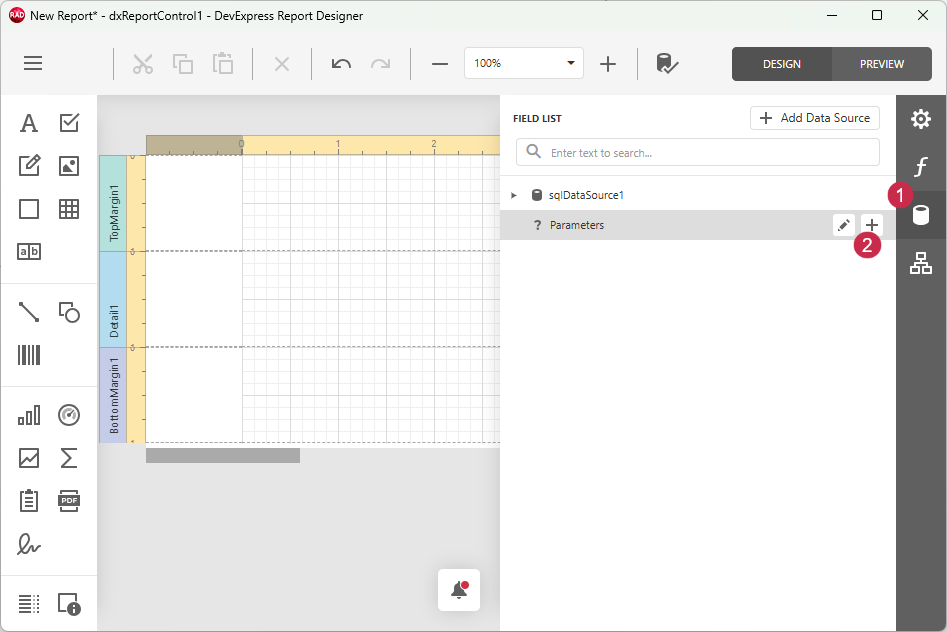
Select the FIELD LIST pane (1) in the Report Designer dialog and click the Add parameter (plus sign) button (2).
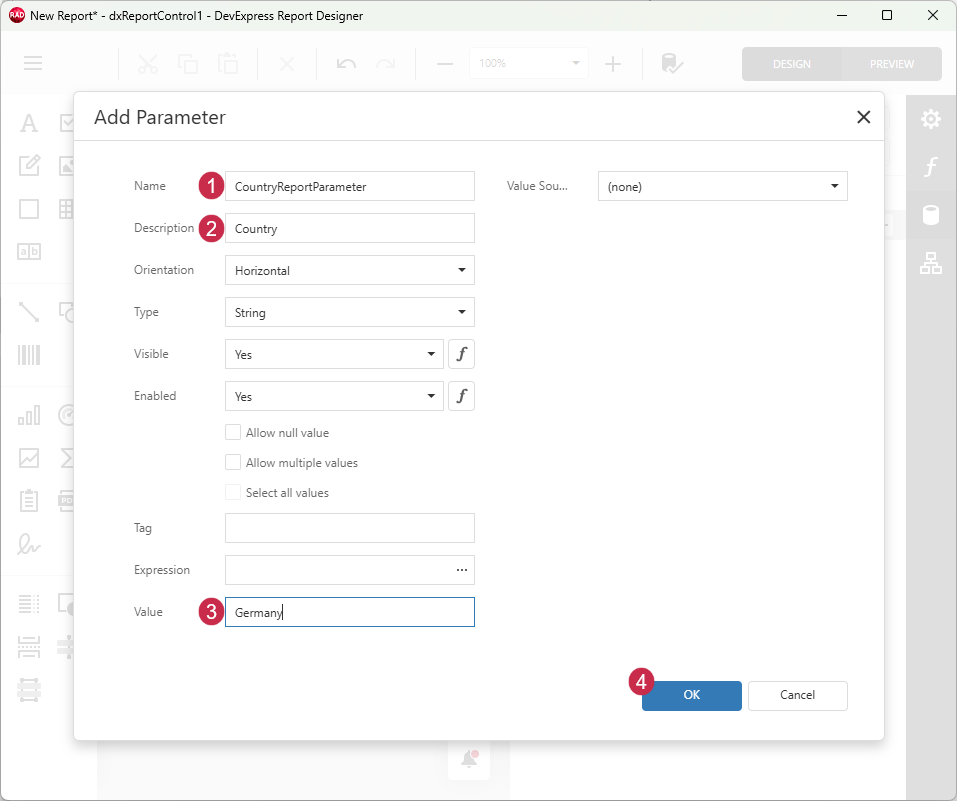
Specify Name (1), Description (2), and Value (3) fields in the Add Parameter dialog and click OK (4) to create a report parameter:
Create a SQL Query Parameter
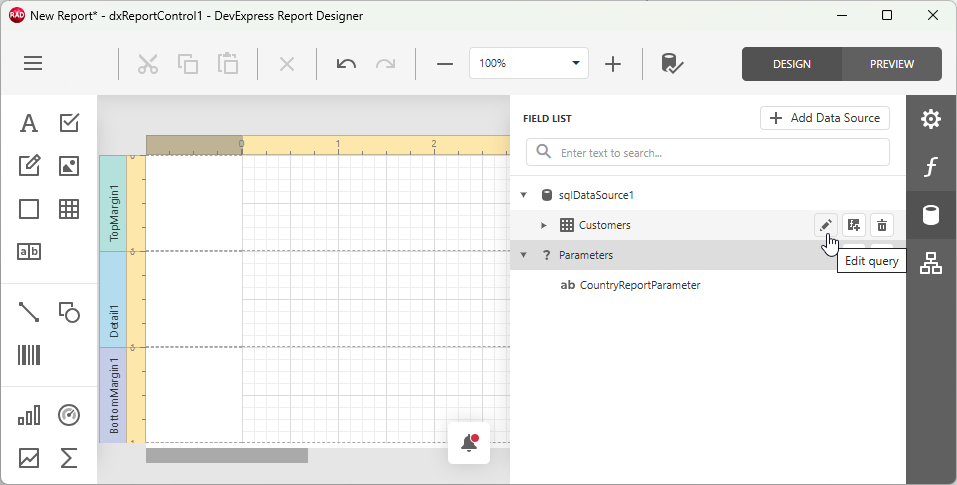
Expand the sqlDataSource1 node (1) and click the Edit query (pencil) button (2) for the Categories table.
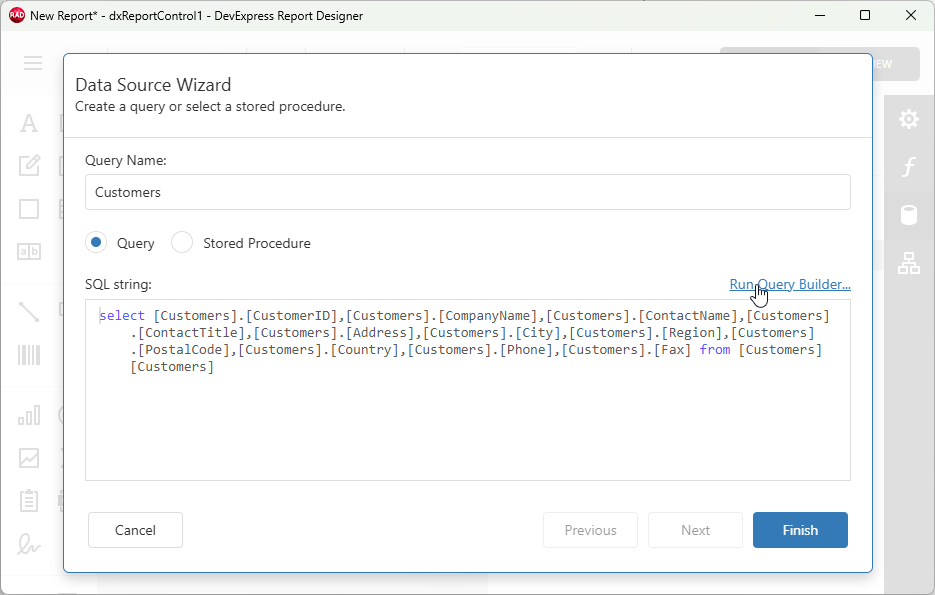
The Data Source Wizard dialog displays the current SQL query for the Customers table selected during data source configuration. Click Run Query Builder… to display the corresponding dialog.
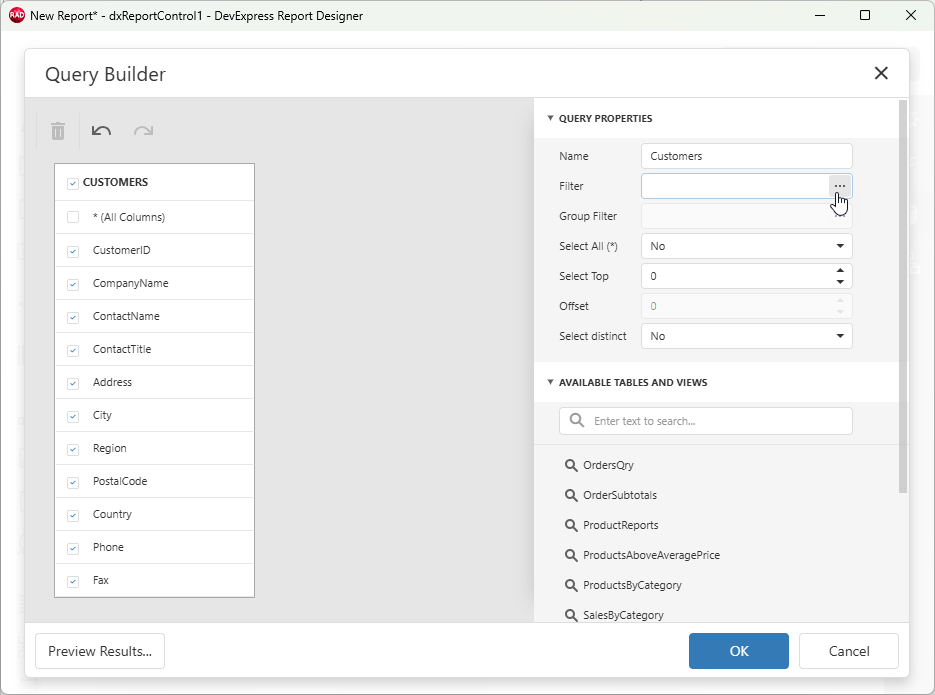
Expand the QUERY PROPERTIES group (1) and click the Filter field’s ellipsis button (2) to display the Filter Editor dialog:
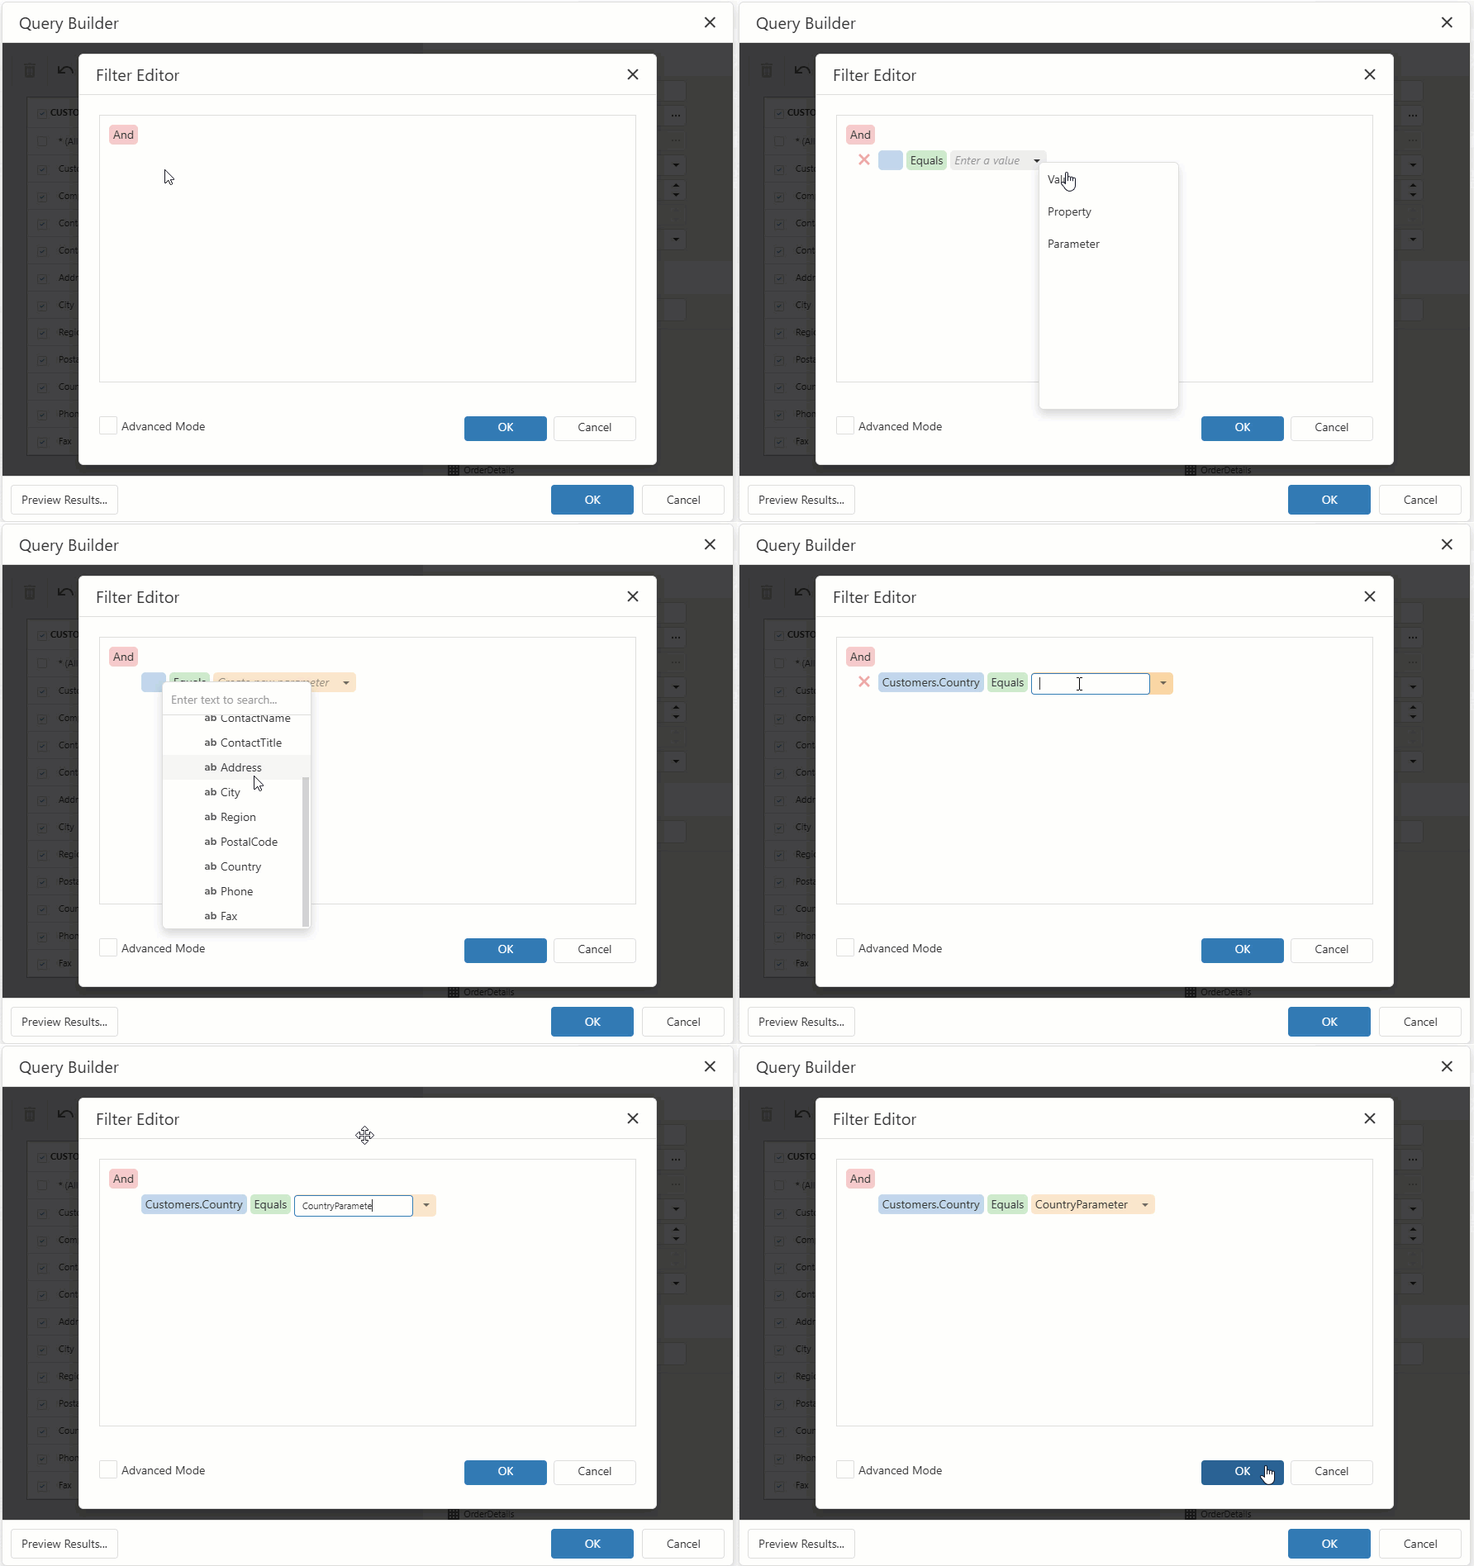
Add a condition, select the target field (Customers.Country), and create a SQL parameter (CountrySqlParameter) as follows:
Bind Created Report and SQL Query Parameters
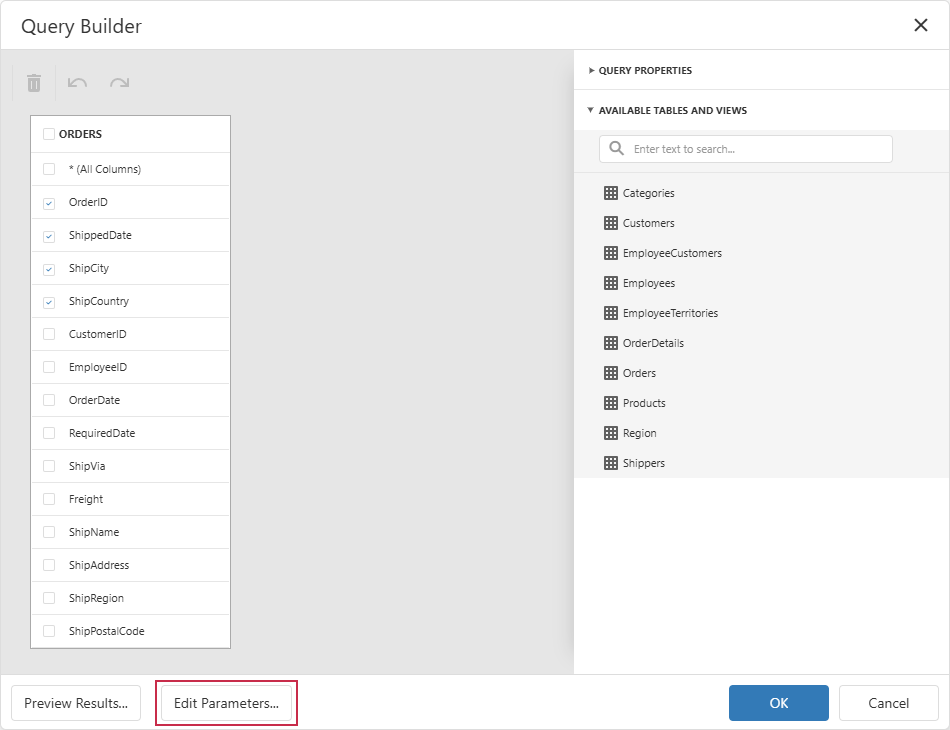
Click the Edit Parameters… button at the bottom of the Query Builder window.
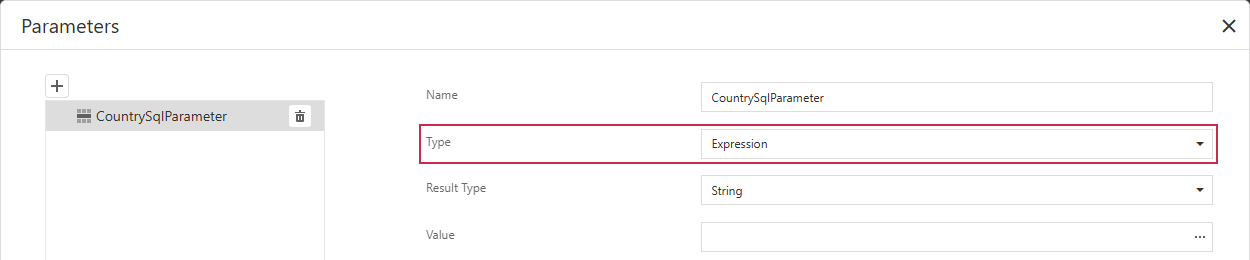
Select CountrySqlParameter and switch its Type to Expression.
Click the Value field’s ellipsis button. In the Expression Editor window, expand the Parameters node (1), and double-click CountryReportParameter (2) to create the ?CountryReportParameter expression for the SQL query parameter. Click the OK button to apply these changes (3).
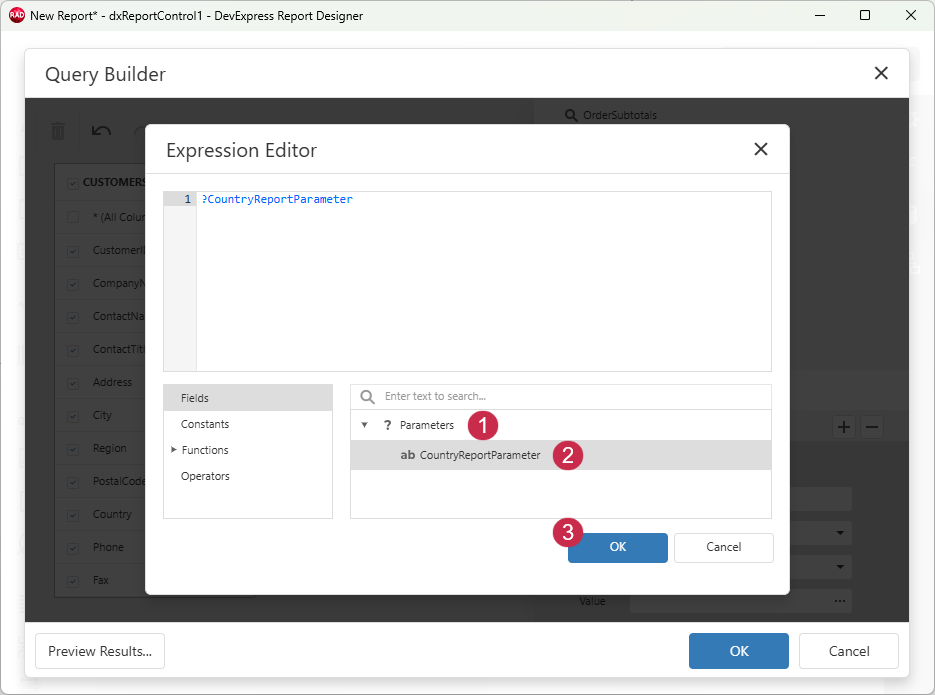
Click OK to close the Query Builder dialog. The Data Source Wizard displays the following SQL query:
select [Customers].[CustomerID],[Customers].[CompanyName],[Customers].[ContactName],[Customers].[ContactTitle],[Customers].[Address],[Customers].[City],[Customers].[Region],[Customers].[PostalCode],[Customers].[Country],[Customers].[Phone],[Customers].[Fax] from [Customers] [Customers]
where ([Customers].[Country] = @CountrySqlParameter)
Switch to the REPORT EXPLORER pane (1) and select Report (2).
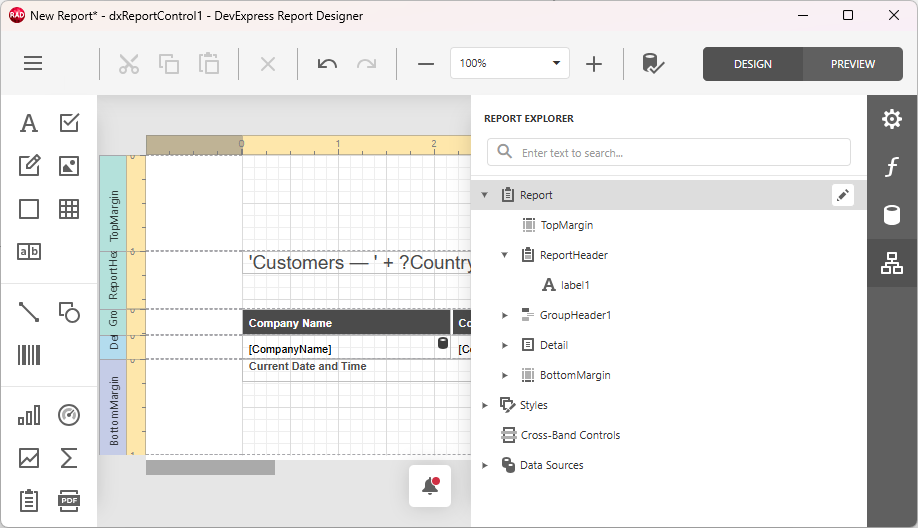
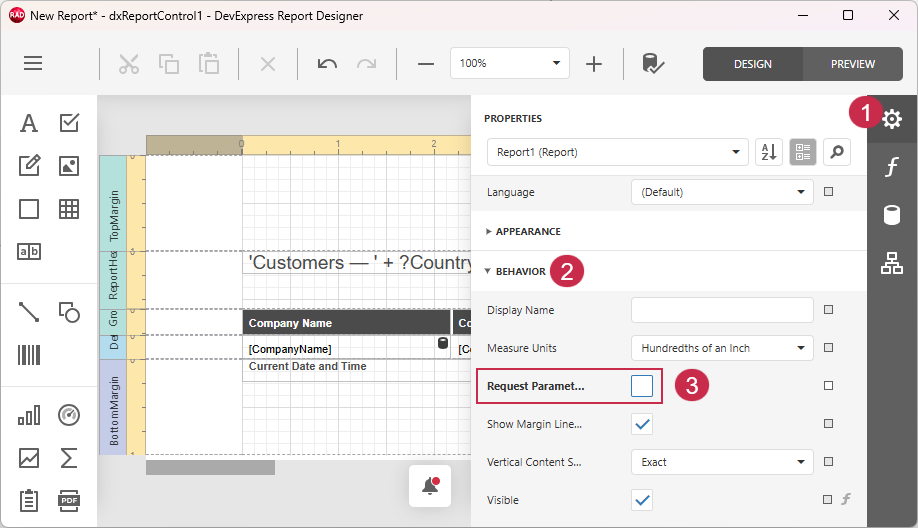
Switch back to the PROPERTIES pane (1), expand the BEHAVIOR group (2), and uncheck the Request Parameters option (3):
Save the report layout definition and close the Report Designer dialog.
Note
To avoid redundant data reload operations when an MDI Child form with a TdxReportControl component is displayed, you need to set the component’s Active property to False at design time using the Object Inspector and enable the Active property at runtime once the required filter is applied to data. Refer to the following section for details: Configure Bar Buttons.
Step 4 — Add & Configure a Tabbed MDI UI
Main Form Configuration
Right-click a TdxBarManager component (dxBarManager1) and click Add Toolbar. Add two bar buttons (TdxBarButton) using the created toolbar’s context menu:
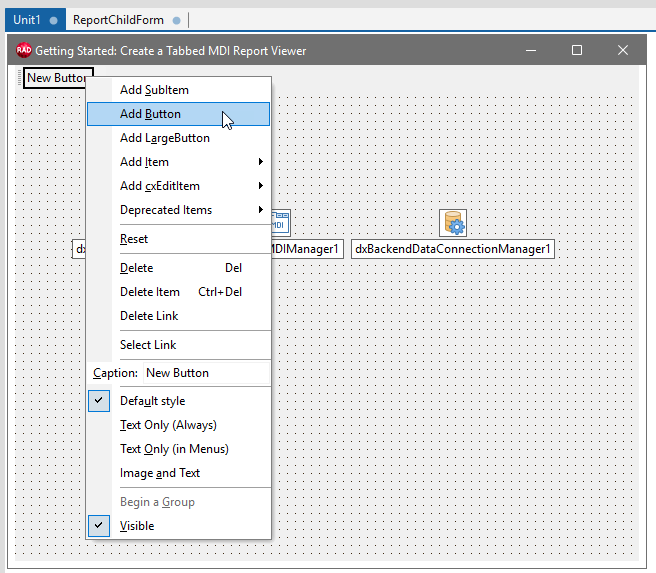
Switch the main form’s FormStyle property from fsNormal to fsMDIForm using the Object Inspector.
Select the TdxTabbedMDIManager component and set its Active property to
True.
Configure Bar Buttons
Rename the first button to German Customers, double-click the button, and add the following OnClick event handler:
procedure TMainForm.btnGermanyCustomersClick(Sender: TObject);
var
  AForm: TReportChildForm;
begin
  AForm := TReportChildForm.Create(Self);  // dxReportControl1.Active is disabled at design time
  AForm.Caption := 'German Customers';
  // Apply the target filter criteria to data using the previously configured report parameter
  AForm.dxReportControl1.Parameters['CountryReportParameter'].Value := 'Germany';
  AForm.dxReportControl1.Active := True;  // Displays report content according to the filter criteria
end;
Rename the second button to UK Customers, double-click the button, and add the following OnClick event handler:
procedure TMainForm.btnUKCustomersClick(Sender: TObject);
var
  AForm: TReportChildForm;
begin
  AForm := TReportChildForm.Create(Self);  // dxReportControl1.Active is disabled at design time
  AForm.Caption := 'UK Customers';
  // Apply the target filter criteria to data using the previously configured report parameter
  AForm.dxReportControl1.Parameters['CountryReportParameter'].Value := 'UK';
  AForm.dxReportControl1.Active := True;  // Displays report content according to the filter criteria
end;
MDI Child Form Configuration
To embed the child form into the main MDI form at runtime, switch the child form’s FormStyle from fsNormal to fsMDIChild using the Object Inspector.
Display Unique Content in Different TdxReportControl Instances
A configured data connection component initially maps the same data to all TdxReportControl component instances in the same application. To display different data according to current filter criteria, you need to associate each TdxReportControl instance with unique group names. Select the MDI child form and handle its OnCreate event as follows:
procedure TReportChildForm.dxFormCreate(Sender: TObject);
var
  G: TGUID;
begin
  CreateGUID(G);
  dxReportControl1.GroupName := GUIDToString(G);
end;
Step 5 — Build & Test Your App
Post-Build Events for WebView2 Loader DLL Deployment
All applications that include the TdxReportControl component require the WebView2 Runtime as a dependency.
To automatically copy a 32- or 64-bit WebView2Loader.dll file to the target build folder, do the following:
- Open the Project Options dialog. Select the Project → Options… item in the RAD Studio menu or press Ctrl + Shift + F11).
Select Build → Build Events in the tree view pane on the left and select the following option in the Target combo box:
'All Configurations - All Platforms'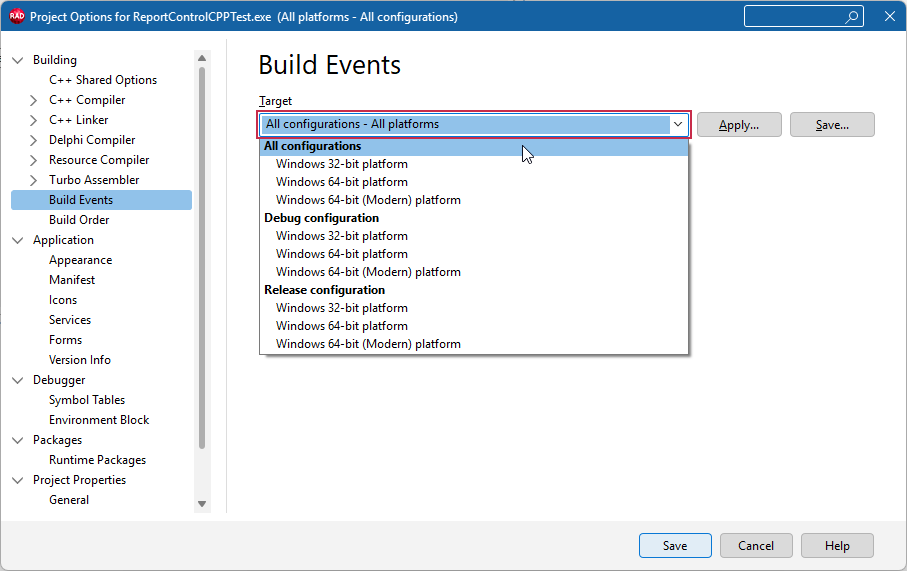
Copy the command line for the target compiler and platform:
copy /Y "$(BDS)\Redist\$(Platform)\WebView2Loader.dll" "$(OUTPUTDIR)"Paste the DLL deployment command line into the Commands box:
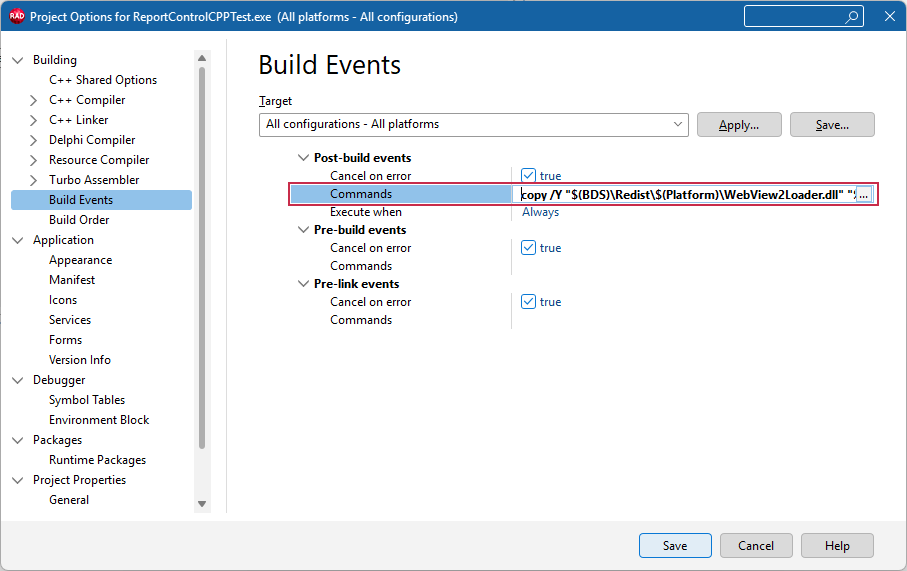
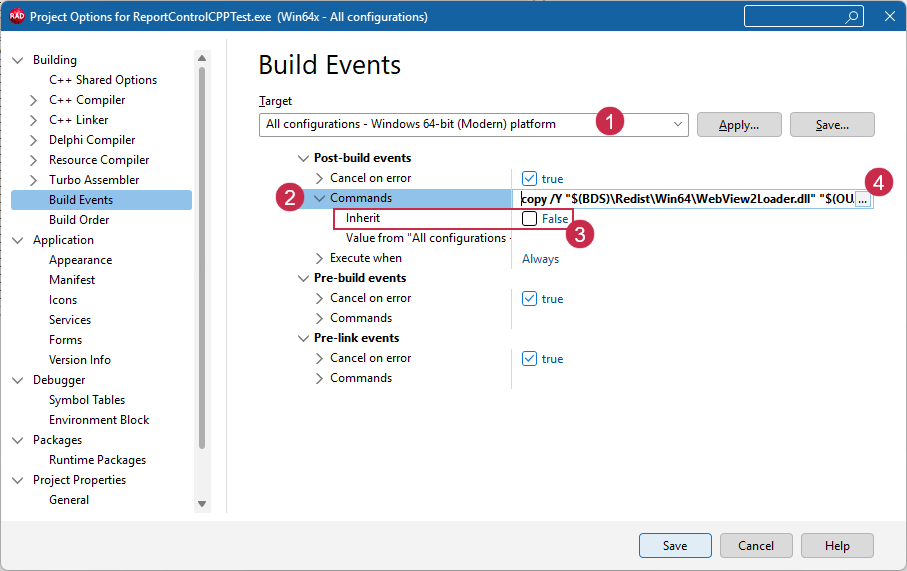
Optional. This step is required only for the Modern C++ RAD Studio compiler.
If you use Windows 64-bit (Modern) as a build target, select the Windows 64-bit (Modern) platform (1), expand the Post-build events → Commands node (2), uncheck the Inherit option (3), and paste the Modern compiler-specific command into the Commands box (4):
Click Save to apply pending changes and close the Project Options dialog.
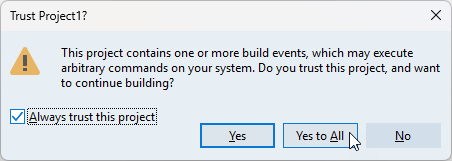
Build the project. Confirm that the configured post-build event is trusted in the following dialog:
All build operations in the current RAD Studio project now ensure that the platform-specific WebView2Loader.dll file version is available in the target build folder (for both Debug and Release configurations).
Run & Test the App
Run the app and click bar buttons to create corresponding tabbed child MDI forms. Click tabs to switch between different data within the same report layout displayed using a TdxReportControl component.
Other Tutorials
Basic Tutorials
Load JSON data from a remote source, define the report layout, and bind the data to the report at design time using the Report Wizard dialog. Display the resulting report in a VCL application.
Featured Components: TdxReport | TdxBackendDataConnectionManager | TdxBackendInMemoryJSONConnection
Follow this tutorial to create a table report and bind it to data using standard FireDAC components (TFDQuery and TFDConnection) shipped with the RAD Studio IDE.
Featured Components: TdxReport | TdxBackendDataConnectionManager | TdxBackendDataSetJSONConnection
Master-Detail Report Tutorials
Define a master-detail relationship between two tables, create the report layout in the Report Designer dialog at design time, and display the report in the Report Viewer end-user dialog at runtime.
The demonstrated solution defines SQL queries and a master-detail relationship at the TdxReport component level using the DevExpress XPO-based data connection component.
Featured Components: TdxReport | TdxBackendDataConnectionManager | TdxBackendDatabaseSQLConnection
Load data from two tables in a sample SQLite database, configure the report layout using the Report Wizard, and display the resulting report in the Report Viewer end-user dialog at runtime.
The solution uses two SQL queries at the FireDAC dataset (TFDQuery) level and defines a master-detail relationship at the TdxReport component level using Data Federation.
Featured Components: TdxReport | TdxBackendDataConnectionManager | TdxBackendDataSetJSONConnection | TFDConnection | TFDQuery | TDataSource
Tip
Refer to the following topic for a complete list of TdxReport/TdxReportControl tutorials: VCL Reports: Getting Started.
-
The demonstrated connection string includes the default installation path of the sample Northwind database file (nwind.db). The actual path to the sample database file depends on the installation path you selected for the compiled DevExpress VCL demos. Update the path within the connection string as necessary.
-
If the TdxReportControl component cannot access source data (the Database item is not displayed in the Data Source Wizard), ensure that the connection string is correct, and uncheck and check the connection component’s Active property in the Object Inspector.
-
Alternatively, you can double-click the TdxReportControl component.