Create a Master-Detail Report Using FireDAC DataSets
- 8 minutes to read
A Master-Detail report displays related hierarchical data, such as customers and their orders or individual orders and their details. This tutorial creates a new project, configures the FireDAC components included with RAD Studio, adds a TdxReport component, defines a master-detail relationship using Data Federation, and creates a report layout in the Report Designer dialog.
Tip
This tutorial uses a DevExpress JSON-based dataset connection component to load data from a sample SQLite database, defines different SQL queries using two TFDQuery components, and configures a master-detail relationship at the TdxReport component level using Data Federation.
The following related tutorial implements the same UI/UX with similar performance but demonstrates the same scenario using the DevExpress XPO-based data connection component:
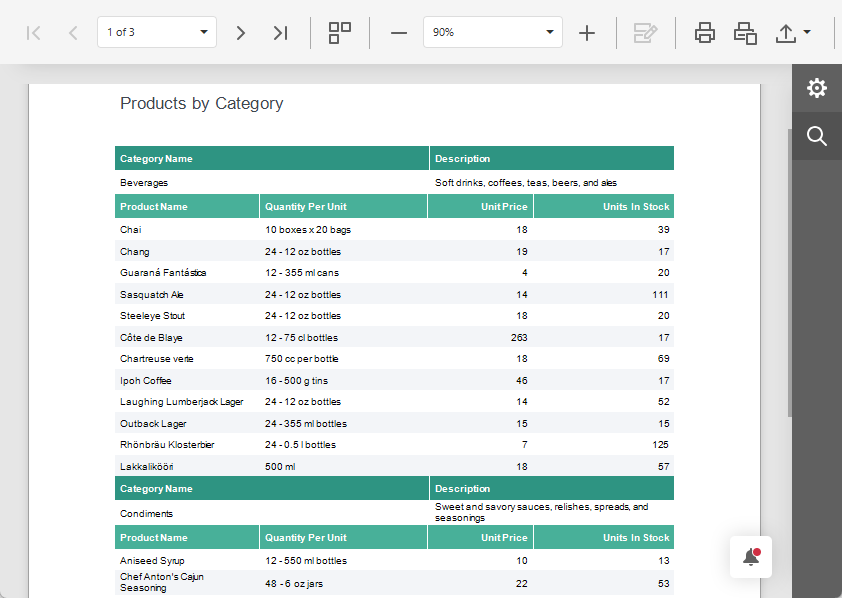
- Sample SQLite Database
- Step 1 — Create & Configure a RAD Studio Project
- Step 2 — Configure FireDAC & Data Connection Components
- Step 3 — Define Master-Detail Relationship & Report Layout Using the Report Wizard
- Next Steps (4 and 5)
- Other Tutorials
Sample SQLite Database
This guide uses the following SQLite database shipped with compiled DevExpress VCL demos:
%PUBLIC%\Documents\DevExpress VCL Demos\MegaDemos\Product Demos\ExpressReports\Data\nwind.db
Step 1 — Create & Configure a RAD Studio Project
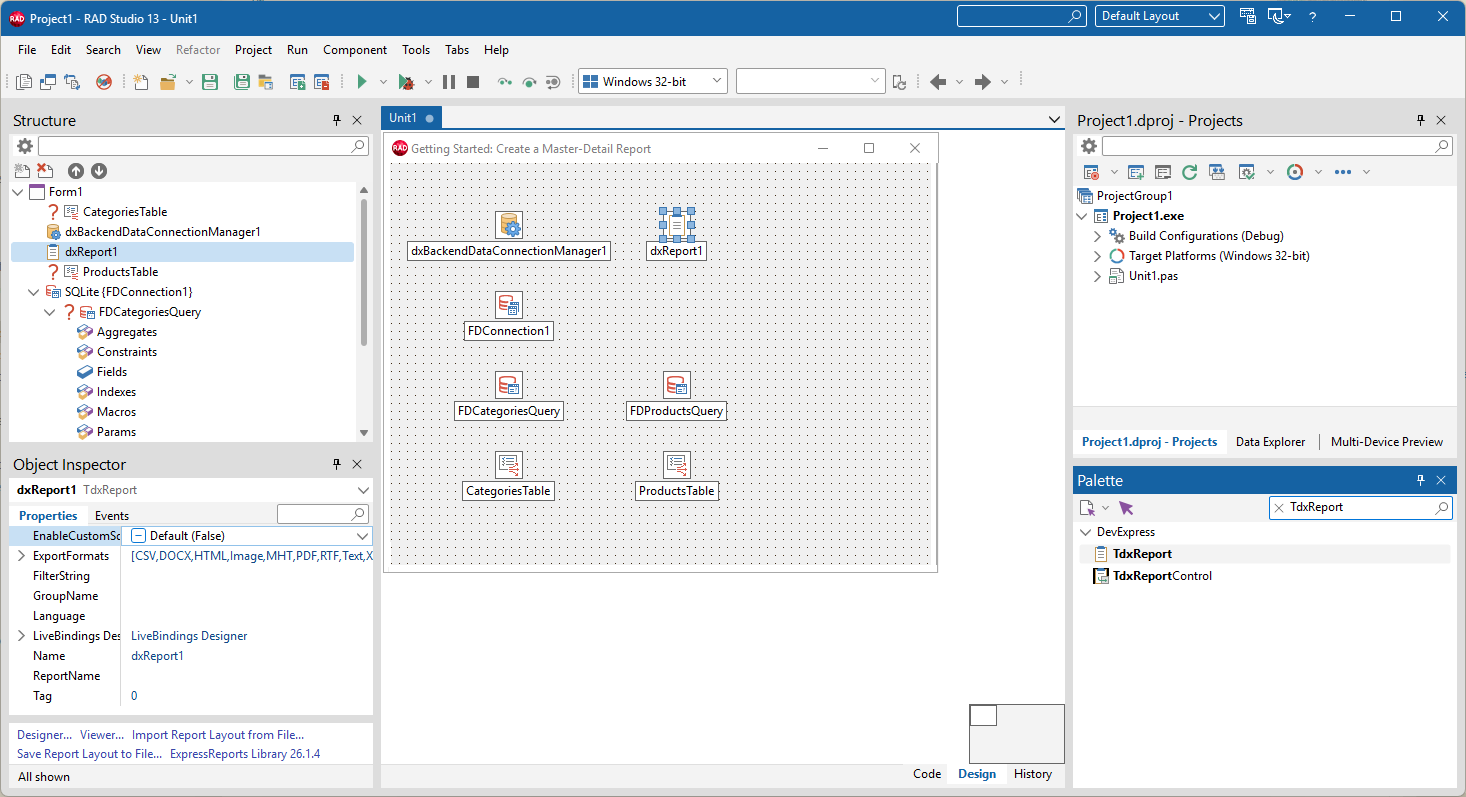
Create a new Delphi or C++Builder project. Use the Tool Palette to place the following components on the form:
DevExpress Components
- TdxBackendDataConnectionManager
- Manages data sources for all reports in your application.
- TdxReport
- Manages report document layouts, end-user dialogs, and related settings.
FireDAC Components
- TFDConnection
- A standard component designed to establish a connection to a database management system.
- TFDQuery
- A dataset component designed to execute SQL queries. Add two TFDQuery components and rename them to FDCategoriesQuery and FDProductsQuery.
- TDataSource
- An interface component designed to connect datasets and data-aware components/controls on a form. Add two TDataSource components and rename them to CategoriesTable and ProductsTable.
Step 2 — Configure FireDAC & Data Connection Components
Configure FireDAC Components
FireDAC Connection
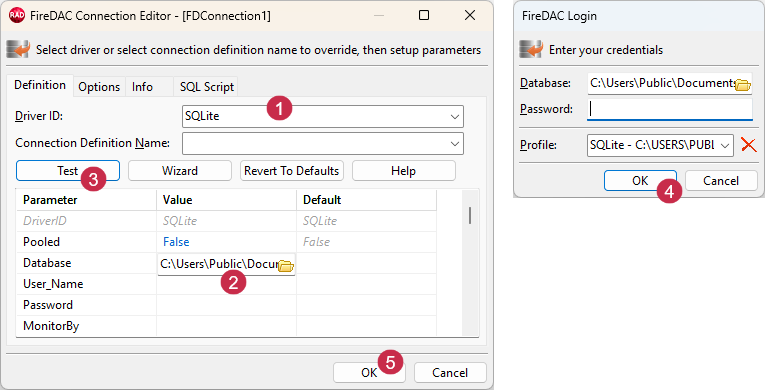
Right-click the TFDConnection component and select Connection Editor… to configure the database connection:
- Select SQLite in the Driver ID combo box.
- Click the folder icon for the Database parameter to display the Open File dialog and select the sample SQLite database file.
- Click Test to check if the sample SQLite database (nwind.db) is accessible.
- Leave the Password field empty and click OK in the FireDAC Login dialog dialog to establish the connection.
- Click OK to close the Connection Editor… dialog.
FireDAC Categories Query (Master Table)
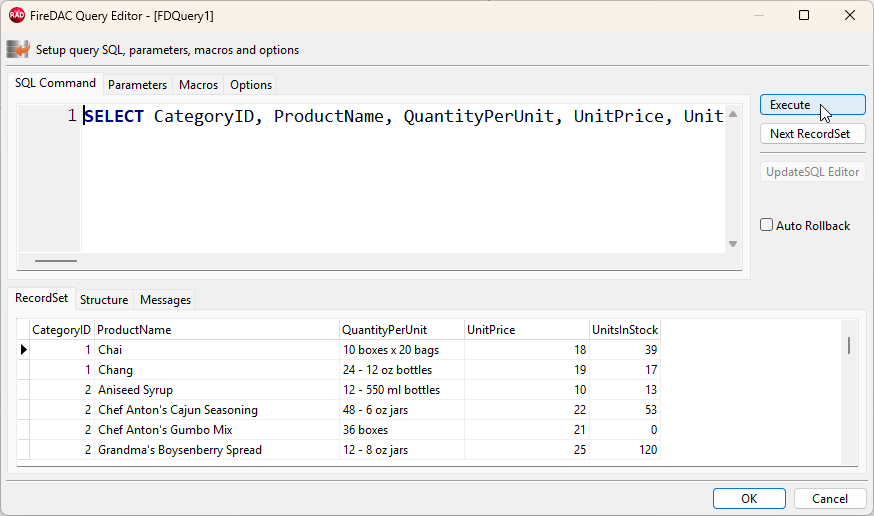
- Double-click the FDCategoriesQuery TFDQuery component to display the FireDAC Query Editor dialog.
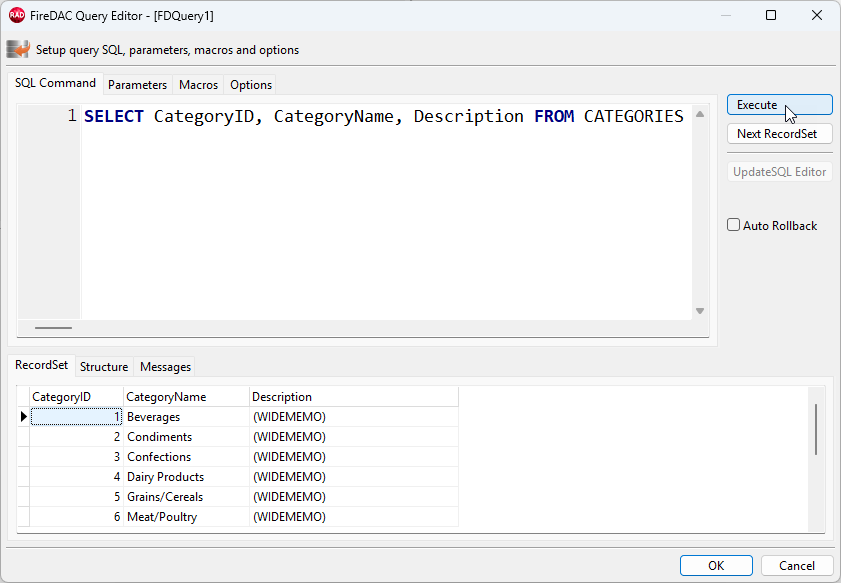
Paste the following SQL Query into the command editor:
SELECT CategoryID, CategoryName, Description FROM CATEGORIESClick Execute to fetch corresponding records from the sample SQLite database:
Close the FireDAC Query Editor dialog and enable the Active property in the Object Inspector.
FireDAC Products Query (Detail Table)
To configure the detail query (the FDProductsQuery TFDQuery component), repeat the steps listed in the FireDAC Categories Query section, but use the following SQL query instead:
SELECT CategoryID, ProductName, QuantityPerUnit, UnitPrice, UnitsInStock FROM PRODUCTS
Data Source Components
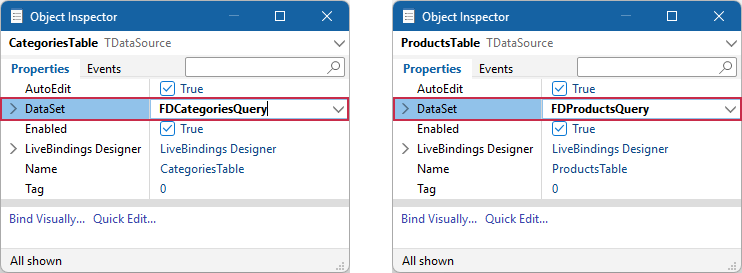
Associate CategoriesTable and ProductsTable TDataSource components with corresponding configured TFDQuery components (FDCategoriesQuery and FDProductsQuery) using the Object Inspector:
Add & Configure Dataset Connection Component
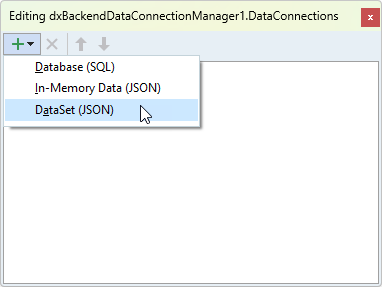
Double-click the TdxBackendDataConnectionManager component on the form to open the Collection Editor dialog, click the Add button, and select the DataSet (JSON) option to create a TdxBackendDataSetJSONConnection component:
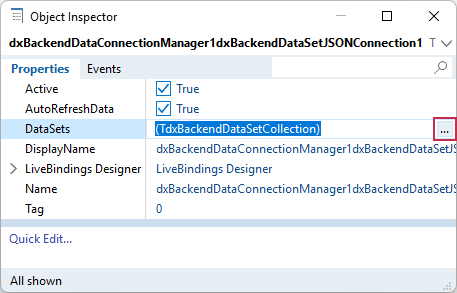
Select the created component and click the ellipsis button for the TdxBackendDataSetJSONConnection.DataSets property in the Object Inspector to display the Collection Editor dialog.
Bind FireDAC Datasets (Master & Detail Tables)
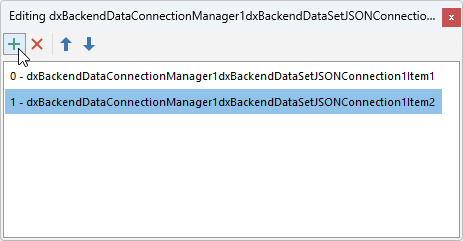
Click the Add New (plus sign) button[1] to create two dataset links (TdxBackendDataSetCollectionItem) for the TdxBackendDataSetJSONConnection component:
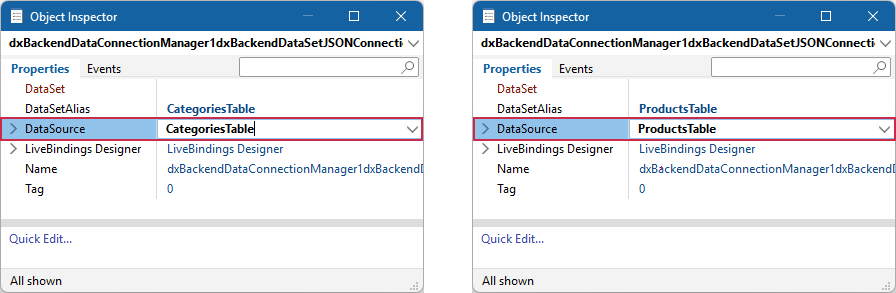
Bind created dataset links to previously configured TDataSource components (CategoriesTable and ProductsTable) using the Object Inspector. Select each dataset link individually and assign a TDataSource component to the TdxBackendDataSetCollectionItem.DataSource property as follows:
TdxBackendDataSetCollectionItem.DataSetAlias property values are automatically updated to match the names of the associated TDataSource components:
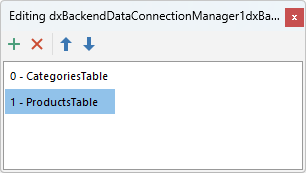
Both SQL tables are now accessible to the TdxReport component (according to SQL queries at the TFDQuery component level).
Add FireDAC SQL Tables as a Data Source to Report Layout Definition
Right-click the TdxReport component and select the Designer… option[2] to display the Report Designer dialog. Switch to the Fields pane (1) and click the Add Data Source button to display the Data Source Wizard:
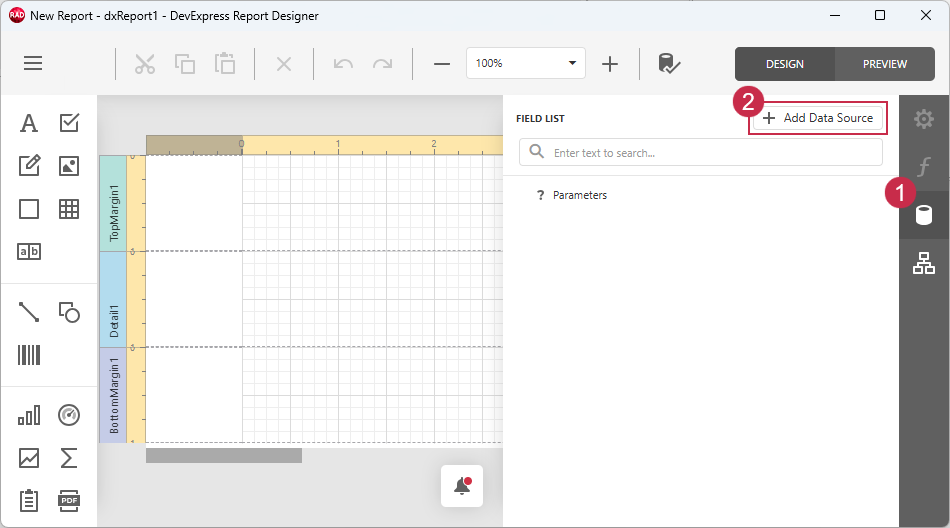
Pane 2 contains two TDataSource components (CategoriesTable and ProductsTable). Click Finish to add both tables to report layout definition as a single data source.
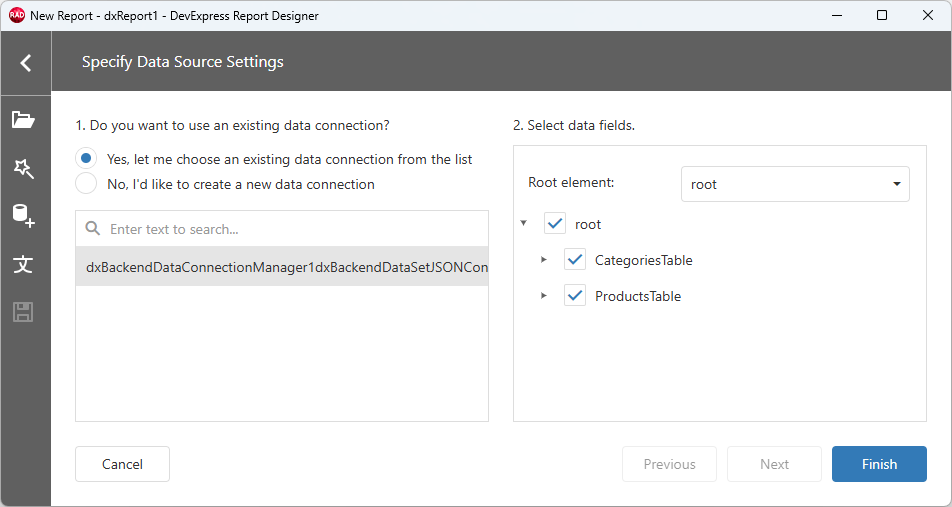
Step 3 — Define Master-Detail Relationship & Report Layout Using the Report Wizard
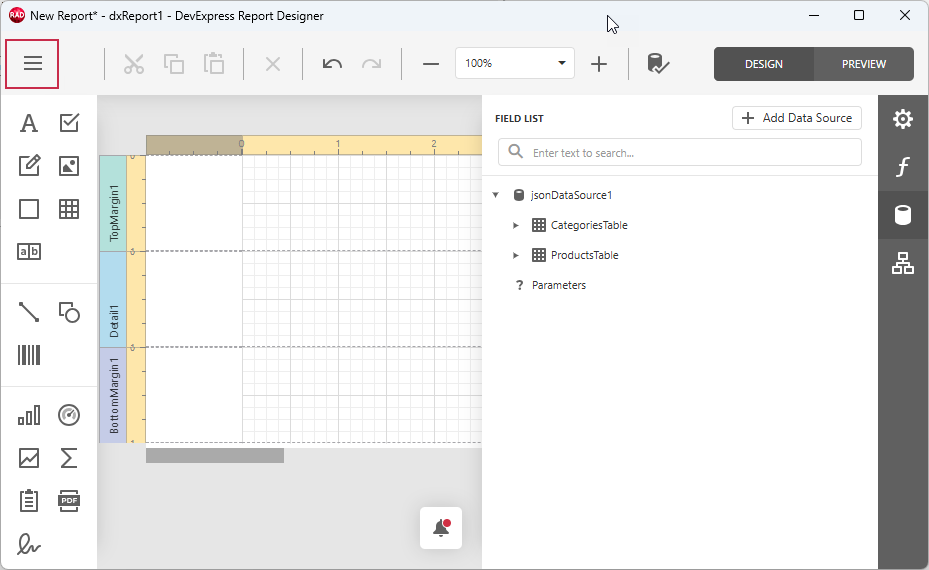
The data source contains the master and detail tables (CategoriesTable and ProductsTable). Click the hamburger button to open the Report Designer menu:
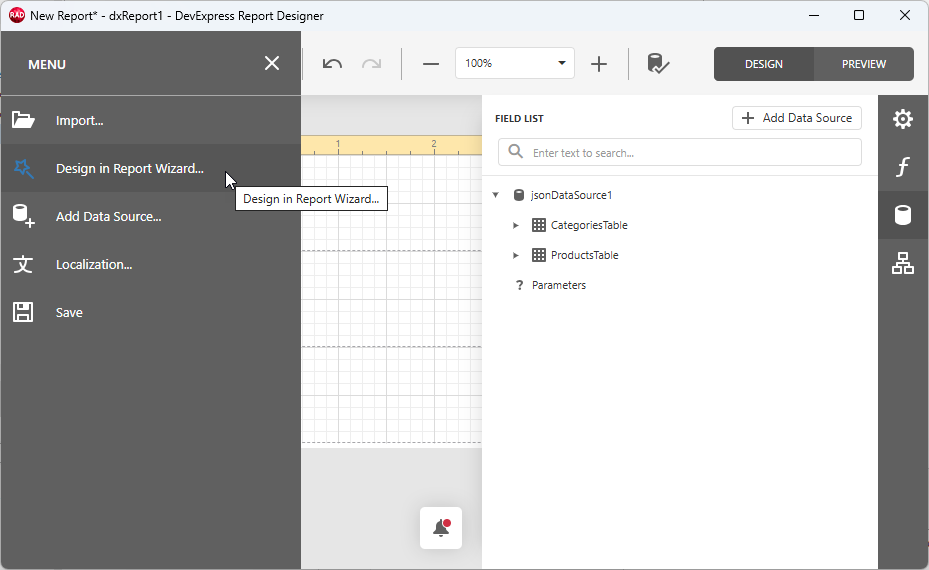
Select the Design in Report Wizard… to display available report types:
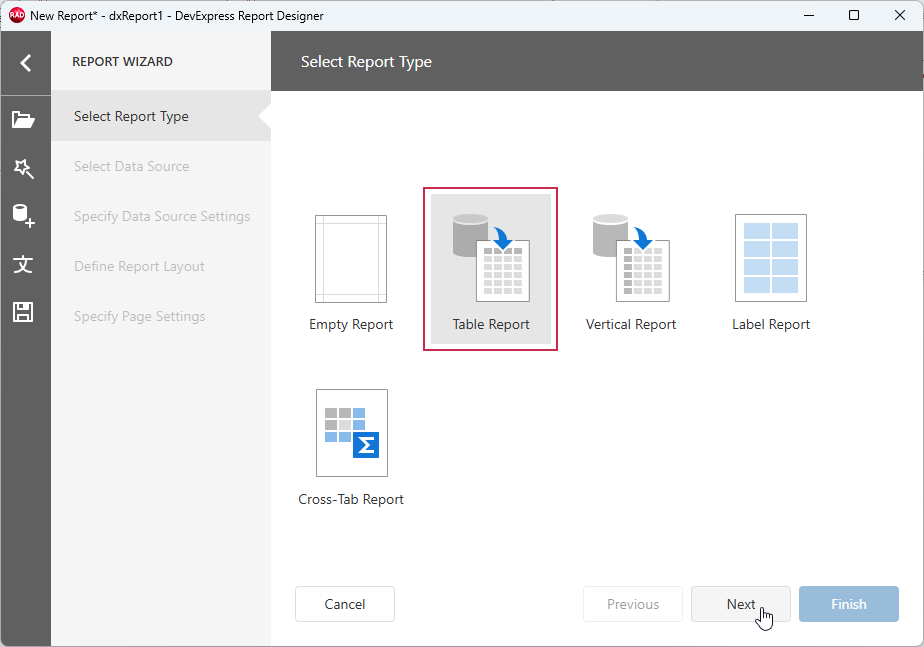
Select Table Report and click Next:
Create a Master-Detail Table Using Data Federation
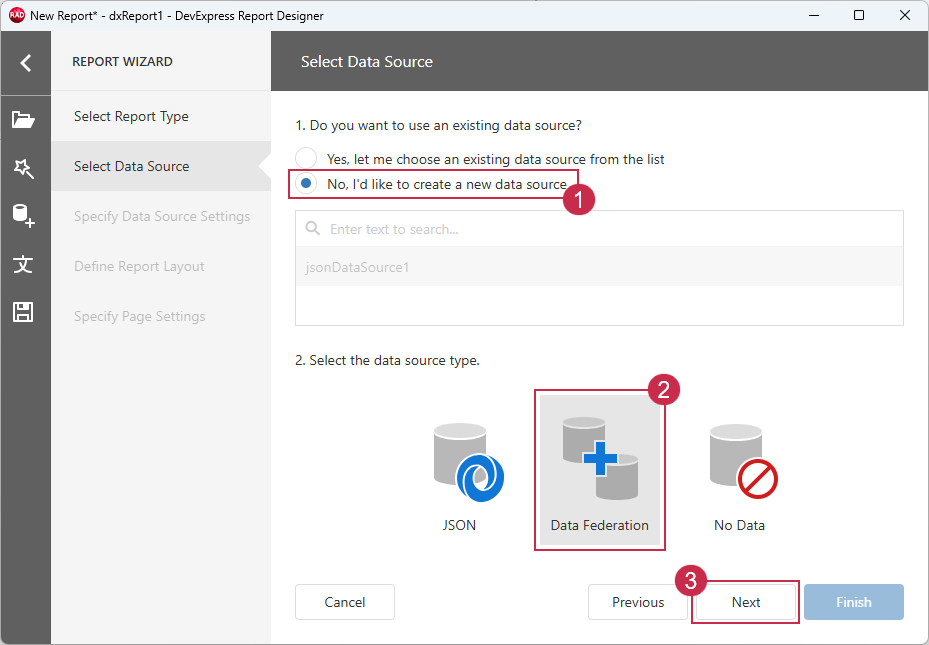
Select No, I’d like to create a new data source (1) and Data Federation (2) options, and click Next (3):
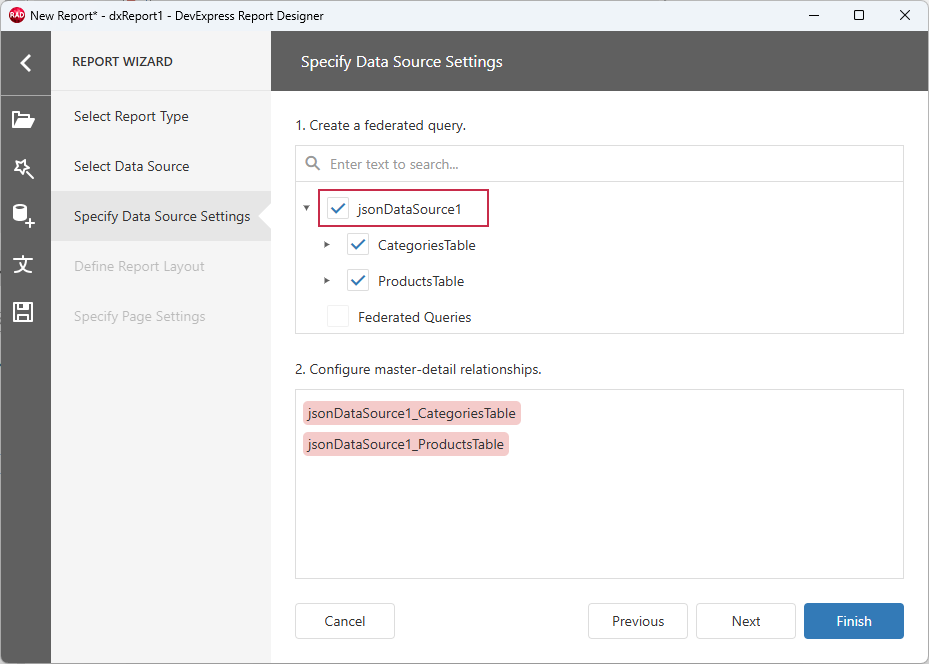
Check configured Categories and Products data sources to create a master-detail relationship:
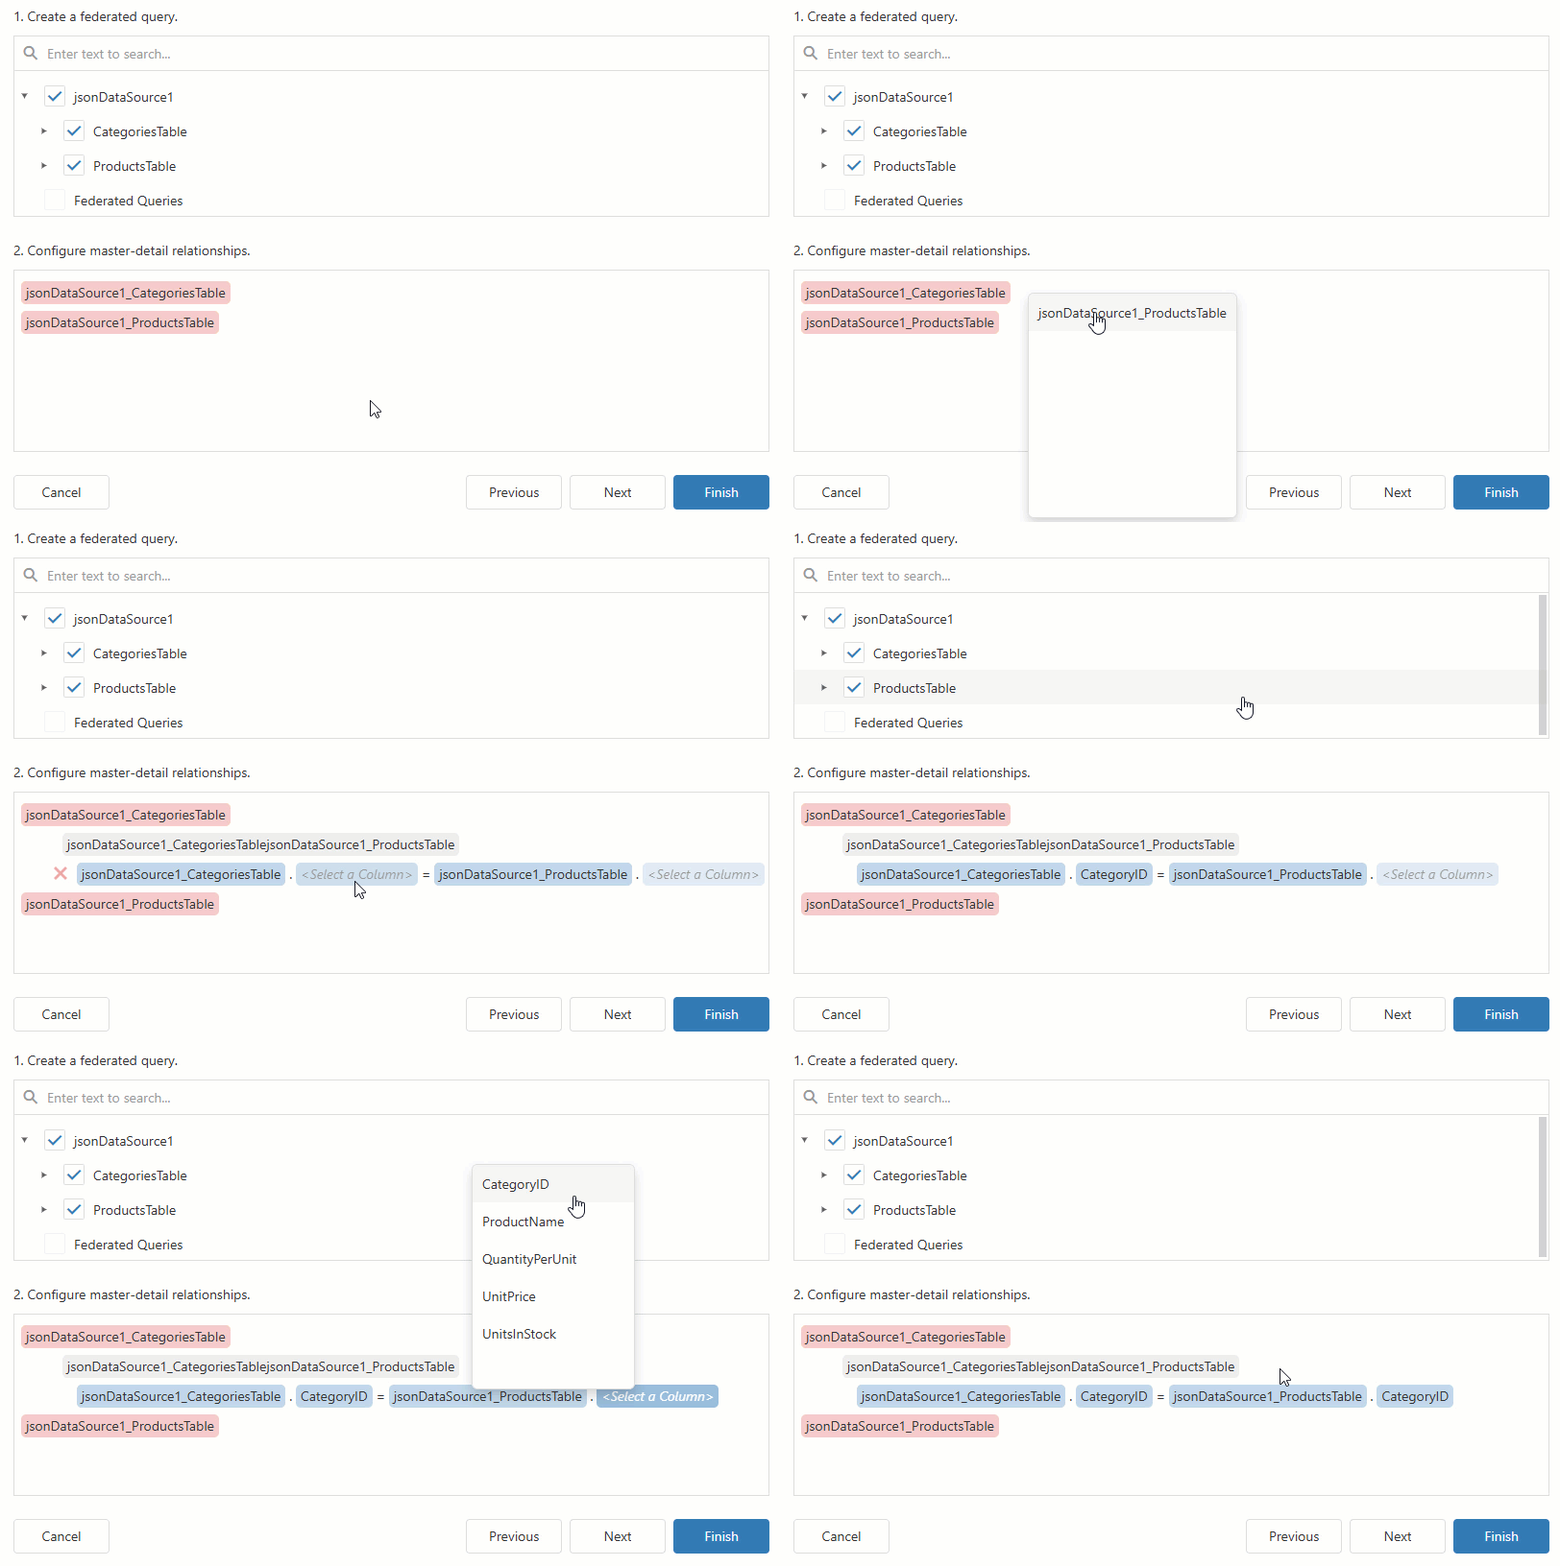
Use pane 2 to build a master-detail relationship between CategoriesTable and ProductsTable (select CategoryID as the key field for both tables):
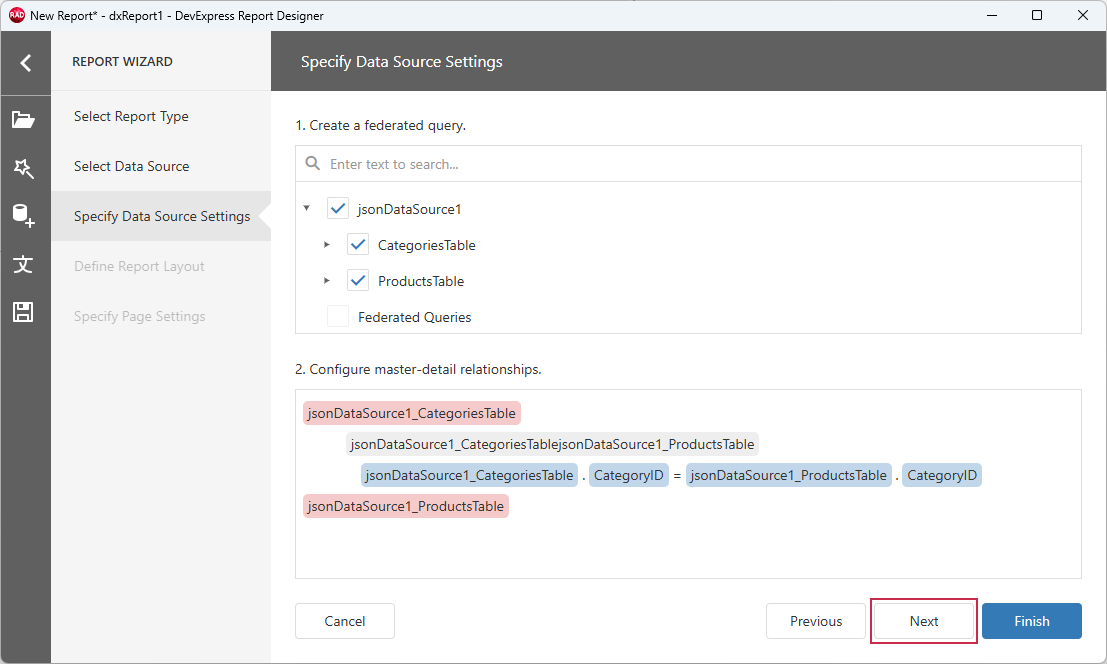
Define the Report Layout
Click Next to define and configure the report layout using the configured master-detail table:
Expand the CategoriesTable node (1), check the nested master-detail table node (2), and select Categories (3) in pane 2. To exclude CategoryID columns from the resulting report, uncheck both CategoryID fields (4 and 5). Click Finish (6) to generate a master-detail report layout.
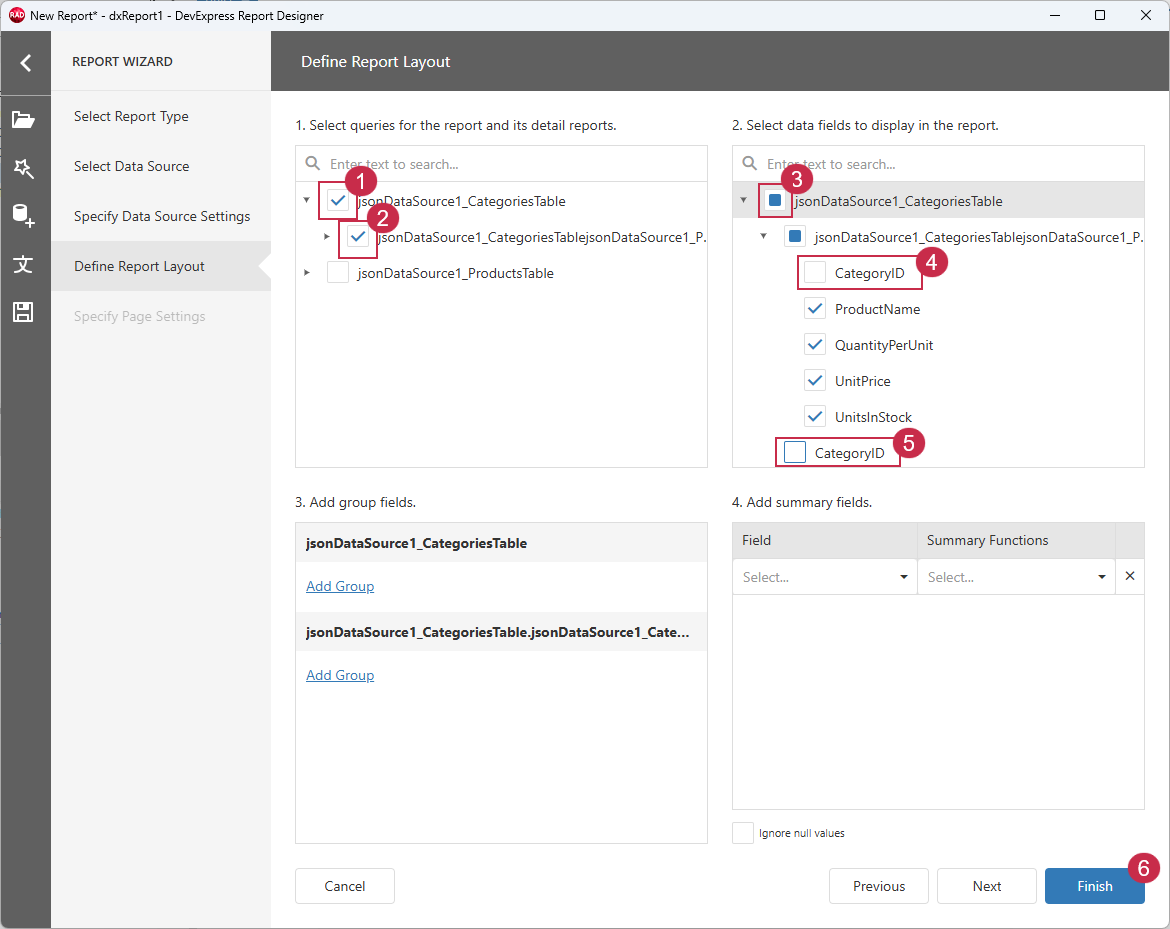
Click Next instead of Finish to add a report title, select a color scheme, and modify paper size, orientation, and other print-related settings using the dedicated Specify Page Settings Report Wizard step:
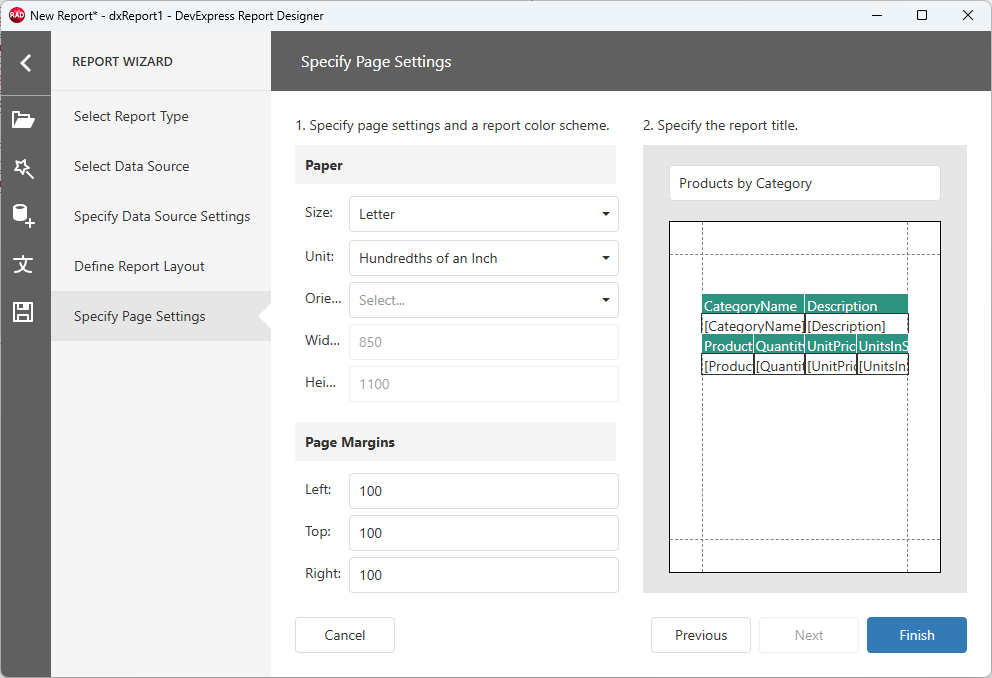
Click Finish to generate the resulting report layout.
Preview & Save the Report Layout
The Report Designer dialog displays the generated report layout.
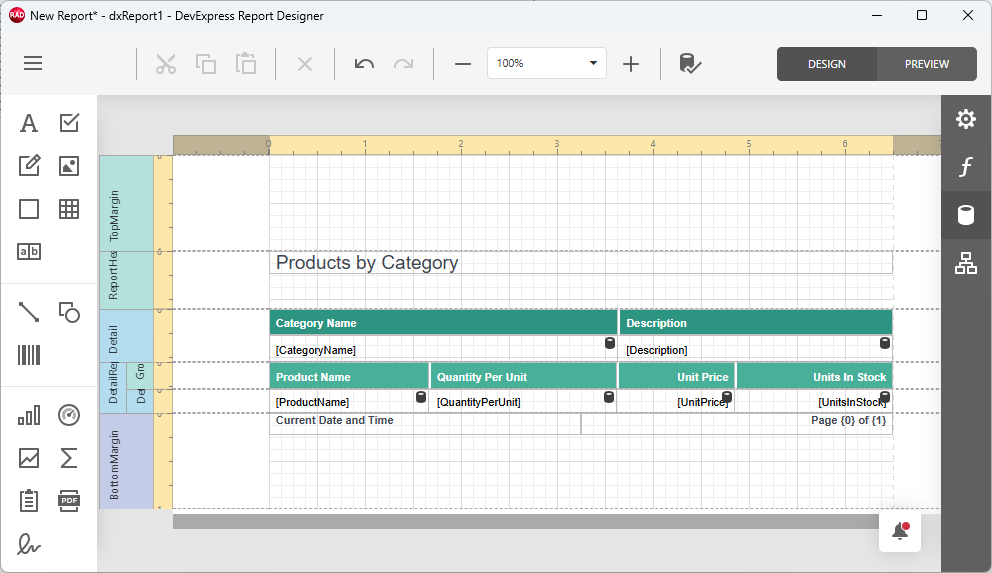
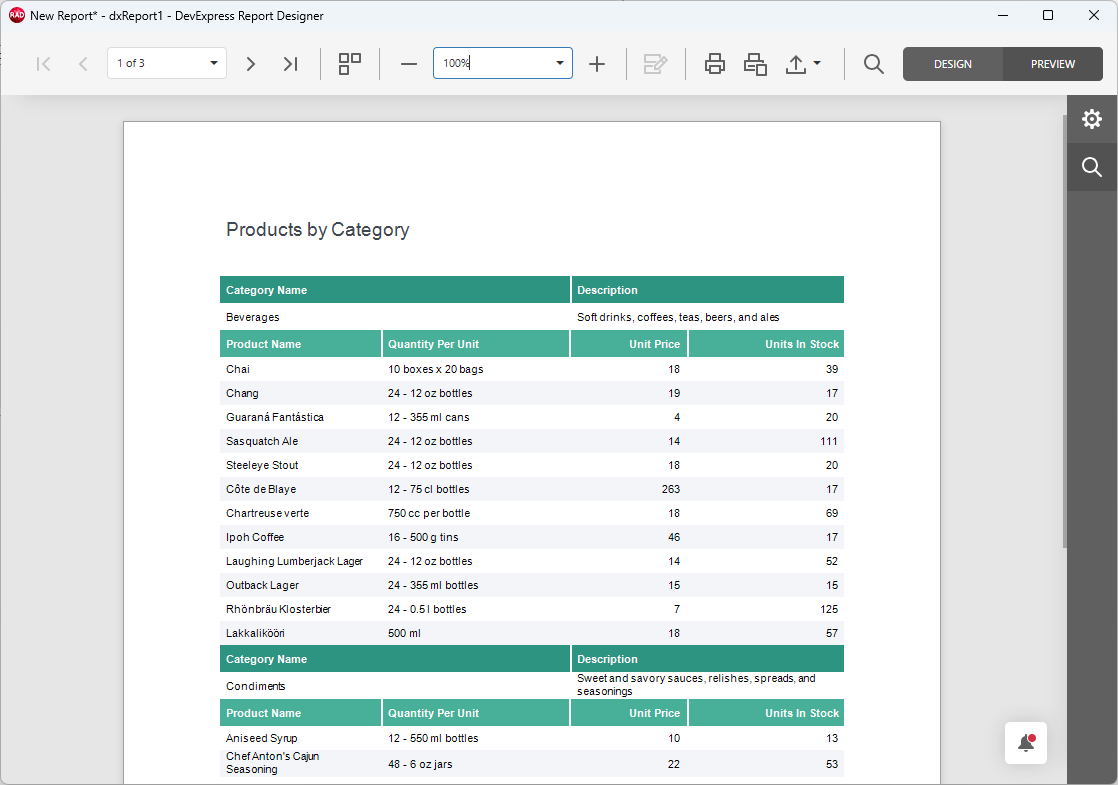
To switch between Design and Preview modes[3], click corresponding buttons.
Tip
You can modify the generated report layout as necessary (rearrange columns, customize appearance settings, add labels, logos, etc.). Refer to the following section for detailed information on report layout customization options:
Save the current report layout using the main Report Designer menu.
Next Steps (4 and 5)
To display Report Designer and Report Viewer dialogs at runtime and deploy the resulting application, follow steps 4 and 5 of the basic Report Generation Tutorial:
- Step 4 — Display Report Viewer & Designer Dialogs at Runtime
- TdxReport is a non-visual component. Follow this tutorial step to display end-user dialogs at runtime using ShowDesigner and ShowViewer methods.
- Step 5 — Build & Test Your First App
- This step explains how to use post-build events in the RAD Studio IDE for automatic dependency deployment for the TdxReport component.
Other Tutorials
Basic Tutorials
Load JSON data from a remote source, define the report layout, and bind the data to the report at design time using the Report Wizard dialog. Display the resulting report in a VCL application.
Featured Components: TdxReport | TdxBackendDataConnectionManager | TdxBackendInMemoryJSONConnection
Follow this tutorial to create a table report and bind it to data using standard FireDAC components (TFDQuery and TFDConnection) shipped with the RAD Studio IDE.
Featured Components: TdxReport | TdxBackendDataConnectionManager | TdxBackendDataSetJSONConnection
Parametrized Report Tutorials
Follow this tutorial to create a Tabbed MDI (multi-document interface) Report Viewer application where different tabs allow users to display the same parametrized report layout/template populated with different data loaded from a relational SQL database using a DevExpress XPO-based data connection component.
The demonstrated solution filters data using SQL queries and report parameters at the TdxReportControl component level.
Featured Components: TdxReportControl | TdxBackendDataConnectionManager | TdxBackendDatabaseSQLConnection | TdxTabbedMDIManager | TdxBarManager
Follow this tutorial to create a Tabbed MDI (multi-document interface) Report Viewer application where different tabs display a parametrized report layout/template populated with different data loaded from a relational database using standard FireDAC components (TFDQuery and TFDConnection) shipped with the RAD Studio IDE.
The demonstrated solution filters data at the FireDAC dataset (TFDQuery) level using a SQL parameter.
Featured Components: TdxReportControl | TdxBackendDataConnectionManager | TdxBackendDataSetJSONConnection | TdxTabbedMDIManager | TdxBarManager | TFDConnection | TFDQuery | TDataSource
Tip
Refer to the following topic for a complete list of TdxReport/TdxReportControl tutorials: VCL Reports: Getting Started.
-
Alternatively, you can press the Insert key.
-
Alternatively, you can double-click the TdxReport component.
-
You can switch to Preview mode at any moment to ensure that the resulting report document looks as intended.