Report Summary Scopes
- 2 minutes to read
To check whether a report element contains a summary, select the element in the Report Designer (1), open the PROPERTIES panel (2), and expand the Summary section (3):
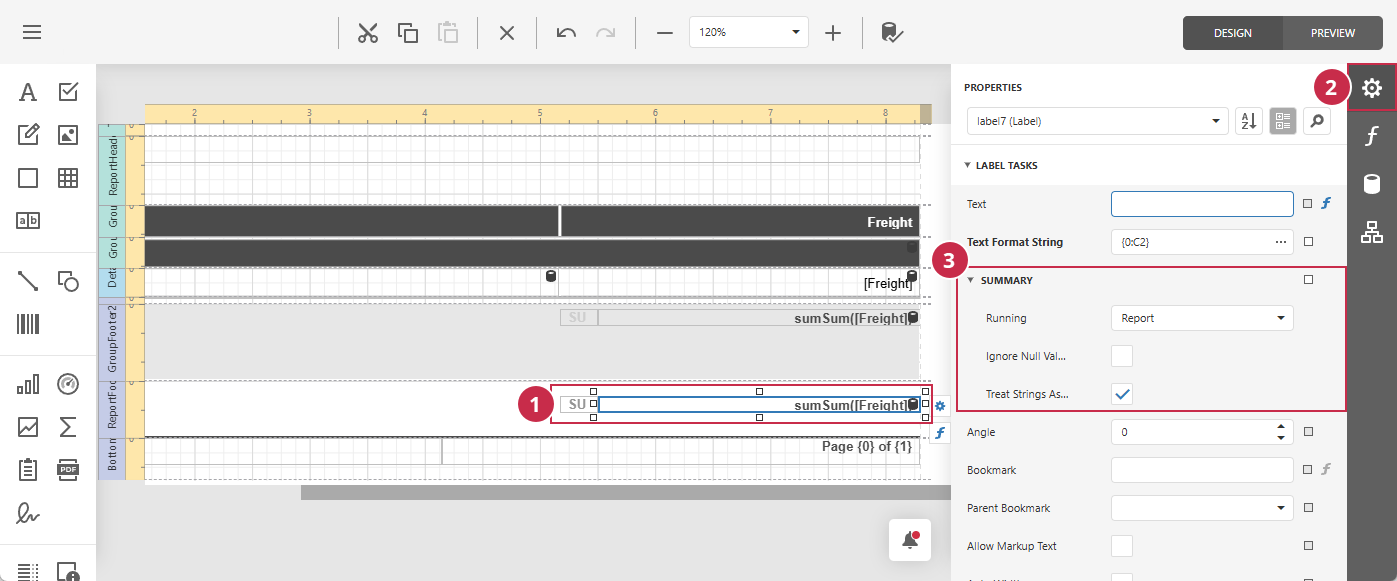
Check the value of the Running option to identify the element’s summary scope:
| Value | Summary Behavior |
|---|---|
| None | Does not calculate a summary. The element displays its value as is. |
| Group | Calculates a separate summary for each group using records within the current group. |
| Page | Calculates a summary for all records on the current page. |
| Report | Calculates a summary using records in an entire report. |
When you add summaries using the Report Wizard, the summary scope determines which footer band displays each result:
- A Group summary appears in the Group Footer band, after all records in each group.
- A Page summary appears in the Page Footer band, after all records on each page.
- A Report summary appears in the Report Footer band, after the last report record.
Reset a Summary
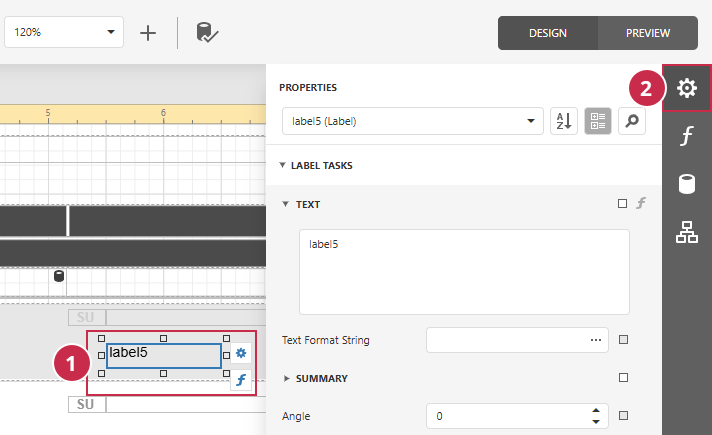
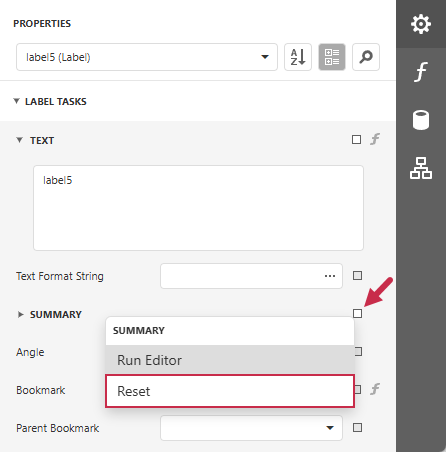
To convert a summary to a standard report element, reset its scope:
Select an element (1) and open its properties (2):
Click the small box next to the Summary section and select Reset from the drop-down menu:
Tip
To remove a summary completely, delete the corresponding report element or the entire container band.
Summary Expressions
Summaries use all records displayed within their Running scope. To calculate a total for a subset of records without hiding other records, assign an aggregate expression to the element’s Text and leave Summary > Running set to None.
Tip
Place elements with aggregate expressions in Footer bands instead of the Detail band to avoid repeating the same result for every record.
For example, a price book can list all items but display a count of only the items in stock. Use the following expression instead of a summary:
[][[UnitsInStock] > 0].Count()
Refer to the following help topic for detailed information on expression syntax: Expression Syntax.