Advanced Grid Printing and Exporting
- 5 minutes to read
The WinForms Report Generator components allows you to convert the DevExpress WinForms Grid control to a report. You can generate reports for the following view types:
Supported Grid Features
- Binding settings of grid columns.
- Unbound columns calculated based on expressions.
- Group, sort, and filter settings.
- Group and total summaries.
- Appearance settings of grid columns (GridColumn.AppearanceHeader and GridColumn.AppearanceCell).
- Appearance settings of rows.
- Conditional formatting rules that are based on expressions.
- Grid bands (when exporting data from BandedGridView and AdvBandedGridView).
- Sparklines displayed within grid cells.
Generate a Report from Grid at Design Time
Follow the steps below to generate a report at design time:
- Drop the ReportGenerator component from the Toolbox onto a Form.
Open the ReportGenerator’s smart tag menu and click “Generate Report”:

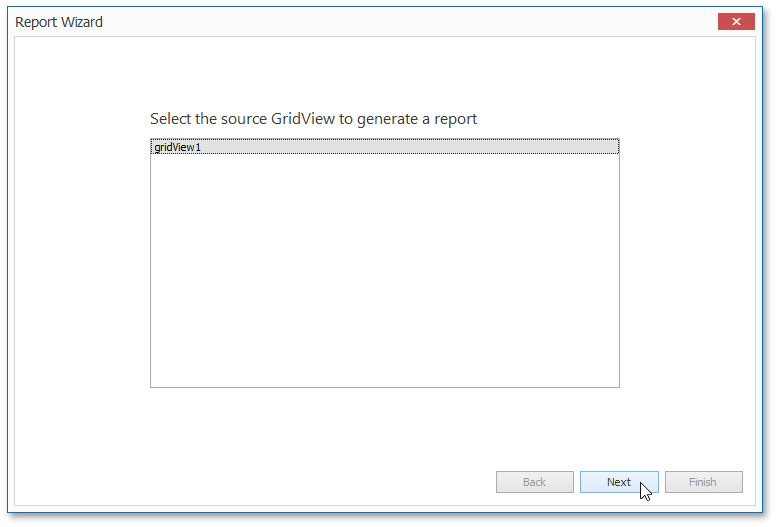
Select the source View and click Next:
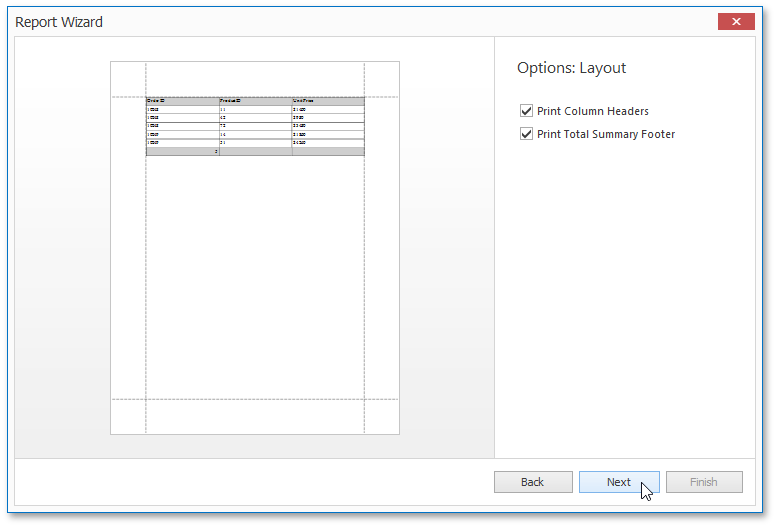
Specify whether to display column headers and a footer with total summaries. Click Next to proceed:
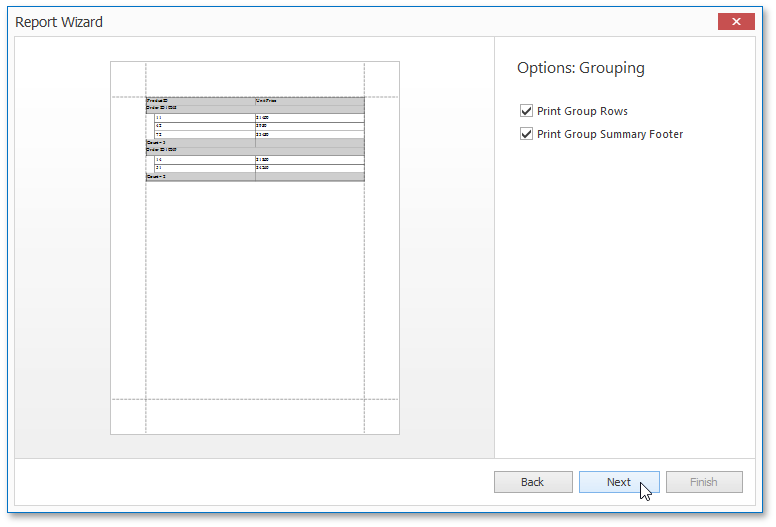
Specify whether to display group rows and footers with group summaries:
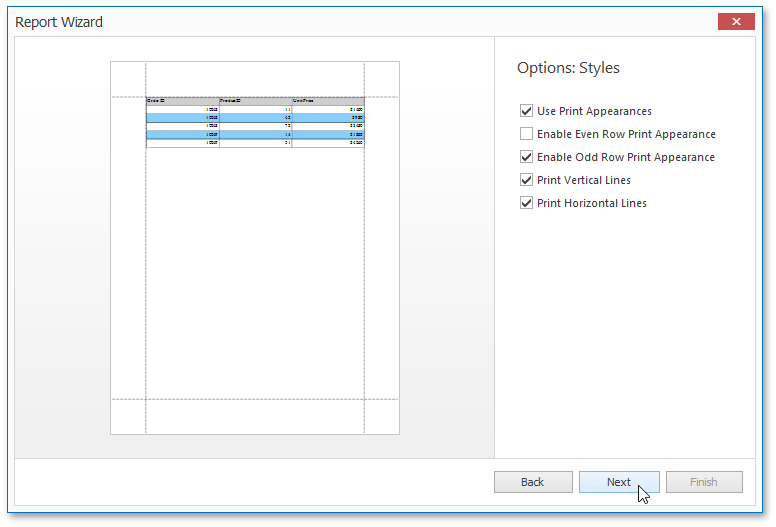
Configure the following appearance settings:
- Use Print Appearances - Specifies whether to use print appearance settings (GridView.AppearancePrint) or regular appearance settings (GridView.Appearance).
- Enable Even Row Print Appearance - Specifies whether to apply appearance settings specified by the GridViewPrintAppearances.EvenRow property to even rows. This option is in effect if the Use Print Appearances setting is enabled.
- Enable Odd Row Print Appearance - Specifies whether to apply appearance settings specified by the GridViewPrintAppearances.OddRow property to odd rows. This option is in effect if the Use Print Appearances setting is enabled.
- Print Vertical Lines - Specifies whether to display vertical lines.
- Print Horizontal Lines - Specifies whether to display horizontal lines.
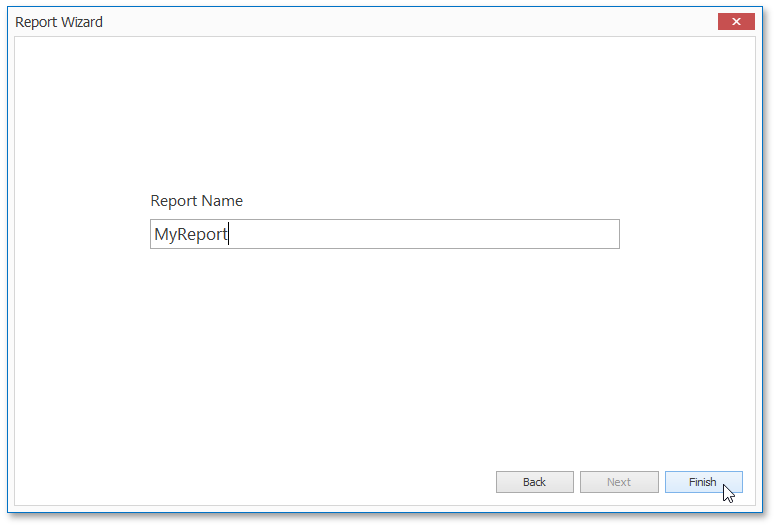
Specify a name for the report, then click Finish.
Generate a Report from Grid in Code
Using the ReportGenerator.GenerateReport static method to generate a report:
using DevExpress.XtraReports.UI;
using DevExpress.XtraReports.ReportGeneration;
using DevExpress.Utils;
using System;

namespace DXApplication {
    public partial class Form1 : DevExpress.XtraBars.Ribbon.RibbonForm {
        XtraReport dataGridReport;
        public Form1() {
            InitializeComponent();
            gridControl1.ForceInitialize();
            dataGridReport = ReportGenerator.GenerateReport(gridView1,
                new ReportGenerationOptions() {
                    EnablePrintAppearanceEvenRow = DefaultBoolean.True,
                    EnablePrintAppearanceOddRow = DefaultBoolean.True,
                    PrintColumnHeaders = DefaultBoolean.True,
                    PrintVerticalLines = DefaultBoolean.True,
                    PrintHorizontalLines = DefaultBoolean.False
                });
        }
        //...
    }
}
To take advantage of binding expressions, use the ReportGenerator.GenerateReport method with the useExpressionBindings Boolean parameter set to true. Binding expressions offer advanced capabilities for further customization of the generated report. See Data Binding Modes to learn more.
Open Report Designer. Preview and Print Generated Report
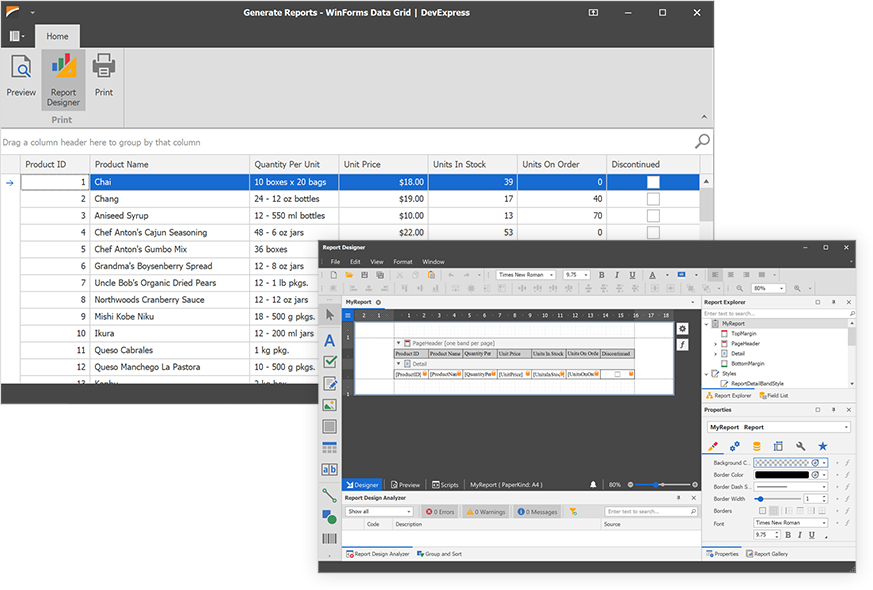
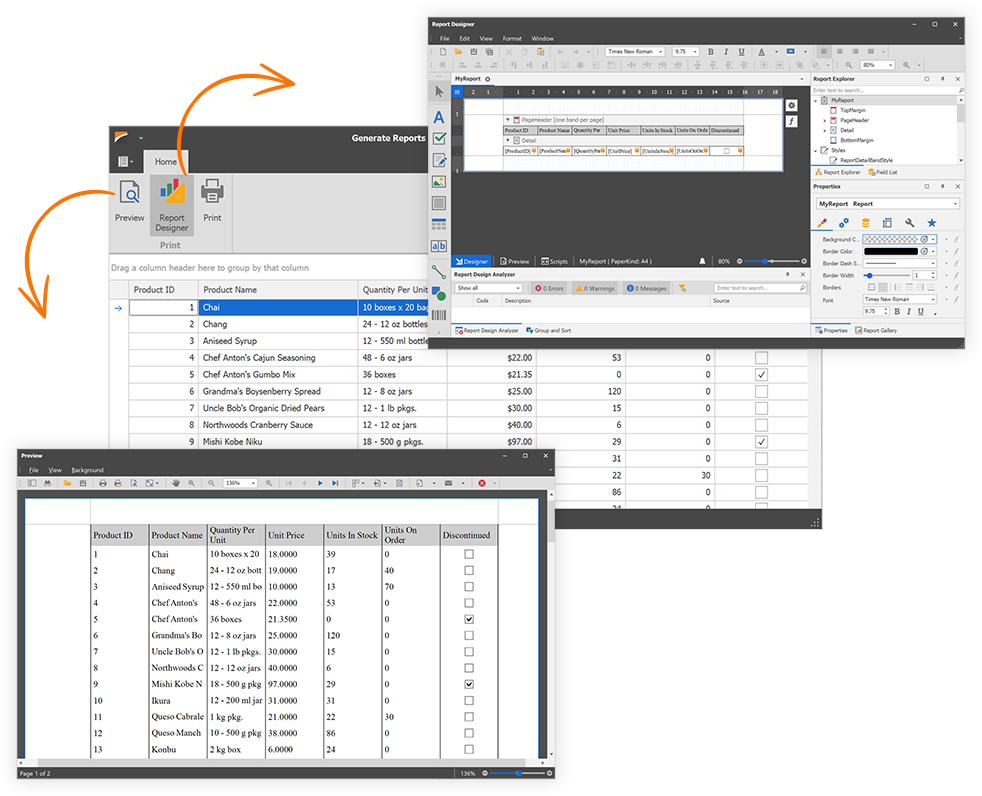
The following code displays the MyReport when a user clicks the “Preview” toolbar command. MyReport was generated and configured at design-time.
using DevExpress.XtraReports.UI;
using System;

//...
public partial class Form1 : DevExpress.XtraBars.Ribbon.RibbonForm {
    MyReport gridReport;
    public Form1() {
        InitializeComponent();
        gridReport = new MyReport();
    }
    void previewBarItem_ItemClick(object sender, DevExpress.XtraBars.ItemClickEventArgs e) {
        gridReport.ShowPreviewDialog();
    }
    void reportDesignerBarItem_ItemClick(object sender, DevExpress.XtraBars.ItemClickEventArgs e) {
        gridReport.ShowDesignerDialog();
    }
    void printBarItem_ItemClick(object sender, DevExpress.XtraBars.ItemClickEventArgs e) {
        gridReport.PrintDialog();
    }
}
The following image shows the result:
Scenarios of Using the Generated Report
The generated report is automatically added to the current project under the specified name and opened in the advanced Report Designer, which is fully integrated into the Visual Studio IDE. The report’s declaration can be found in the file with the same name as the report name.
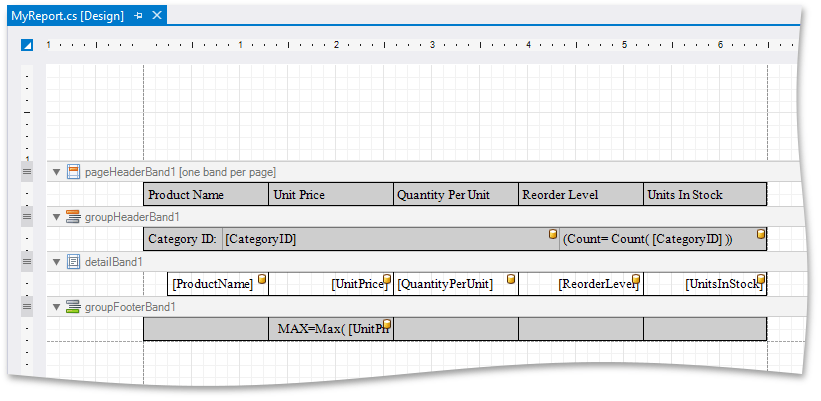
The report designer provides rich creating, editing and publishing capabilities including the following.
- Print, Print Preview, and Export actions
- Modifying report element layouts
- Modifying report element appearances
- Applying data grouping, sorting and filtering
- Adding totals
- Adding page numbers and system information
- etc.
See the Visual Studio Report Designer document for more information about report design-time customization.
After the report is generated and customized, you can show the report’s print preview to your end-users.
It is possible to delegate report customization to end-users. They can use the End-User Report Designer to manually modify the report, show a Print Preview, export the report, etc. For more information, refer to the Report Designer document.
The following code creates a new instance of the generated report class and opens it in the End-User Report Designer.
using DevExpress.XtraReports.UI;
//...

MyReport report = new MyReport();
ReportDesignTool designTool = new ReportDesignTool(report);
designTool.ShowDesignerDialog();
Limitations
The report generation engine does not support the following features:
- Unbound columns populated on the ColumnView.CustomUnboundColumnData event.
- Event-based customizations (including conditional formatting rules configured within event handlers).
- Merged cells.
-
Tip
Use the DevExpress Printing Library to print and export a master-detail grid. Enable PrintDetails and ExpandAllDetails options.