Create a Master-Detail Report with a Detail Report Band
- 6 minutes to read
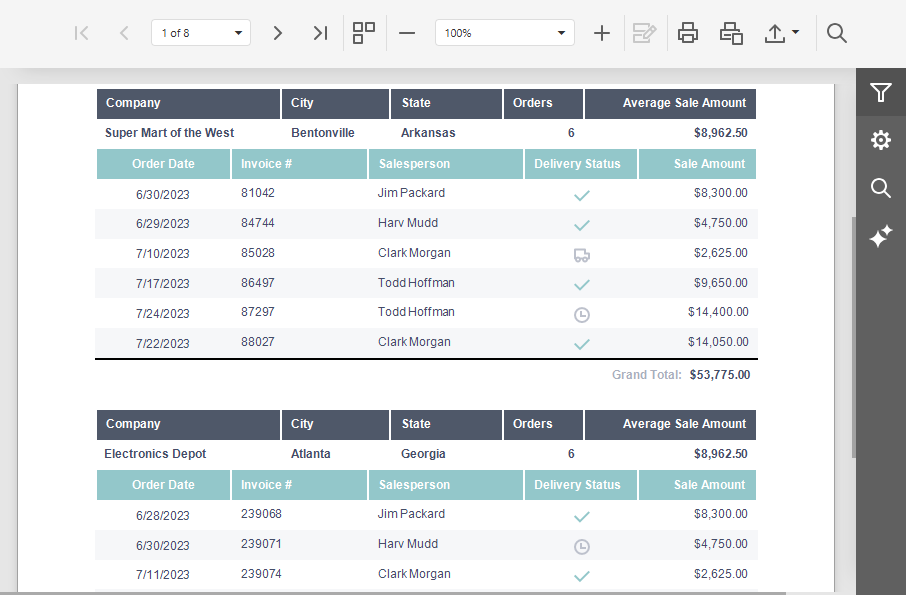
A Master-Detail report allows you to display related and hierarchical data, such as customers and their orders (or individual orders and corresponding details). This tutorial creates a new project, loads and associates two tables from a sample SQLite database using a SQL data connection component, adds a TdxReport component, and uses the Report Designer dialog to set up a master-detail report layout.
Sample SQLite Database
This guide uses the following SQLite database shipped with compiled DevExpress VCL demos:
Tip
%PUBLIC%\Documents\DevExpress VCL Demos\MegaDemos\Product Demos\ExpressReports\Data\nwind.db
Step 1 — Create & Configure a RAD Studio Project
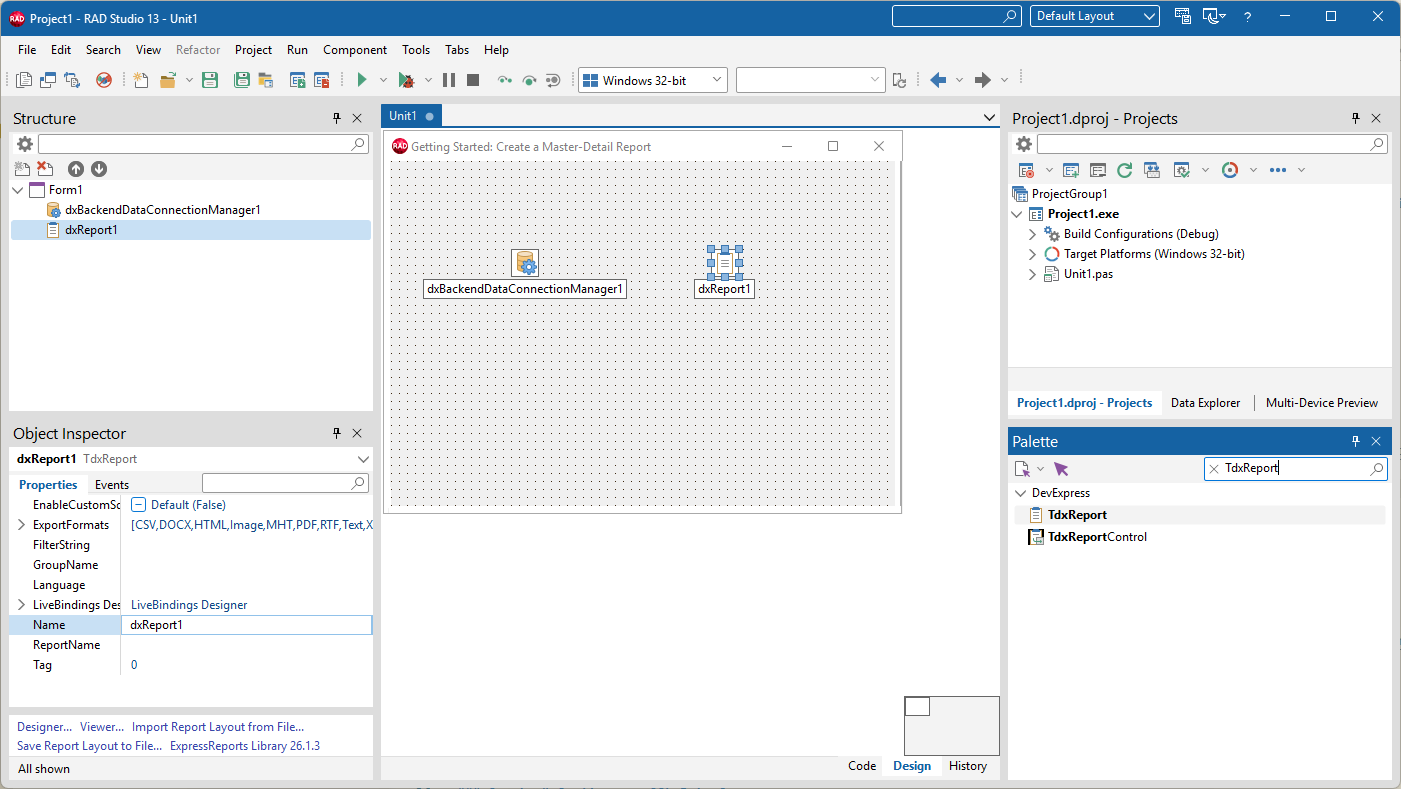
Create a new Delphi or C++Builder project. Place two components on the form (using the Tool Palette):
- TdxBackendDataConnectionManager
- Manages data sources for all reports in your application.
- TdxReport
- Manages report document layouts, end-user dialogs, and related settings.
Create & Configure a SQL Data Source
Copy the following connection string[1] for the sample SQLite database:
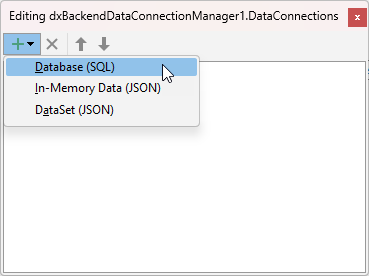
XpoProvider=SQLite;Data Source=C:\Users\Public\Documents\DevExpress VCL Demos\MegaDemos\Product Demos\ExpressReports\Data\nwind.dbDouble-click the TdxBackendDataConnectionManager component. In the Collection Editor dialog, select Add → Database (SQL). This menu item creates a TdxBackendDatabaseSQLConnection component designed to load data from a relational database and bind it to your report.
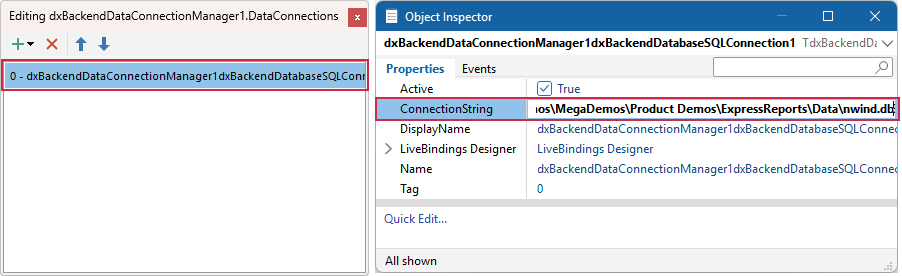
Select the created component in the Collection Editor dialog. Paste the copied string to the ConnectionString property editor[2] in the Object Inspector.
Step 2 — Add a Data Source and Configure Master-Detail Relationship
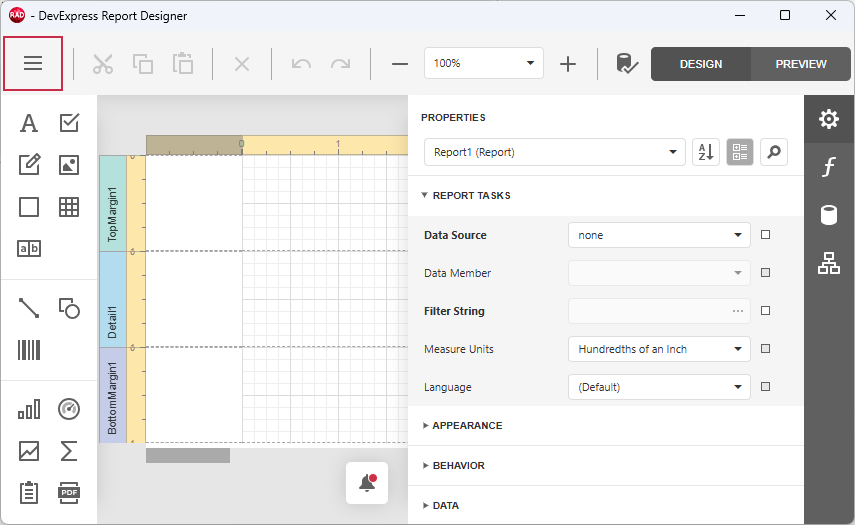
Right-click the TdxReport component and select the Designer… option[3] to display the Report Designer dialog. Click the hamburger button to display the Report Designer menu:
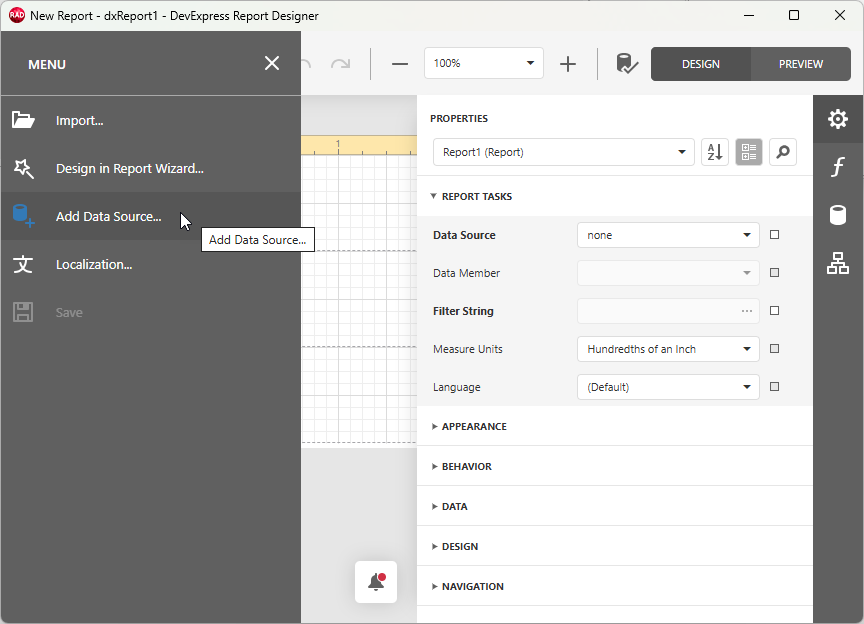
Select Add Data Source… to add the configured data source to the current report layout definition.
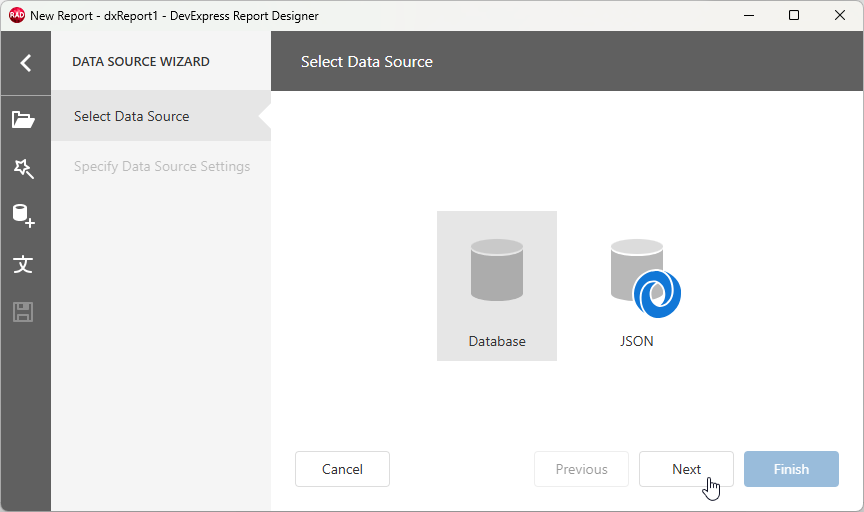
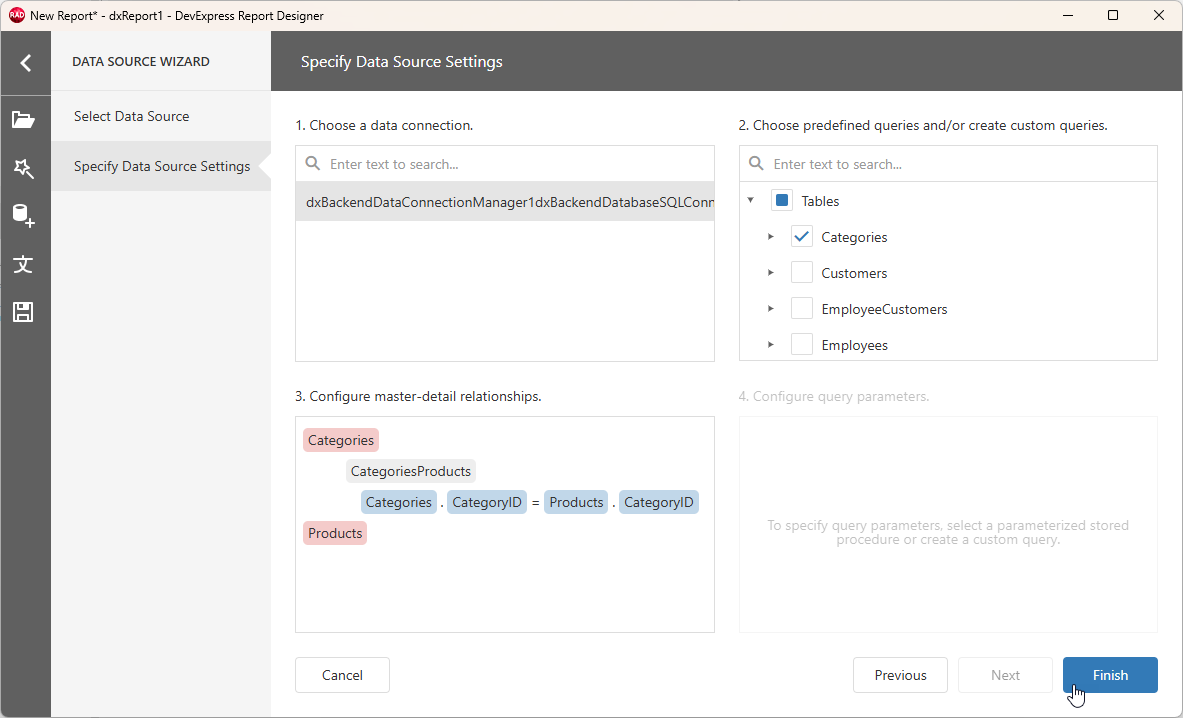
Select Database[2] and click Next to navigate to the Specify Data Source Settings wizard page:
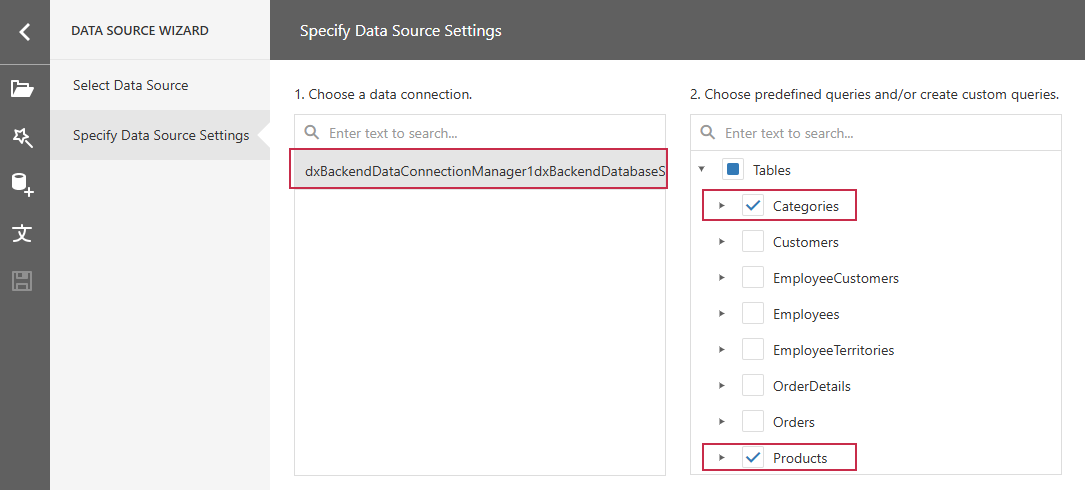
Select and Associate Tables
- Pane 1 displays the SQL data connection component.
Select Categories and Products in the Tables node displayed in pane 2:
Use pane 3 to build a master-detail relationship between Categories and Products (select CategoryID as the key field for both tables):
Click Finish to add a configured data source to the current report layout definition.
Step 3 — Design a Master-Detail Report Layout
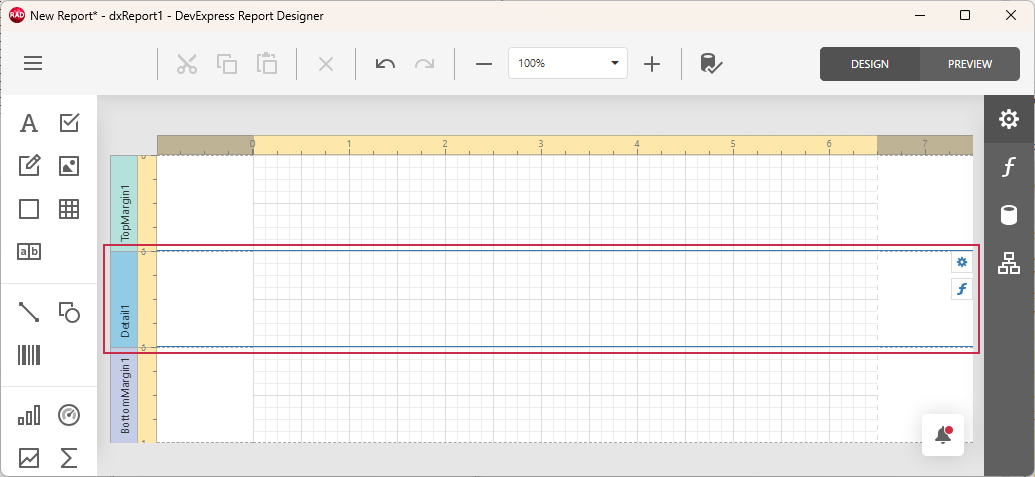
The Detail layout section is designed for placeholders populated with data.
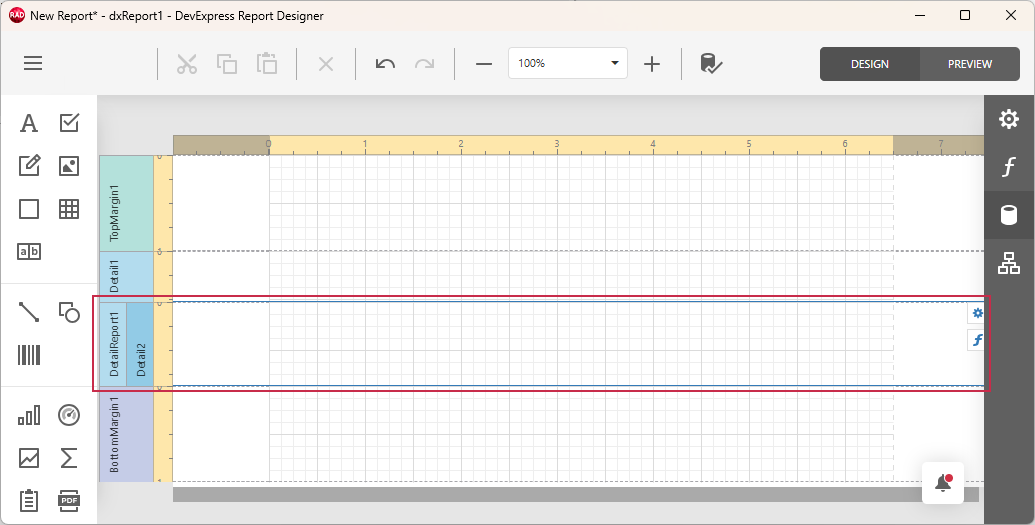
Add a Detail Report Band
Master-detail reports require a nested detail layout section (band) for detail data. Right-click the Detail1 (blue) band in the Report Designer dialog and select Insert Band → Detail Report menu item:
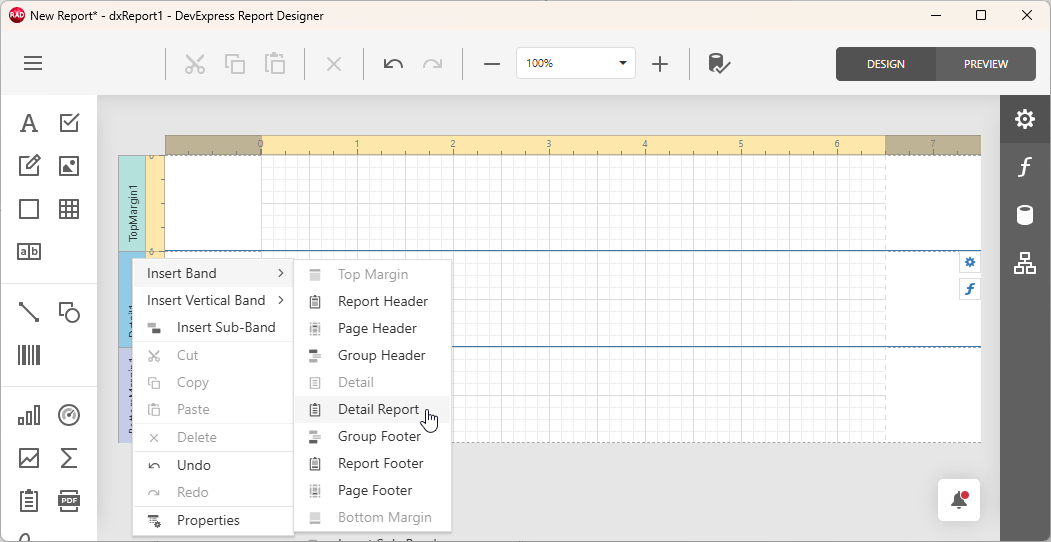
The updated report layout structure contains two bands:
- Detail1
- Designed to display content repeated for each master table (Categories) record (cells for master record data, cell headings for detail data, extra labels, etc.).
- DetailReport1
- Intended to contain detail placeholders populated with data from the CategoriesProducts table built from Categories and Products tables associated earlier using the CategoryID key field.
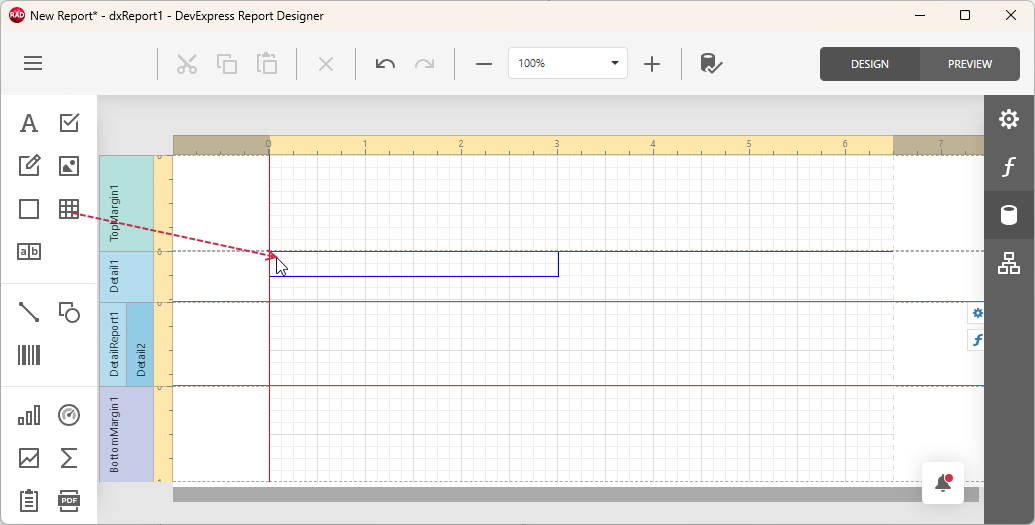
Design a Content Structure
To create a table in the root (master) detail layout section, drag-and-drop the Table item to the Detail1 section:
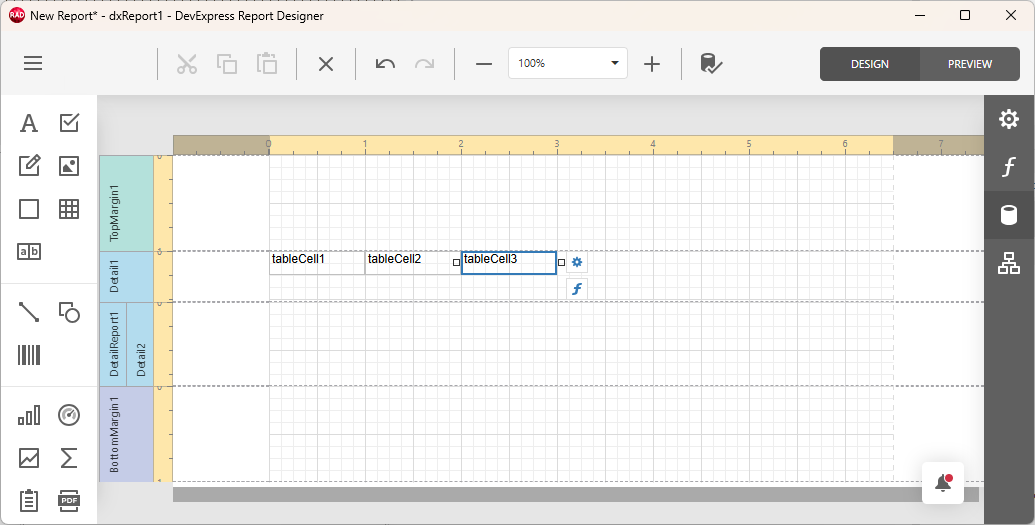
Add a Master Table
This operation creates a single-row table with three cells. This table is intended to display CategoryName and Description fields from the master Category table. Select tableCell3 and press Delete to delete the last cell.
Add Detail Table Captions
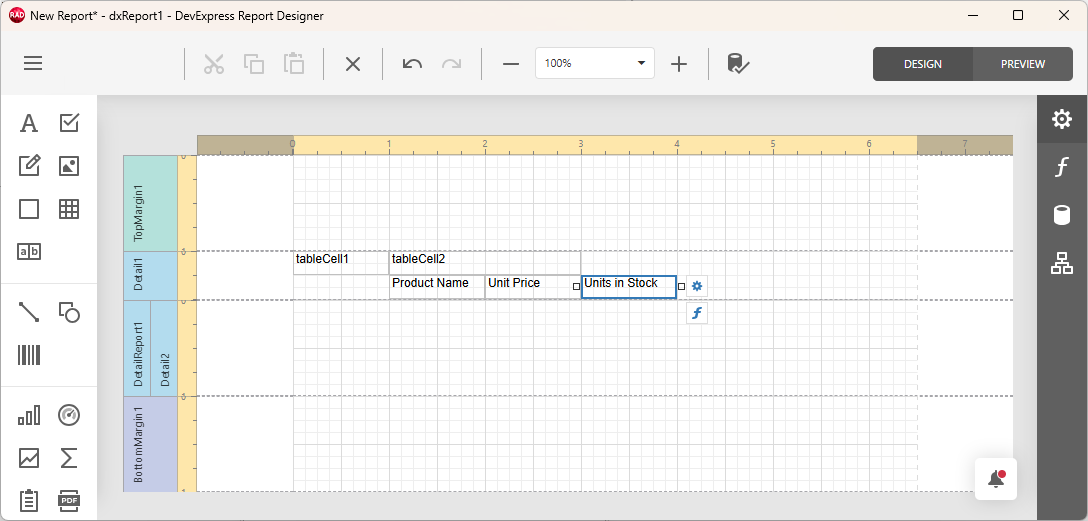
Place an additional table below the previously created table in the Detail1 section:
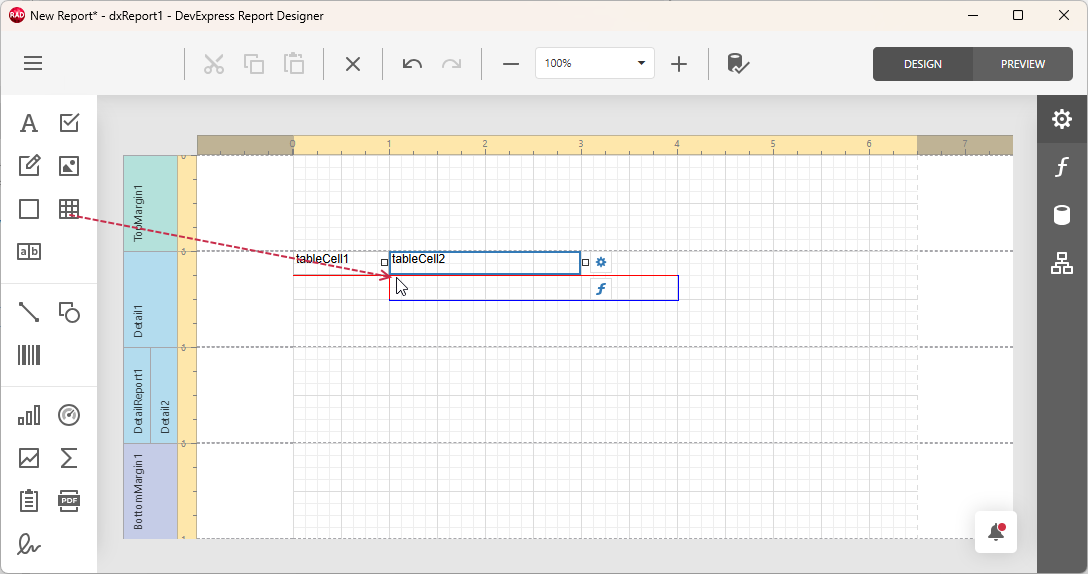
Double-click a cell to activate an in-place editor. Rename tableCell4, tableCell5, and tableCell6 to Product Name, Unit Price, and Units in Stock, respectively (detail table captions).
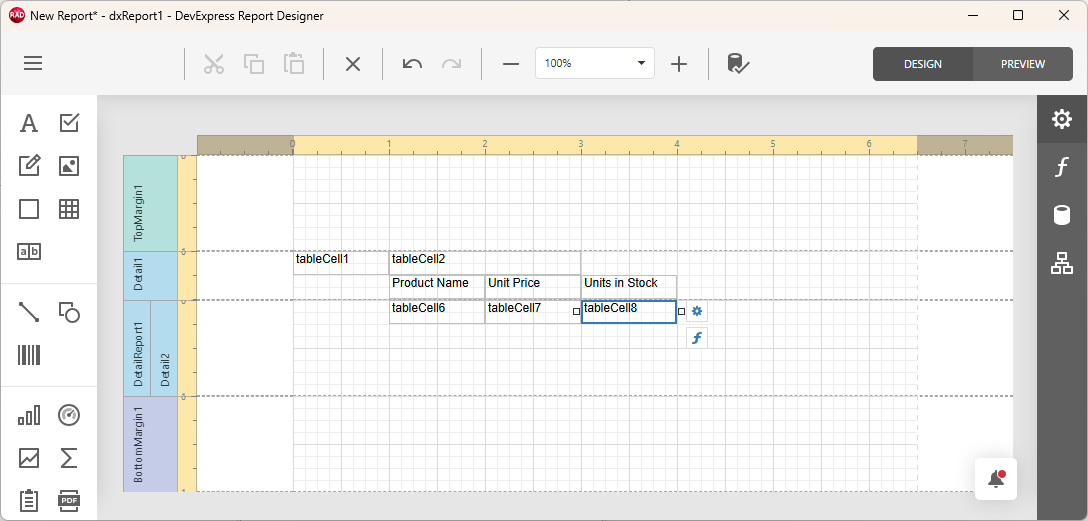
Add a Detail Table
Add another table to the DetailReport1 band and position the new table below the table with detail captions:
Bind Report Tables to Data
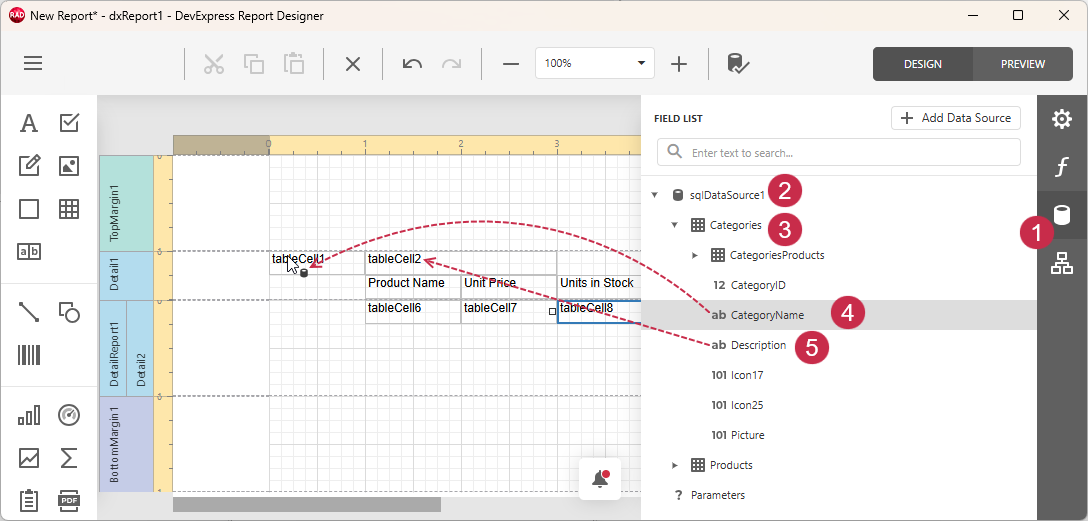
Add Master Table Placeholders
- Open the FIELD LIST pane.
- Expand sqlDataSource1.
- Expand Categories.
- Drag-and-drop the CategoryName field to tableCell1.
- Drag-and-drop the Description field to tableCell2.
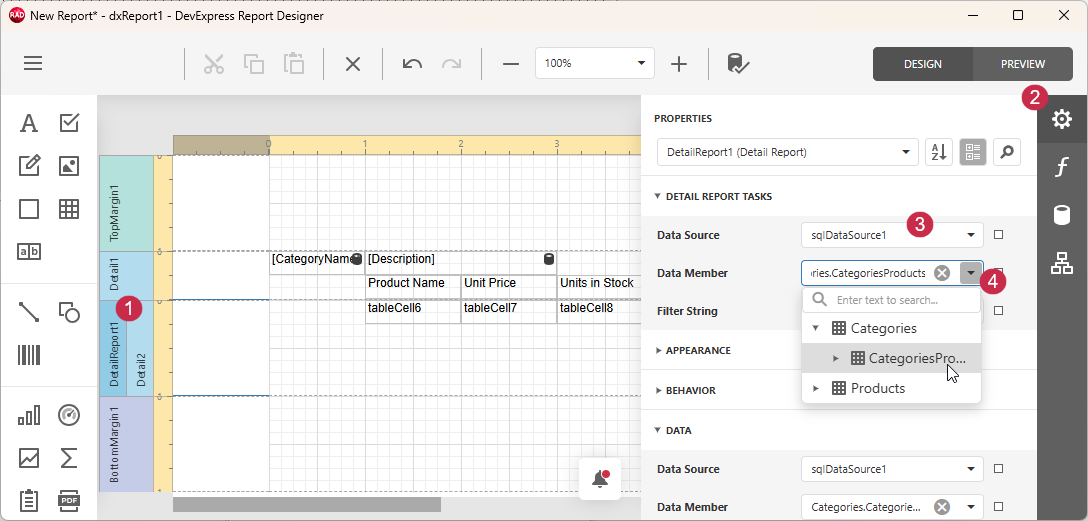
Bind a Detail Report to Data
- Select the DetailReport1 band.
- Open the PROPERTIES pane.
- Select sqlDataSource1 in the Data Source combo box.
Select the CategoriesProducts table in the Data Member editor.
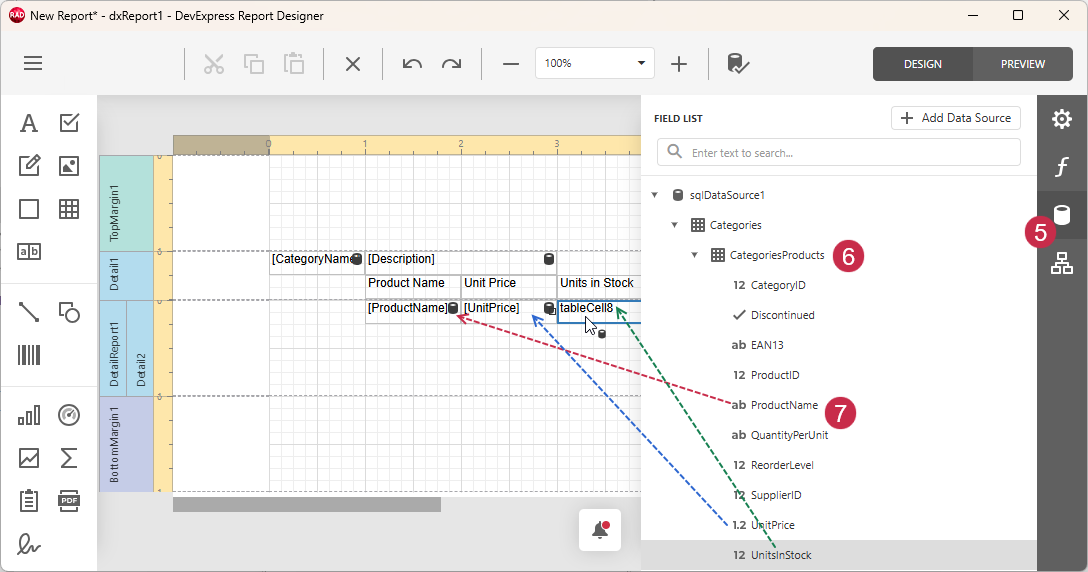
Switch to the FIELD LIST pane.
- Expand the CategoriesProducts node.
Drag-and-drop ProductName, UnitPrice, and UnitsInStock fields to corresponding cells within the DetailReport1 band:
Adjust & Preview the Master-Detail Report Layout
Drag the ReportDetail1 band’s bottom border to reduce the detail section height to match content.
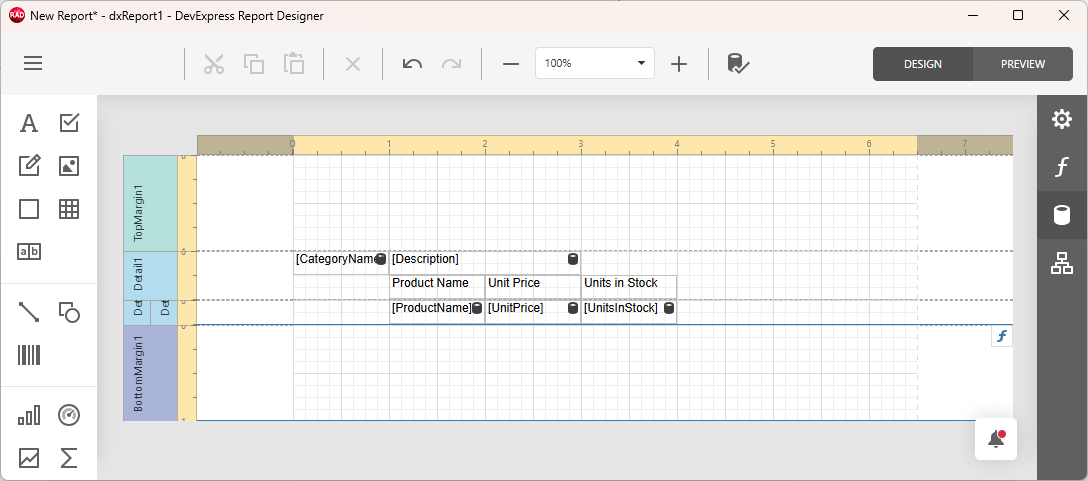
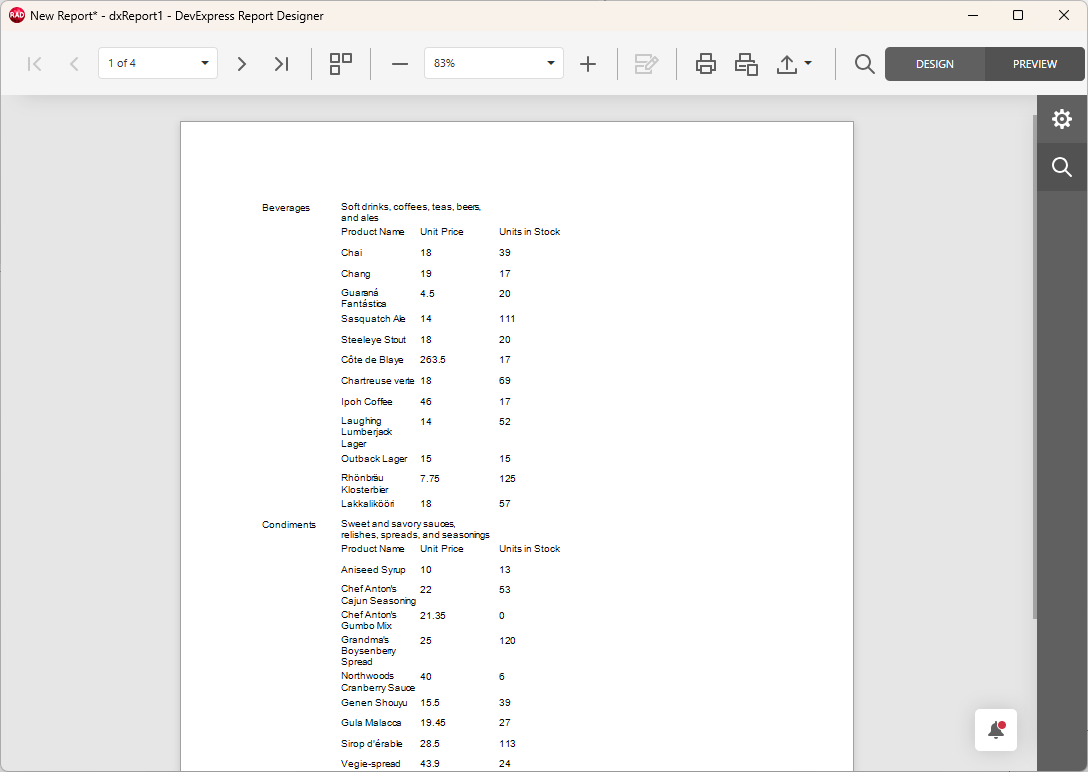
To switch between Design and Preview modes[4], click the appropriate button.
Modify the Report Layout (Optional)
You can modify the report layout as needed (rearrange columns, customize appearance settings, add labels, logos, etc.).
Tip
Refer to the following section for detailed information on report layout customization options:
Next Steps (4 and 5)
To display Report Designer/Report Viewer dialogs at runtime and deploy the resulting application, follow steps 4 and 5 of the basic Report Generation Tutorial:
- Step 4 — Display Report Viewer & Designer Dialogs at Runtime
- TdxReport is a non-visual component. Follow this tutorial step to display end-user dialogs at runtime using ShowDesigner and ShowViewer methods.
- Step 5 — Build & Test Your First App
- This step explains how to use post-build events in the RAD Studio IDE for automatic dependency deployment for the TdxReport component.
Other Tutorials
- Follow this tutorial to create a table report and bind it to data using standard FireDAC components (TFDQuery and TFDConnection) shipped with the RAD Studio IDE.
- Follow this tutorial to create a table report, bind it to a stored database procedure, and pass a report parameter to that procedure using Report Designer and Report Wizard dialogs at design time.
- Follow this tutorial to create a Tabbed MDI (multi-document interface) Report Viewer application where different tabs allow users to display different data from a relational SQL database in the same report template.
-
The demonstrated connection string includes the default installation path of the sample Northwind database file (nwind.db). The actual path to the sample database file depends on the installation path you selected for the compiled DevExpress VCL demos. Update the path within the connection string as necessary.
-
If source data is unavailable to the TdxReport component (the Database item is not displayed in the Data Source Wizard), make sure that the connection string is correct, and uncheck and check the connection component’s Active property in the Object Inspector.
-
Alternatively, you can double-click the TdxReport component.
-
You can switch to Preview mode at any moment to ensure that the resulting report document looks as intended.