Tutorial: Row Height and Layout Basics
- 2 minutes to read
This walkthrough is a transcript of the Row Height and Layout Basics video available on the DevExpress YouTube Channel.
In this tutorial, you will learn how to allow end-users to resize data rows, how to pre-define the height of data and group rows, how the grid adjusts row height based on currently applied styles and how you can use a specially designed event to specify custom height for individual rows.
Enabling Row Resizing for End-Users
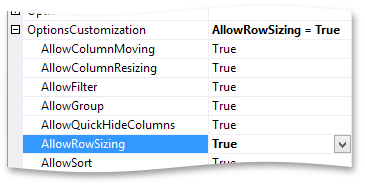
At design-time, click the View label to access its properties, expand GridView.OptionsCustomization and enable the GridOptionsCustomization.AllowRowSizing property.
End-users can now resize rows by dragging any row’s bottom edge.
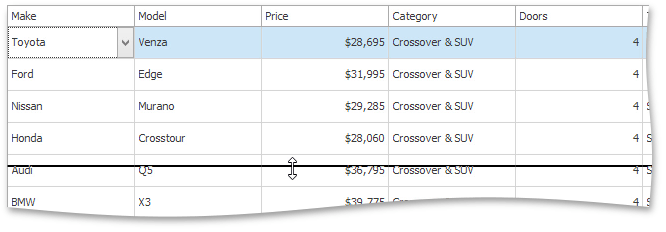
Note that this changes row height for all rows at once. End-users cannot freely resize individual rows.
Specifying Row Height
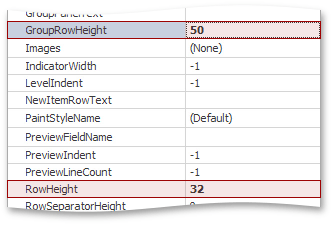
You can predefine row height at design-time or in code using the grid View’s properties. GridView.RowHeight sets the height for data rows, GridView.GroupRowHeight for group rows.
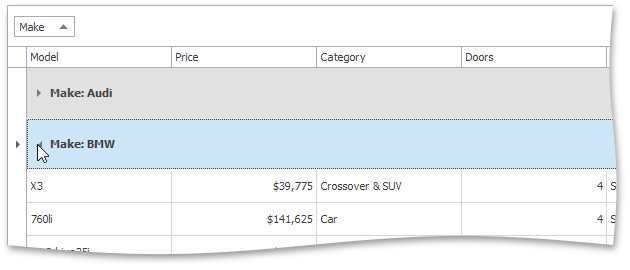
Group grid data to see that the changes were applied.
Applying Visual Styles
Grid row height is also affected by applied visual styles. To illustrate this, first turn on the GridOptionsView.EnableAppearanceOddRow option. Then, access the GridViewAppearances.OddRow appearance settings and change the font size.
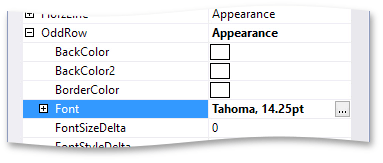
You’ll see that the row height changed, but once again it has changed for all rows at once, not only for odd rows.

If you allow end-users to resize rows at runtime, they won’t be able to resize them less than required to display odd rows completely.
Providing Variable Row Height
To apply height to individual rows, you’ll need to handle the GridView.CalcRowHeight event. Use it to specify different heights for odd and even rows.
private void gridView1_CalcRowHeight(object sender, RowHeightEventArgs e) {
    if (e.RowHandle % 2 == 1)
        e.RowHeight = 22;
    else
        e.RowHeight = 36;
}
Run the application to see that now rows have different heights, as set by the event handler code.
