Header and Footer Dialog
- 2 minutes to read
The Header/Footer dialog allows end-users to insert custom headers and footers at the top and bottom of a printed worksheet. End-users can invoke this dialog by clicking the Custom Header/Footer… button in the Page Setup Dialog.
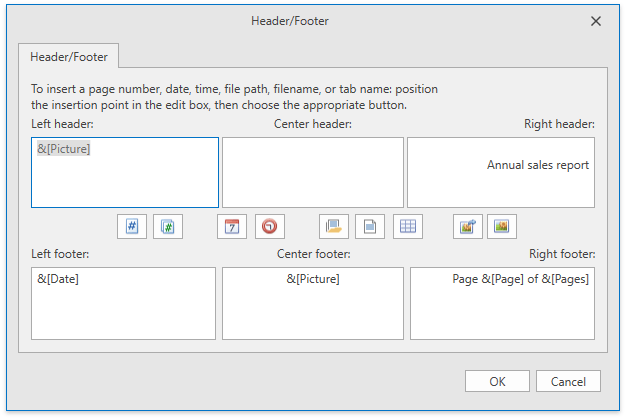
End-users can type text in the dialog’s Left, Center and Right header/footer edit boxes. Use the buttons between the header and footer sections or enter the corresponding code to add dynamic information (page number, total number of pages, current date and time, file name, file path or worksheet name) into a header or footer. The table below lists the supported header and footer codes.
| Code | Description |
|---|---|
| &P | Inserts the current page number. |
| &N | Inserts the total number of pages in a workbook. |
| &D | Inserts the current date. |
| &T | Inserts the current time. |
| &Z | Inserts the workbook’s file path. |
| &F | Inserts the name of a workbook file. |
| &A | Inserts a worksheet’s name. |
| && | Inserts the ampersand character. |
Clicking the Insert Picture button invokes the Open dialog, which allows end-users to insert a picture file in the header/footer. Click the Format Picture
 button to format this image.
Tip
Use the Worksheet.HeaderFooterOptions property to specify headers and footers in code. Refer to the How to: Add Headers and Footers to a Worksheet Printout topic for more details.