Use Project Templates to Create a RichEditControl
- 3 minutes to read
This tutorial uses the DevExpress Template Kit to create a WinForms application that mimics Microsoft Word for editing DOCX/RTF files. The application targets .NET 9 and integrates a Rich Text Editor and Ribbon UI.

Tip
Refer to the following help topic for information on how to download and install the DevExpress Template Kit: Install DevExpress Template Kit.
Note
Use the DevExpress Project Template Gallery to create applications based on templates that target the .NET Framework.
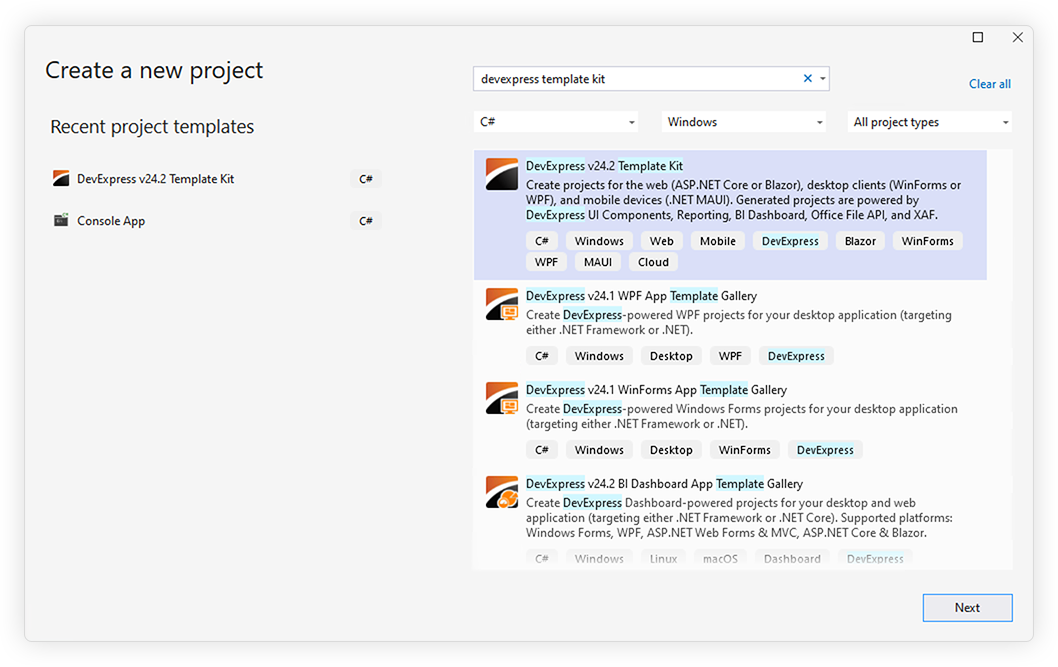
Create a Word Processing App
In Visual Studio, go to “File | New | Project” to create a new project. Select DevExpress v26.1 Template Kit and click Next:
- Specify project settings and click Create to run the DevExpress Project Wizard.
Select the WinForms platform. Scroll down to the Office-inspired Controls section and select Word Processing Application. Click Create Project.

Run the application to see the result.

Tip
Specify restriction settings to disable or hide specific Ribbon commands. Use RichEditControl.Options.Behavior and RichEditControl.Options.DocumentCapabilities properties.
Note
Ribbon UI commands can throw unhandled exceptions (for example, when a user saves the document to a locked or read-only file). To prevent application failure, handle the UnhandledException event and set the e.Handled event parameter to true.
Change the Application Skin
Open DevExpress Project Settings and select a skin based on your preferences:

The following code snippet applies the “Office2019Colorful” skin to the application:
using DevExpress.LookAndFeel;

internal static class Program {
    /// <summary>
    ///  The main entry point for the application.
    /// </summary>
    [STAThread]
    static void Main() {
        ApplicationConfiguration.Initialize();
        UserLookAndFeel.Default.SetSkinStyle(SkinStyle.Office2019Colorful);
        Application.Run(new Form1());
    }
}
Display SVG or PNG Icons
The newly created word processing application uses vector icons. This ensures that the application is rendered correctly on high-DPI devices.
Set the WindowsFormsSettings.AllowDefaultSvgImages property to DefaultBoolean.False at application startup to display PNG icons:
static void Main() {
    DevExpress.XtraEditors.WindowsFormsSettings.AllowDefaultSvgImages = DevExpress.Utils.DefaultBoolean.False;
    // ...
}
Enable DevExpress Open/Save File Dialogs
Enable the WindowsFormsSettings.UseDXDialogs setting at application startup to enable DevExpress dialogs in your application:
using DevExpress.LookAndFeel;
using DevExpress.Utils;
using DevExpress.XtraEditors;

internal static class Program {
    /// <summary>
    /// The main entry point for the application.
    /// </summary>
    [STAThread]
    static void Main() {
        ApplicationConfiguration.Initialize();
        UserLookAndFeel.Default.SetSkinStyle(SkinStyle.Office2019Colorful);
        WindowsFormsSettings.UseDXDialogs = DefaultBoolean.True;
        Application.Run(new Form1());
    }
}
