Pictures in Spreadsheet Documents
- 5 minutes to read
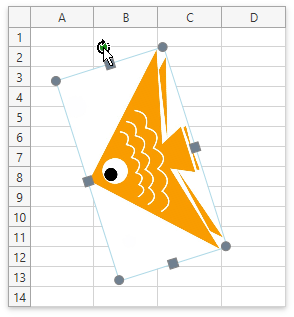
The WPF Spreadsheet allows you to insert pictures into a worksheet. A Picture interface represents an individual picture embedded in a worksheet. All images are stored in PictureCollection, accessible using the Worksheet.Pictures property. Use the PictureCollection.AddPicture method to insert a picture into a worksheet.
// Set the measurement unit in the workbook to Inch.
workbook.Unit = DevExpress.Office.DocumentUnit.Inch;

// Insert a picture at 0.67 inches from the left, 1.45 inches from the top,
// and resize it to 2 inches in width and 1.05 inches in height.
worksheet.Pictures.AddPicture("Picture1.png", 0.67f, 1.45f, 2f, 1.05f);

// Insert a picture to fit in the specified range.
worksheet.Pictures.AddPicture("Picture2.png", worksheet["B2:D6"]);
You can obtain a picture from the collection by its index or using the PictureCollection.GetPictureById or PictureCollection.GetPicturesByName method.
The Picture and base Shape and FloatingObject interfaces’ methods and properties allow you to manipulate pictures in a document.
| API | Description |
|---|---|
| Picture.Image | Returns the image that the current Picture object contains. |
| Picture.ImageFormat | Returns the format of the image residing in the Picture object. |
| Picture.OriginalHeight | Returns the height of the image residing in the Picture object. |
| Picture.OriginalWidth | Returns the width of the image residing in the Picture object. |
| Shape.Name | Specifies a picture’s name. |
| Shape.Id | Specifies a picture’s unique identifier. |
| ShapeFormatBase.Outline | Allows you to format a picture’s outline. |
| Shape.AlternativeText | Specifies the descriptive (alternative) text for a picture. |
| Shape.InsertHyperlink | Adds a hyperlink to a picture. |
| FloatingObject.Height | Specifies a picture’s height. |
| FloatingObject.Width | Specifies a picture’s width. |
| FloatingObject.LockAspectRatio | Specifies whether a picture should keep its original proportions after resizing. |
| FloatingObject.Placement | Specifies how a picture should behave when the underlying cells are resized or moved. |
| FloatingObject.Top | Defines the distance between a worksheet’s top edge and the top left corner of a picture. |
| FloatingObject.Left | Defines the distance between a worksheet’s left edge and the top left corner of a picture. |
| FloatingObject.TopLeftCell | Specifies a cell where a picture’s top left corner is located. |
| FloatingObject.BottomRightCell | Specifies a cell where a picture’s bottom right corner is located. |
| FloatingObject.Move | Moves a picture by the specified offset. |
| Picture.ChangeImage | Replaces an existing picture with another picture. |
| Shape.Delete | Allows you to remove a picture from the document. |
Refer to the following topics for more examples on how to add a picture to a worksheet, and adjust its size and location.
Supported Image Formats
The SpreadsheetControl supports the following types of images.
- Bitmap (*.bmp, *.dib)
- JPEG File Interchange Format (*.jpg, *.jpeg)
- Portable Network Graphics (*.png)
- Graphics Interchange Format (*.gif)
- Tagged Image File Format (*.tif, *.tiff)
- Microsoft Enhanced Metafile (*.emf)
- Windows Metafile (*.wmf)
- Scalable Vector Graphics (*.svg)
Note
SVG images are preserved as vector graphics when you export documents to Open XML formats (XLSX, XLSM, XLTX, and XLTM). When exporting to non-Open XML formats, SVG images are rasterized.
Working with Pictures in UI
End-users can insert pictures into a worksheet by clicking the Picture button on the Insert ribbon tab. Refer to the Create a Simple Spreadsheet Application topic for details on how to provide a ribbon UI for the SpreadsheetControl.

End-users can move, resize, rotate, copy and delete embedded pictures.

Keyboard Shortcuts
The SpreadsheetControl also supports the following shortcut keys and key combinations that enable end-users to quickly perform operations with pictures.
Shortcut | Description |
|---|---|
DELETE | Deletes the selected picture. |
BACKSPACE | Deletes the selected picture. |
ARROW KEYS | Move the selected picture in a worksheet. |
ALT+LEFT ARROW KEY | Rotates the selected picture counterclockwise by 15 degrees. |
CTRL+ALT+LEFT ARROW KEY | Rotates the selected picture counterclockwise by 1 degree. |
ALT+RIGHT ARROW KEY | Rotates the selected picture clockwise by 15 degrees. |
CTRL+ALT+RIGHT ARROW KEY | Rotates the selected picture clockwise by 1 degree. |
SHIFT+RIGHT ARROW KEY | Increases the width of the selected picture by 10%. If LockAspectRatio is true, the height is also increased to keep the picture’s proportions. |
SHIFT+UP ARROW KEY | Increases the height of the selected picture by 10%. If LockAspectRatio is true, the width is also increased to keep the picture’s proportions. |
CTRL+SHIFT+RIGHT ARROW KEY | Increases the width of the selected picture by 1%. If LockAspectRatio is true, the height is also increased to keep the picture’s proportions. |
CTRL+SHIFT+UP ARROW KEY | Increases the height of the selected picture by 1%. If LockAspectRatio is true, the width is also increased to keep the picture’s proportions. |
SHIFT+LEFT ARROW KEY | Decreases the width of the selected picture by 10%. If LockAspectRatio is true, the height is also decreased to keep the picture’s proportions. |
SHIFT+DOWN ARROW KEY | Decreases the height of the selected picture by 10%. If LockAspectRatio is true, the width is also decreased to keep the picture’s proportions. |
CTRL+SHIFT+LEFT ARROW KEY | Decreases the width of the selected picture by 1%. If LockAspectRatio is true, the height is also decreased to keep the picture’s proportions. |
CTRL+SHIFT+DOWN ARROW KEY | Decreases the height of the selected picture by 1%. If LockAspectRatio is true, the width is also decreased to keep the picture’s proportions. |
CTRL+A | Selects all pictures in a worksheet. |
TAB | Selects the next picture in a worksheet. |
TAB+SHIFT | Selects the previous picture in a worksheet. |