Create a Simple Scheduling Application
- 6 minutes to read
This tutorial describes how to create a simple scheduling application with the SchedulerControl.
Create a New Project
Create a new WPF Application project.
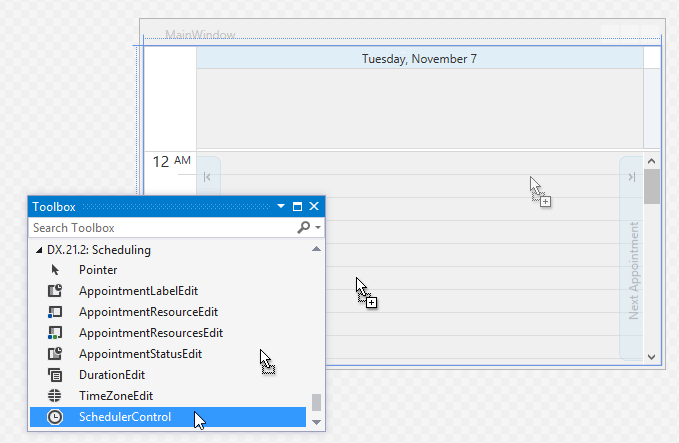
Open the MainWindow.xaml file in the Visual Studio Designer. Add the SchedulerControl object to your project. You can do this by dragging the SchedulerControl item from the DX.25.1: Scheduling Toolbox tab to the canvas.
Use a NuGet Feed
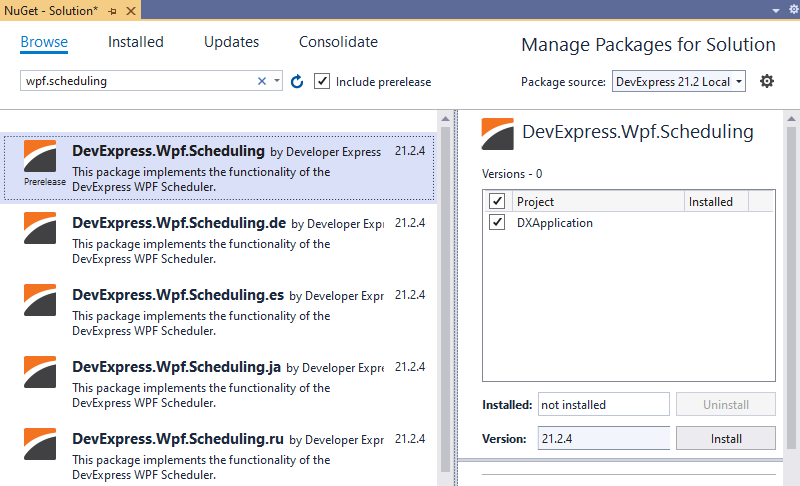
If you add the DevExpress products via a NuGet feed instead of the Unified Component Installer, the toolbox doesn’t contain DevExpress controls until you add the corresponding NuGet package.
Go to Tools | NuGet Package Manager | Manage NuGet Packages for Solution and add the DevExpress.Wpf.Scheduling NuGet package.
Create a Data Model
You can use DevExpress MVVM Framework to create a POCO ViewModel that provides data for an application.
The MedicalAppointment class instance is an Appointment:
using System;

namespace SimpleSchedulingExample
{
    public class MedicalAppointment
    {
        public static MedicalAppointment Create()
        {
            return new MedicalAppointment();
        }
        internal static MedicalAppointment Create(DateTime startTime, DateTime endTime,
            int doctorId, string notes, string location, int categoryId, string patientName,
            string insuranceNumber, bool firstVisit)
        {

            MedicalAppointment apt = MedicalAppointment.Create();
            apt.StartTime = startTime;
            apt.EndTime = endTime;
            apt.DoctorId = doctorId;
            apt.Notes = notes;
            apt.Location = location;
            apt.CategoryId = categoryId;
            apt.PatientName = patientName;
            apt.InsuranceNumber = insuranceNumber;
            apt.FirstVisit = firstVisit;
            return apt;
        }

        protected MedicalAppointment() { }

        public virtual int Id { get; set; }
        public virtual bool AllDay { get; set; }
        public virtual DateTime StartTime { get; set; }
        public virtual DateTime EndTime { get; set; }
        public virtual string PatientName { get; set; }
        public virtual string Notes { get; set; }
        public virtual string Subject { get; set; }
        public virtual int StatusId { get; set; }
        public virtual int CategoryId { get; set; }
        public virtual int Type { get; set; }
        public virtual string Location { get; set; }
        public virtual string RecurrenceInfo { get; set; }
        public virtual string ReminderInfo { get; set; }
        public virtual int? DoctorId { get; set; }
        public virtual string InsuranceNumber { get; set; }
        public virtual bool FirstVisit { get; set; }
    }
}
The Doctor class instance is a resource:
namespace SimpleSchedulingExample
{

    public class Doctor
    {
        public static Doctor Create()
        {
            return new Doctor();
        }
        public static Doctor Create(int Id, string Name)
        {
            Doctor doctor = Doctor.Create();
            doctor.Id = Id;
            doctor.Name = Name;
            return doctor;
        }

        protected Doctor() { }

        public virtual int Id { get; set; }
        public virtual string Name { get; set; }
    }
}
Create a View Model
Create a view model that exposes two ObservableCollection type collections.
using System;
using System.Collections.ObjectModel;

namespace SimpleSchedulingExample {
    public class MainViewModel {
        public virtual ObservableCollection<Doctor> Doctors { get; set; }
        public virtual ObservableCollection<MedicalAppointment> Appointments { get; set; }

        public MainViewModel() {
            CreateDoctors();
            CreateMedicalAppointments();
        }
        private void CreateDoctors() {
            Doctors = new ObservableCollection<Doctor>();
            Doctors.Add(Doctor.Create(Id: 1, Name: "Stomatologist"));
            Doctors.Add(Doctor.Create(Id: 2, Name: "Ophthalmologist"));
            Doctors.Add(Doctor.Create(Id: 3, Name: "Surgeon"));
        }
        private void CreateMedicalAppointments() {
            Appointments = new ObservableCollection<MedicalAppointment>();
            Appointments.Add(MedicalAppointment.Create(
                startTime: DateTime.Now.Date.AddHours(10), endTime: DateTime.Now.Date.AddHours(11),
                doctorId: 1, notes: "", location: "101", categoryId: 1, patientName: "Dave Muriel",
                insuranceNumber: "396-36-XXXX", firstVisit: true));
        }
    }
}
Set the DataContext to the MainViewModel instance:
xmlns:dxmvvm="http://schemas.devexpress.com/winfx/2008/xaml/mvvm"
DataContext="{dxmvvm:ViewModelSource local:MainViewModel}"
Create Ribbon
Select the SchedulerControl and invoke its Quick Actions.
Tip
You can use the Document Outline Window to select an element for which to invoke Quick Actions.
Click the Create Ribbon item to add ribbon UI to the Scheduler.

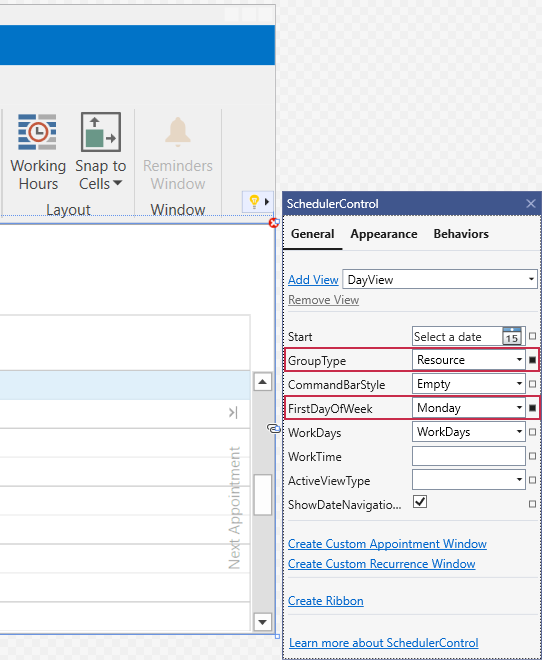
Specify the Scheduler Settings
Set the SchedulerControl.GroupType property to Resource to group the view by resources.
Set the SchedulerControl.FirstDayOfWeek property to Monday so that Monday starts the Week View and Work Week View displays.
<dxsch:SchedulerControl GroupType="Resource" FirstDayOfWeek="Monday" />
Tip
All view types with default settings are available “out-of-the-box”. However, you can create any number of views with different types and settings. See the Manage Views section for more information.
Bind to Data
Bind the DataContext collections to the DataSource.AppointmentsSource (for MedicalAppointment objects) and DataSource.ResourcesSource (for Doctor objects) properties. Appointment and resource properties should be mapped to the MedicalAppointment and Doctor class properties, respectively. Use the DataSource.AppointmentMappings and DataSource.ResourceMappings properties to specify mappings.
<dxsch:SchedulerControl.DataSource>
    <dxsch:DataSource ResourcesSource="{Binding Doctors}" AppointmentsSource="{Binding Appointments}">
        <dxsch:DataSource.ResourceMappings>
            <dxsch:ResourceMappings Caption="Name" Id="Id"/>
        </dxsch:DataSource.ResourceMappings>
        <dxsch:DataSource.AppointmentMappings>
            <dxsch:AppointmentMappings
                                        Type="Type"
                                        StatusId="StatusId"
                                        Start="StartTime"
                                        Subject="PatientName"
                                        ResourceId="DoctorId"
                                        RecurrenceInfo="RecurrenceInfo"
                                        Reminder="ReminderInfo"
                                        LabelId="CategoryId"
                                        Location="Location"
                                        Id="Id"
                                        End="EndTime"
                                        Description="Notes"
                                        AllDay="AllDay">
                <dxsch:CustomFieldMapping Mapping="InsuranceNumber" Name="InsuranceNumber"/>
                <dxsch:CustomFieldMapping Mapping="FirstVisit" Name="FirstVisit"/>
            </dxsch:AppointmentMappings>
        </dxsch:DataSource.AppointmentMappings>
    </dxsch:DataSource>
Run the Project
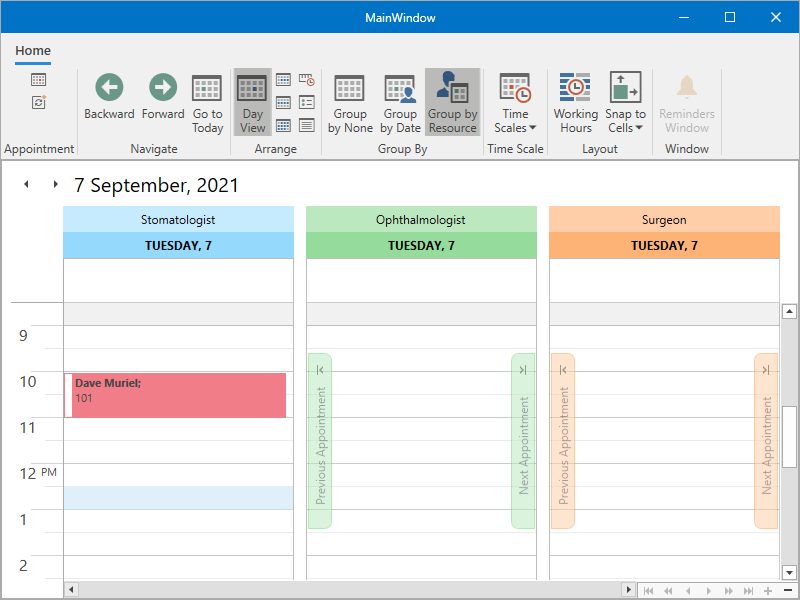
Double-click an appointment to edit it, right-click an appointment to change its label or status, or select a time cell and start typing to create a new appointment with the specified subject.
Next Steps
You can create and modify appointment, adjust the layout and switch views. However, appointments do not persist after closing the application because the Scheduler control operates in unbound mode. To save changes, bind the Scheduler to an external data source as illustrated in the How to: Bind Scheduler to Data using the Entity Framework Code First Approach example.
The Scheduler control has the necessary windows and dialogs available out-of-the-box. You can use the approach illustrated in the How to: Customize Editing and Recurrence Dialogs example to change them or modify the template as shown in the How to: Customize the In-Place Editor example.
Learn more at the Examples section.