Navigation
- 5 minutes to read
You can navigate through the SchedulerControl‘s dates, resources, and time cells. You can use commands and properties to perform these actions in code.
The topic consists of the following sections:
- Navigate Through Dates
- Navigate Through Resources
- Navigate Through Time Cells
- Navigate Through Appointments
Navigate Through Dates
You can set the SchedulerControl.Start property to specify the date on which the scheduler initially shows its data. The Start value is used to calculate the time interval displayed in the view. However, the start of the visible time interval may be different, because each view may have display restrictions.
Use the following commands to navigate through dates:
- SchedulerCommands.GoToDateCommand
- SchedulerCommands.GoToTodayCommand
- SchedulerCommands.NavigateViewBackwardCommand
- SchedulerCommands.NavigateViewForwardCommand
Use the API listed below to manually navigate through different views:
Note
The SchedulerControl does not currently support IResourceNavigationService and IDateTimeNavigationService.
Users can navigate through dates within a scheduler with the Navigation ribbon group items:

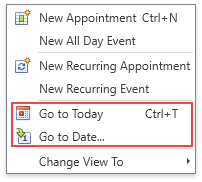
Users can right-click within the main scheduler area to invoke the context menu to navigate through dates:
- Go to Today moves focus to the current day preserving the existing view mode.
- Go to Date… invokes the Go to Date dialog to select a date and view type. The date can be selected using either the calendar control or by entering a string with the placeholders. Use the Show In drop-down list to select the desired view type.

Date Navigator
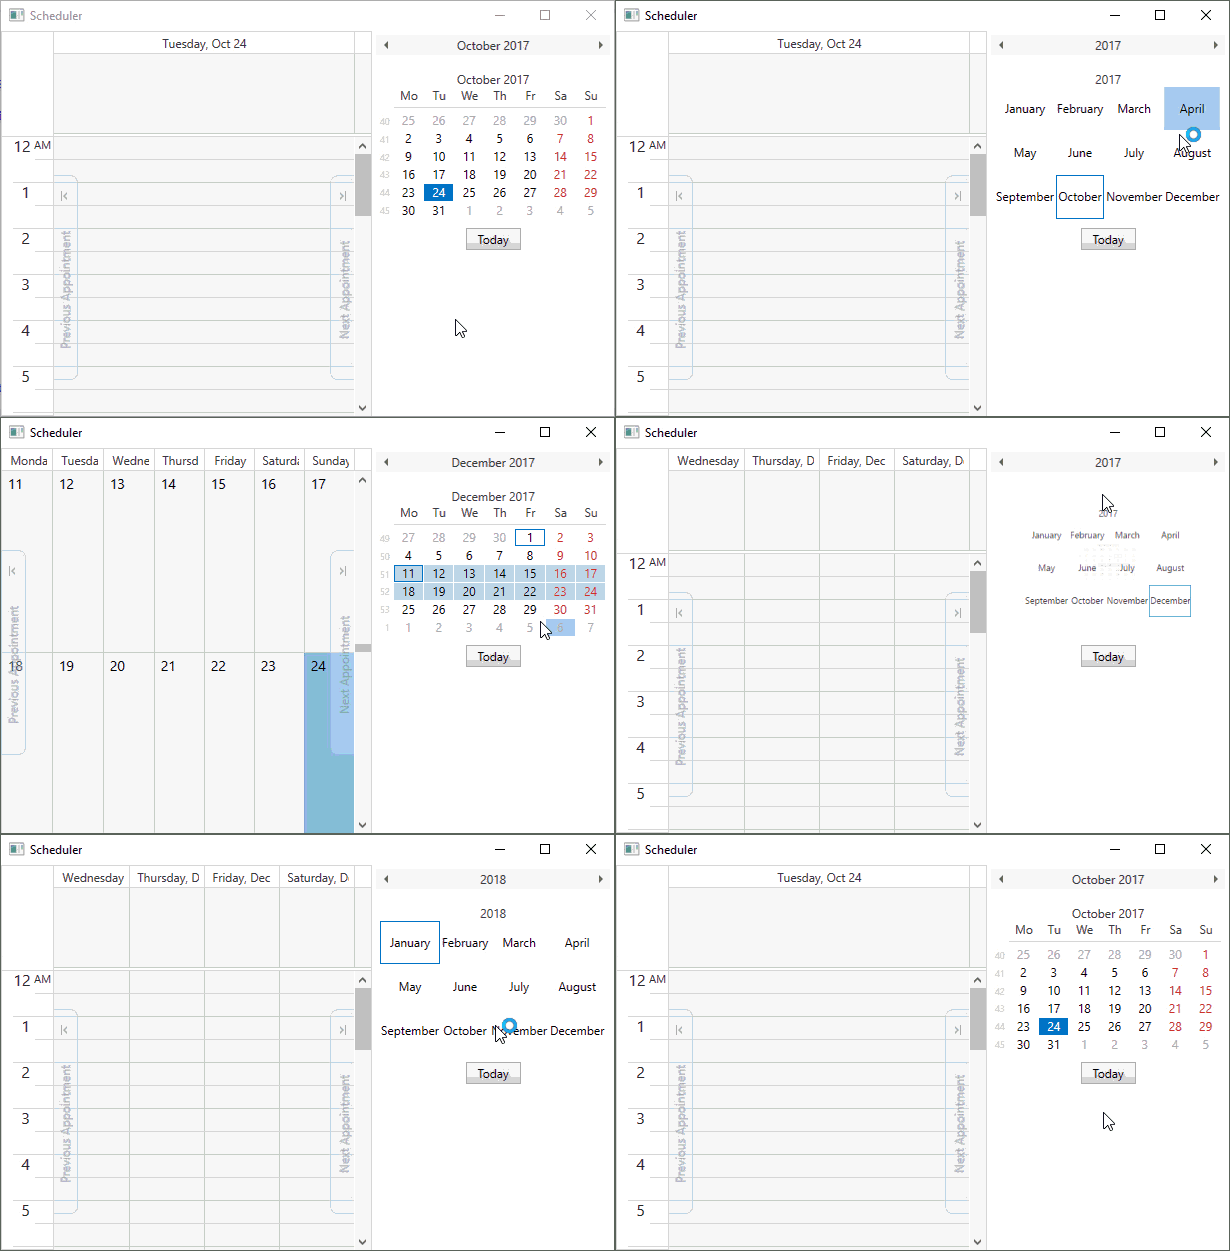
Users can navigate through dates using a DateNavigator control.
Users can click the corresponding arrows on the DateNavigator date header to navigate to the desired month and year.
Users can click the left and right scroll buttons to navigate back and forth by one step. The Today button navigates to the current date.

Refer to the How to: Create the Scheduler with the DateNavigator help topic for an example on how to add a DateNavigator to the scheduler.
Navigate Through Resources
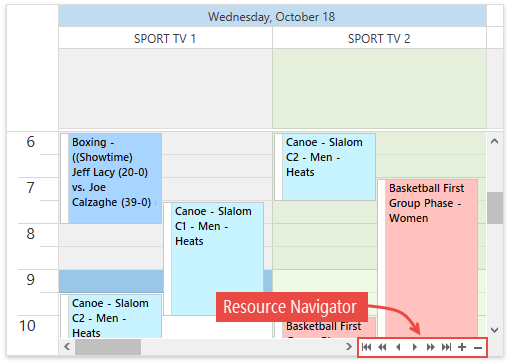
Users can navigate through resources and change the number of resources each page displays using the Resource Navigator.
Users can click buttons to navigate forward and backward through the resources list: one by one, or directly to the list’s last page. The scheduler tracks selections and displays the corresponding resource groups. The plus and minus buttons increase or decrease the number of resources displayed.

Users have two options to scroll through resources:
- Scrollbar
- Press Shift + scroll the mouse wheel (or tilt the mouse wheel left/right if the mouse supports it)
The resource navigator can only be displayed when there are visible resources. Set the SchedulerViewBase.ShowResourceNavigator property to true to enable the resource navigator.
The SchedulerViewBase.ResourcesPerPage property specifies the number of resources displayed simultaneously. Both properties are individually specified for each view.
Navigate through Time Cells
The following table contains the common navigation operations available to users:
Action | Effect |
|---|---|
Click a cell | Moves focus to the clicked cell. |
Press the Up or Down arrow key |
|
Press the LEFT or RIGHT arrow key |
|
Press the Page Down key | Moves the row focus one page down, preserving the column focus. |
Press the Page Up key | Moves the row focus one page up, preserving the column focus. |
Press the Home key |
|
Press the End key |
|
Press Ctrl + Home keys |
|
Press Ctrl + End keys |
|
Press the Tab key | Switches focus to the next time appointment within the time span shown. Pressing the key repeatedly iterates through the appointments with a specified duration, then through all-day appointments. |
Press Shift+Tab keys | Switches focus to the previous time appointment within the time span shown. Pressing the key repeatedly iterates through the appointments with a specified duration, then through all-day appointments. |
Press Alt key with Up or Down arrow key |
|
Note
When appointments are grouped, only arrow keys can move focus to another resource group.
Navigate Through Appointments
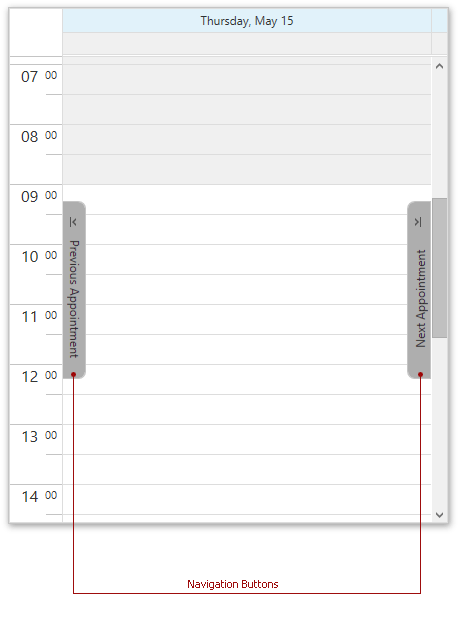
You can use navigation buttons to scroll to the previous or next appointment. Navigation buttons are helpful when there is a significant amount of time between scheduled appointments.

Use the NavigationButtonsVisibility property to display navigation buttons. If the NavigationButtonsVisibility property is set to Auto, navigation buttons are visible if some appointments are not displayed within the current view area.