Custom Editors
- 13 minutes to read
In this help topic you will learn how to create custom editors for standalone and in-place editing (e.g., in GridControl, TreeList, and BarManager).
General Information
Creating a custom editor involves three steps:
Create a custom editor class
If you need to implement completely new functionality for your editor, you can inherit from the BaseEdit class. The
BaseEditclass is the root ancestor for all data editors in the XtraEditors library. You can also inherit from the appropriate data editor (for example,DateEdit,ComboBoxEdit) if you want to extent their functionality.Create a custom repository item class to store editor-specific properties
Each data editor in the XtraEditors library has an associated repository item. Repository items store editor-specific settings and event handlers. For example, settings for a DateEdit control are encapsulated by the RepositoryItemDateEdit class, while settings for an ImageComboBoxEdit editor are encapsulated by the RepositoryItemImageComboBox class. Repository items derived from the base RepositoryItem class.
You must create a repository item class for your custom editor. The repository item class should override the
EditorTypeNameproperty and introduce new settings, events, or redefine the processing of default settings. If you derive your custom editor from the BaseEdit class, you should create a new repository item class. To do this, derive it from the RepositoryItem class. For example, if you create a DateEdit descendant, you should inherit the new repository item from the RepositoryItemDateEdit class.You should also shadow the custom editor’s
Propertiesproperty to return the corresponding repository item.Register the custom editor and custom repository item
Custom editors must be registered in an internal registration collection so that they can then be accessed using the PersistentRepository component or any container control (for example, GridControl, Bars, etc.). The registration code must be implemented as a static method of the repository item class.
You can create the custom editor and repository item manually, or generate them automatically using the Custom Data Editor template from the Template Gallery. To open the Custom Data Editor template, right-click your project in the Solution Explorer and select Add DevExpress Item -> New Item menu command:

In the project gallery, select the Custom Data Editor template. The template allows you to select the base editor and specify additional options:

Enable the following options to generate infrastructure classes for a custom editor:
Painter- implements API that paints the custom editor.ViewInfo- calculates and stores the custom editor’s visual information.PopupForm- allows you to display custom content within the custom editor’s dropdown window.
If you do not want to change the default UI rendering or behavior in your custom editor, uncheck the corresponding options.
Generally, you place the code that implements custom editors in a separate library. For instance, after compiling the library, it can be added to an application project by selecting PROJECT | Add Reference in the main menu of Visual Studio. From then on, the custom editor can be accessed by the PersistentRepository‘s Designer, or any container control’s Designer.
Note
The Designer searches for custom editors attached to the application only when the Designer is opened for the first time. If you open the Designer and add a reference to the editors library, the editor will not be displayed the next time the Designer is opened. Reload the project to see custom editors that have been added.
Custom Editor Class
- Each custom editor must override the
EditorTypeNameproperty and return a unique name that identifies the editor. The editor’sEditorTypeNameproperty and the repository item’sEditorTypeNameproperty should return the same value. This value should be used when registering the custom editor in the XtraEditors library (see below). - If a new repository item class is created for a custom editor, you should override the custom editor’s
Propertiesproperty. You should override thegetmethod to return thePropertiesobject type of the base class - cast to a corresponding repository item type. - A custom editor must also implement a static constructor that calls the registration code.
[ToolboxItem(true)]
public class CustomDateEdit : DateEdit
{
    static CustomDateEdit()
    {
        RepositoryItemCustomDateEdit.RegisterCustomDateEdit();
    }

    public CustomDateEdit()
    {
    }

    [DesignerSerializationVisibility(DesignerSerializationVisibility.Content)]
    public new RepositoryItemCustomDateEdit Properties => base.Properties as RepositoryItemCustomDateEdit;

    public override string EditorTypeName => RepositoryItemCustomDateEdit.CustomEditName;

    protected override PopupBaseForm CreatePopupForm()
    {
        return new CustomDateEditPopupForm(this);
    }
}
Tip
To display a custom editor in the Toolbox, apply the ToolboxItem(true) attribute to the custom editor class.
Custom Repository Item Class
- Override the
EditorTypeNameproperty to return a unique name that identifies the custom editor. The name must match the name returned by the custom editor’sEditorTypeNameproperty. - Implement a static constructor that calls the registration code. The registration code must be placed in a separate static method.
- If you add new properties or events to the custom repository item, override the
Assignmethod that copies settings from a repository item passed as the method’s parameter to the current repository item. - Add the
[UserRepositoryItem("RegisterCustomEdit")]attribute to the custom repository item class (where “RegisterCustomEdit” is the name of the static registration method).
[UserRepositoryItem("RegisterCustomDateEdit")]
public class RepositoryItemCustomDateEdit : RepositoryItemDateEdit
{
    static RepositoryItemCustomDateEdit()
    {
        RegisterCustomDateEdit();
    }

    public const string CustomEditName = "CustomDateEdit";

    public RepositoryItemCustomDateEdit()
    {
    }

    public override string EditorTypeName => CustomEditName;

    public static void RegisterCustomDateEdit()
    {
        Image img = null;
        EditorRegistrationInfo.Default.Editors.Add(new EditorClassInfo(CustomEditName, typeof(CustomDateEdit), typeof(RepositoryItemCustomDateEdit), typeof(CustomDateEditViewInfo), new CustomDateEditPainter(), true, img));
    }

    public override void Assign(RepositoryItem item)
    {
        BeginUpdate();
        try
        {
            base.Assign(item);
            RepositoryItemCustomDateEdit source = item as RepositoryItemCustomDateEdit;
            if (source == null) return;
            //
        }
        finally
        {
            EndUpdate();
        }
    }
}
Register a Custom Editor
- Place the code that registers a custom editor in a separate static method of the repository item class. The registration code links the custom editor with the corresponding repository item, view info, and painter objects. This information is used when creating both standalone and in-place editors.
- Add the
[UserRepositoryItem("RegisterCustomEdit")]attribute to the custom repository item class (where “RegisterCustomEdit” is the name of the static registration method).
To provide registration information on the custom editor, create the DevExpress.XtraEditors.Registrator.EditorClassInfo object. Use the following overload of the view info class’s constructor to supply registration information:
public EditorClassInfo(
    string name,            // Specifies the editor's name.
    Type editorType,        // Specifies the type of the editor class.
    Type repositoryType,    // Specifies the type of the custom repository item class.
    Type viewInfoType,      // Specifies the type of the editor's ViewInfo class.
    BaseEditPainter painter,// An instance of the editor's Painter class.
    bool designTimeVisible, // Specifies whether or not the custom editor
                            // will be visible at design time within container controls
                            // (for instance, when creating an in-place editor
                            // within Grid Control or XtraBars).
    Image image,            // Specifies the image that will be displayed along
                            // with the editor's name within container controls.
    Type accessibleType     // Specifies the type of the object
                            // that provides accessibility information.
);
Generally, viewInfoType and accessibleType parameters should to be set to ViewInfo and AccessibilityInformation types that correspond to the custom editor’s ancestor. For the painter parameter, you should to specify an instance of a corresponding Painter class.
After the EditorClassInfo has been created, it must be added to the static DevExpress.XtraEditors.Registrator.EditorRegistrationInfo.Default.Editors collection:
public class RepositoryItemCustomDateEdit : RepositoryItemDateEdit
{
    // ...
    public static void RegisterCustomDateEdit()
    {
        Image img = null;
        EditorRegistrationInfo.Default.Editors.Add(new EditorClassInfo(CustomEditName, typeof(CustomDateEdit), typeof(RepositoryItemCustomDateEdit), typeof(CustomDateEditViewInfo), new CustomDateEditPainter(), true, img));
    }
}
Note
The RichTextEdit is a simplified version of the RichEditControl. The RichTextEdit control is hidden from the Toolbox, and is not intended to be used as a standalone control. The RepositoryItemRichTextEdit object is public. You can use it to display RTF data in container controls such as GridControl and TreeList.
To display and edit RTF data in a standalone control, use RichEditControl.
Custom Dropdown Editors with Popup Forms
Dropdown editors support popup forms that allow users to select values or edit data. When defining a custom dropdown editor, you can override the PopupBaseEdit.CreatePopupForm method to supply a custom popup form. The following table lists popup form types used by DevExpress dropdown editors. You can derive your popup form from one of these classes:
| Dropdown Editor | Popup Form Type (a PopupBaseForm descendant) |
|---|---|
| CalcEdit | PopupCalcEditForm |
| CheckedComboBoxEdit | CheckedPopupContainerForm |
| ColorEdit | PopupColorEditForm |
| ComboBoxEdit | PopupListBoxForm |
| DateEdit | PopupDateEditForm or VistaPopupDateEditForm |
| ImageComboboxEdit | PopupImageComboBoxEditListBoxForm |
| ImageEdit | ImagePopupForm |
| LookUpEdit | PopupLookUpEditForm |
| MemoExEdit | MemoExPopupForm |
| MRUEdit | PopupMRUForm |
| PopupContainerEdit | PopupContainerForm |
| TokenEdit | TokenEditPopupForm |
| BreadCrumbEdit | BreadCrumbPopupForm |
Examples
Custom TextEdit Descendant
This example creates a custom text editor (CustomEdit) that inherits the base functionality from the TextEdit. The RepositoryItemCustomEdit class implements a new UseDefaultMode property (for demo purposes).
using System.Drawing;
using System.Reflection;
using System.ComponentModel;
using System.Windows.Forms;
using System.Reflection;
using DevExpress.XtraEditors;
using DevExpress.XtraEditors.Repository;
using DevExpress.XtraEditors.Registrator;
using DevExpress.XtraEditors.Drawing;
using DevExpress.XtraEditors.ViewInfo;
using DevExpress.Accessibility;

namespace DevExpress.CustomEditors {

    //The attribute that points to the registration method
    [UserRepositoryItem("RegisterCustomEdit")]
    public class RepositoryItemCustomEdit : RepositoryItemTextEdit {

        //The static constructor that calls the registration method
        static RepositoryItemCustomEdit() { RegisterCustomEdit(); }

        //Initialize new properties
        public RepositoryItemCustomEdit() {
            useDefaultMode = true;
        }

        //The unique name for the custom editor
        public const string CustomEditName = "CustomEdit";

        //Return the unique name
        public override string EditorTypeName { get { return CustomEditName; } }

        //Register the editor
        public static void RegisterCustomEdit() {
            //Icon representing the editor within a container editor's Designer
            Image img = null;
            try {
                img = (Bitmap)Bitmap.FromStream(Assembly.GetExecutingAssembly().
                  GetManifestResourceStream("DevExpress.CustomEditors.CustomEdit.bmp"));
            }
            catch {
            }
            EditorRegistrationInfo.Default.Editors.Add(new EditorClassInfo(CustomEditName,
              typeof(CustomEdit), typeof(RepositoryItemCustomEdit),
              typeof(TextEditViewInfo), new TextEditPainter(), true, img, typeof(TextEditAccessible)));
        }

        //A custom property
        private bool useDefaultMode;

        public bool UseDefaultMode {
            get { return useDefaultMode; }
            set {
                if(useDefaultMode != value) {
                    useDefaultMode = value;
                    OnPropertiesChanged();
                }
            }
        }

        //Override the Assign method
        public override void Assign(RepositoryItem item) {
            BeginUpdate();
            try {
                base.Assign(item);
                RepositoryItemCustomEdit source = item as RepositoryItemCustomEdit;
                if(source == null) return;
                useDefaultMode = source.UseDefaultMode;
            }
            finally {
                EndUpdate();
            }
        }
    }

    [ToolboxItem(true)]
    public class CustomEdit : TextEdit {

        //The static constructor that calls the registration method
        static CustomEdit() { RepositoryItemCustomEdit.RegisterCustomEdit(); }

        //Initialize the new instance
        public CustomEdit() {
            //...
        }

        //Return the unique name
        public override string EditorTypeName { get { return
            RepositoryItemCustomEdit.CustomEditName; } }

        //Override the Properties property
        //Simply type-cast the object to the custom repository item type
        [DesignerSerializationVisibility(DesignerSerializationVisibility.Content)]
        public new RepositoryItemCustomEdit Properties {
            get { return base.Properties as RepositoryItemCustomEdit; }
        }

    }
}
The above registration method associates an icon with the custom editor (the icon was added as a resource to the project). The icon will be displayed at design time in the PersistentRepository‘s Designer and the container editor’s Designer.
To add an icon as a resource to the project, do the following:
- Right-click the project in the Solution Explorer and select Add | Existing Item…. Load the custom image that will be associated with the editor.
- Select the image added in the Solution Explorer. Its name must match the name of the editor. If not, rename the image (for example, by pressing the F2 key).
- Right-click the image in the Solution Explorer and select Properties. In the Properties window, set the Build Action item to Embedded Resource.
The full name used to refer to the icon is the value of the Default Namespace setting plus the name of the image. The Default Namespace must be set to the name of the namespace where the custom editor is declared. To change the Default Namespace setting, right click the project in the Solution Explorer and select Properties. In the invoked dialog, modify the Default Namespace setting (Root Namespace in the VB IDE). In the above example, it must be set to “DevExpress.CustomEditors”.
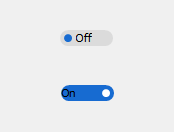
Custom ToggleSwitch - Display Text in the Editor
This example creates a custom toggle switch control that displays text within its content.
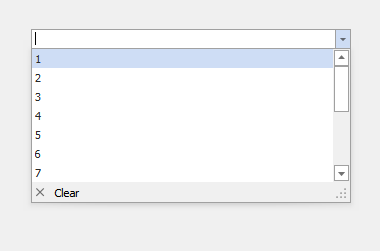
Display Close and Clear Buttons in the ComboBoxEdit Dropdown
This example creates a custom combobox editor that displays Close and Clear buttons in the dropdown.
Custom Button Editor that Displays its EditValue on the Button
This example creates a custom editor (a ButtonEdit descendant) that displays two buttons. The second button displays the EditValue. When the user enters text into the edit box, the text appears on the second button.
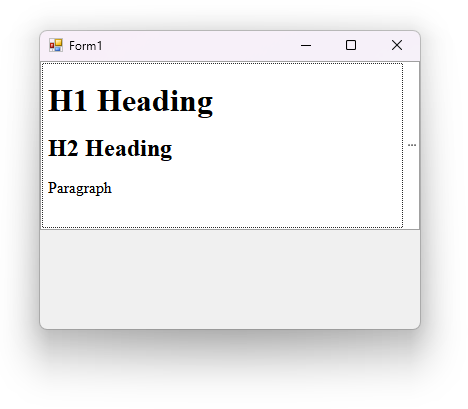
Custom Button Editor that Displays Read-only RTF/HTML Content
This example creates a custom button editor that can display rich content. The custom editor supports auto-height and can be used as a cell editor in container controls such as Data Grid and TreeList.
Custom ImageEdit - Preview a Drop-down Image in the Edit Box
This example creates a custom image editor that previews a drop-down image in the edit box.

Custom ButtonEdit with Customizable Paddings
This example creates and registers a custom button editor with customizable button paddings (the Padding property).
Custom Lookup - Hide the Close Button from the Dropdown
This example creates a custom lookup control that does not display the Close button in the dropdown (the fCloseButtonStyle field is set to BlobCloseButtonStyle.None). The example overrides the LookUpEdit.CreatePopupForm method to return a custom edit form.
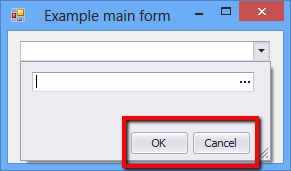
Custom Popup Container Editor - Display the Default OK Button in the Dropdown
This example creates a custom popup container editor that displays the default OK button in the popup window.
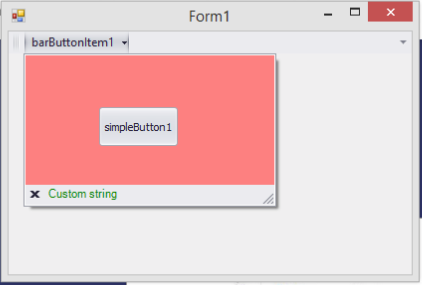
Custom PopupControlContainer - Draw a String within the Footer
This example creates a custom PopupControlContainer control and draws a string within its footer.
Radio Group - Custom Draw Radio Items
This example creates a custom radio group control that allows you to manually paint radio items.

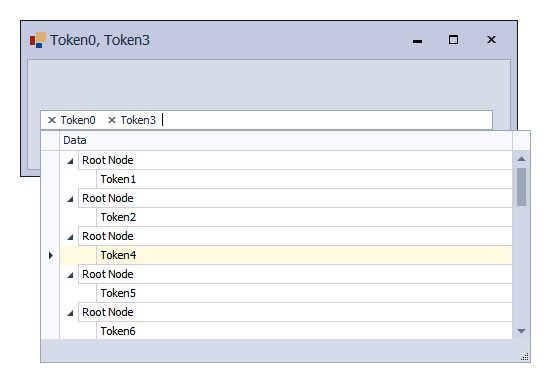
Custom Token Editor - Create a Dropdown with the TreeList control
This example creates a custom dropdown menu with the integrated TreeList control.
Custom Token Editor - Create Checked Tokens
This example creates a custom token editor (CustomTokenEdit) that displays a checkbox in tokens.
