Step 3 – Adjust the Control
- 2 minutes to read
The Gantt control can display the following Views:
Chart
Resource Sheet
Timeline
It can display only one view at a time, but you can switch between them. To do this, set the View’s Active property value to True.
Chart View
The control initially displays the Chart View. This View consists of the task sheet and the chart.

Use the control’s ViewChart property to access the View’s settings.
Drag the sheet’s right border or set the View’s OptionsSheet.Width property value to 520 to modify the sheet’s width and display the remaining sheet columns.

Set the OptionsSheet.ColumnQuickCustomization property value to True to display the “Quick Column Customization” button at the sheet’s top-left edge.

This button invokes the drop-down list that displays all columns and allows users to display, hide, and reorder them at runtime.
Click the OptionsSheet.Columns property’s ellipsis button to access the column collection and adjust a particular column’s settings (visibility, caption, width, etc.).
You can hide the sheet and allow the chart to fill the entire area of the control. To do this, set the OptionsSheet.Visible property value to False.
The chart displays vertical lines that denote a project’s start/finish and the current date (see the image below).
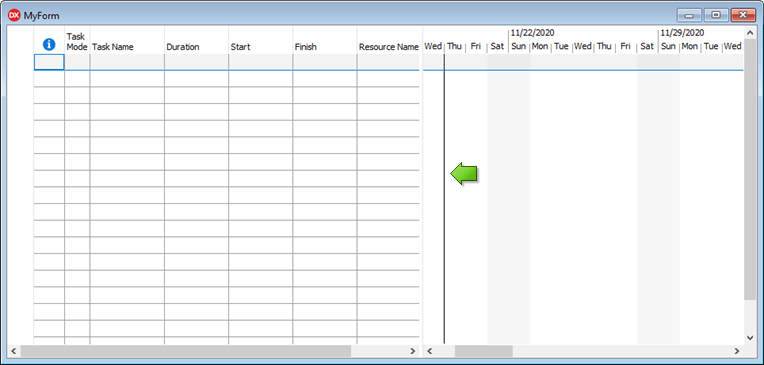
Use the Vew’s OptionsGridline property to customize gridline settings such as color and line style.
Resource Sheet View
The Resource sheet allows you to specify resources required for a task (people, materials, or costs).

This view has the same options as the task sheet in the Chart View so you can customize it in the same manner.
Timeline View
Use the control’s ViewTimeline property to access timeline settings. This view is empty at design-time, but when you populate the control with tasks, they appear in the timeline.
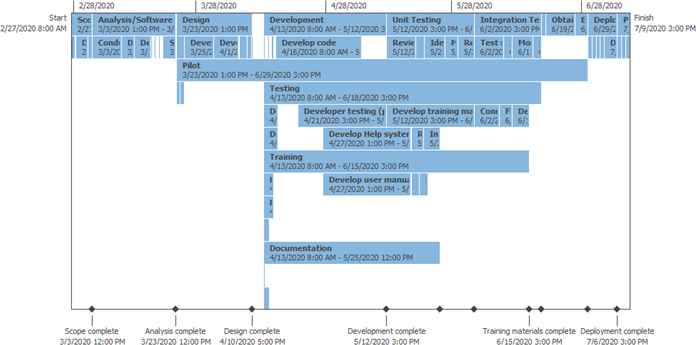
Set the View’s TimescaleUnitMinWidth property value to 100 to change the distance between timescale units that you can modify via the TimescaleUnit property.
Launch the application to see the customized control.