How To: Create a Message Box Flyout With User Control
- 4 minutes to read
This example creates a Flyout that contains a Document and an Action.
- Create a new WindowsUI View application or open an existing one.
Open the DocumentManager’s context menu and run the Designer.

Switch to the ‘Elements’ section and select ‘Content Containers’. Click the ‘Add New Container’ button and choose ‘Flyout’ from the drop-down list.

- Select the newly created Flyout and change its name to userConrolFlyout via the property grid.
In the Visual Studio Solution Explorer window, right click your project and select ‘Add’, then ‘Add New Item’ and choose a User Control. Change its name to ucAddCustomer and click ‘OK’. Add four text boxes and labels onto your user control as shown below:

- Switch back to the Document Manager Designer. Open the ‘Elements’ section, choose ‘Documents’ and click the ‘Populate’ button. A document for your user control will be created automatically. Change its name to addCustomerDocument. Note that a corresponding Tile appears as well. You can remove it in the ‘Elements’ - ‘Tiles’ section.
Call the BaseView.AddDocument method and pass a new ucAddCustomer class instance to this method as a parameter. See the Documents topic for more info.
Now pass the created user control to the Flyout. To do so, assign the addCustomerDocument object to the Flyout.Document property.

Tip
Use the Document.Control property to get the UI control displayed in the document.
Add a WindowsUI button to your start-up Content Container. See the WindowsUI Buttons topic for more info.

Next, handle the Content Container’s BaseContentContainer.ButtonClick event. Use the WindowsUIView.ActivateContainer method to display the Flyout.
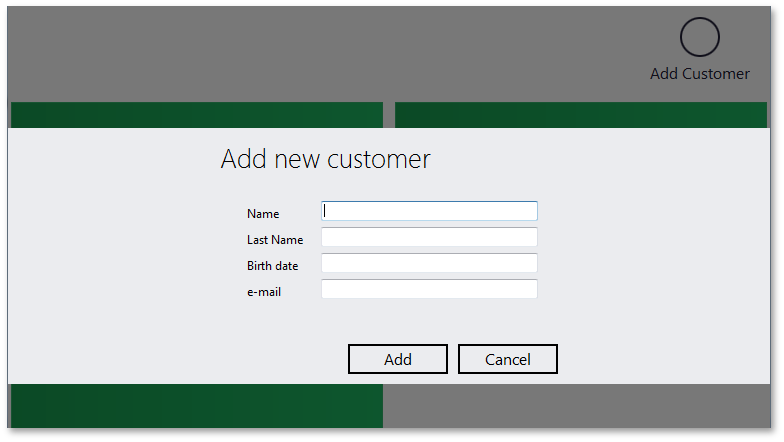
Launch your application and click the WindowsUI Button. The result should be similar to the following:

As you can see, even if the IFlyoutDefaultProperties.Style property value equals FlyoutStyle.MessageBox, the Flyout is displayed as a pop-up. This occurs because no message box buttons were specified. The easiest way to add message box buttons is to use standard button sets via the Flyout.FlyoutButtons property. Set this property to YesNo and see the result.

Note that you may want something more flexible than standard button sets. In this example, ‘Yes’ and ‘No’ buttons do not perfectly fit the displayed content. In this case, use FlyoutActions.
Create a FlyoutAction and specify its UIActionPropertiesCore.Caption. Add a standard ‘Cancel’ button to its FlyoutAction.Commands collection.
Add your own custom button by creating a FlyoutCommand class descendant, and overriding the required properties.
Now you can add your custom button to the FlyoutAction.
The last step is to assign your action to the Flyout via the Flyout.Action property.
Launch your application to view the results:

To get which Flyout Button an end-user has clicked, handle the WindowsUIView.FlyoutHidden event.