Filtering
- 2 minutes to read
End users can use a field’s filter popup to apply a filter criteria to a field and a filter editor to apply it to the entire control.
Filter Popup
The filter popup allows end users to filter certain filter, column or row fields. To apply filtering to a field, click the filter button in the field header and select field values that should be displayed in the pivot grid:
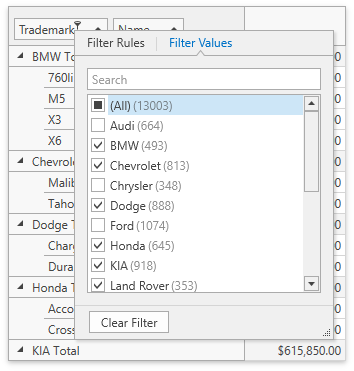
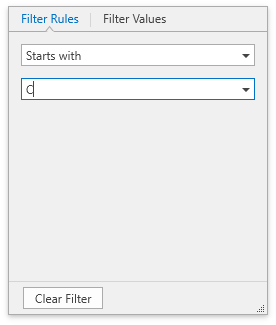
The Excel-style filter popup’s content depends on the type of data the related field displays. In the “Values” tab, end users can select specific field values from the Pivot Grid. The “Filters” tab supplies users with additional options related to the field type. For example, when filtering a string field, you can show only those records that begin with ‘C’:
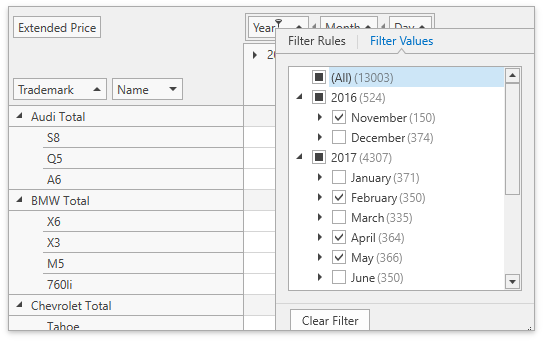
The filter drop-down, invoked for fields arranged into a group, has a tree-like interface and allows you to manipulate the values of all fields in the group.
Filter Editor
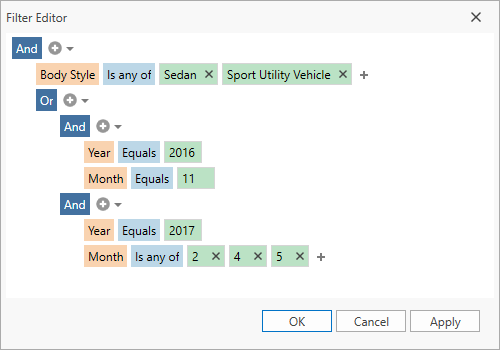
The Filter Editor allows you to build complex filter criteria with an unlimited number of filter conditions, combined by logical operators. To invoke the Filter Editor at runtime, right-click a field header area or a field header, and choose Show Filter Editor from the context menu:
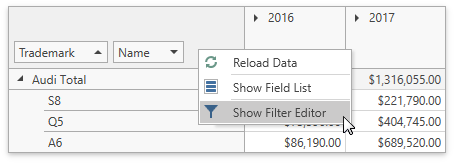
The “Show Filter Editor” option invokes the Filter Editor. See Filter Editor for more information.
Filter Panel
When the Filter is applied, the PivotGridControl shows the Filter Panel at the bottom. The Filter Panel displays the filter expression. This panel also contains buttons used to disable/enable and clear the filter.
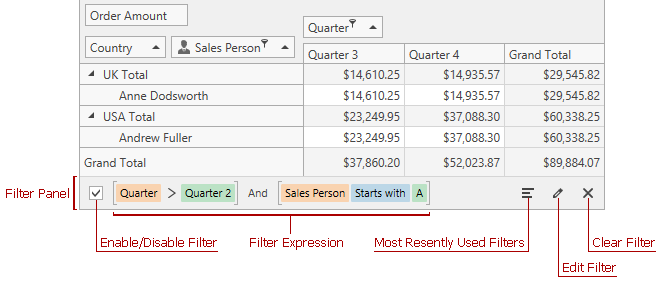
The Filter Panel contains the following elements:
Enable/Disable Filter check box
End users can click this check box to enable/disable the current filter.
Filter Expression text
Shows applied filter expressions.
The MRU filter button
Displays the most recently used filter criteria.
Edit Filter button
Invokes the Filter Editor.
Clear Filter button
Clears the current filter.