Banded Table View Tutorial. Step 3: Adjust Bands
- 4 minutes to read
In the previous steps, you added the grid control to a form, bound its View to data, and configured a user-friendly display and layout. This section describes how to use bands to arrange columns into groups.
Create Bands
The View cannot display columns if they are not linked to bands. The View initially has a band with an empty caption and a zero index, and all newly created or loaded columns are linked to this band.

Create three more bands in any of the following ways:
- Context Menu
Right-click a column and select “Create Parent Band” in the context menu.

- Editing Dialog
Click the View’s Bands property’s ellipsis button to open the dialog that corresponds to the band collection. Click the
Add Newbutton.
You can click the corresponding buttons to delete or rearrange a band.
- Component Editor
Click the View’s
Customize...button to open the dialog. Switch to theBandstab, and click Add.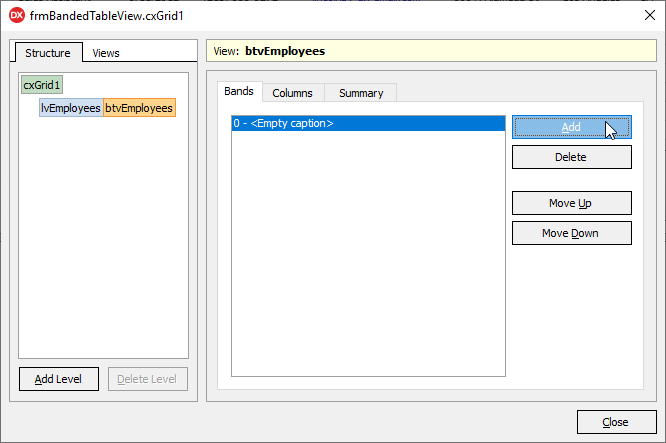
The Component Editor allows you to configure the control’s structure in addition to band management options.
The View now has four bands without a caption.
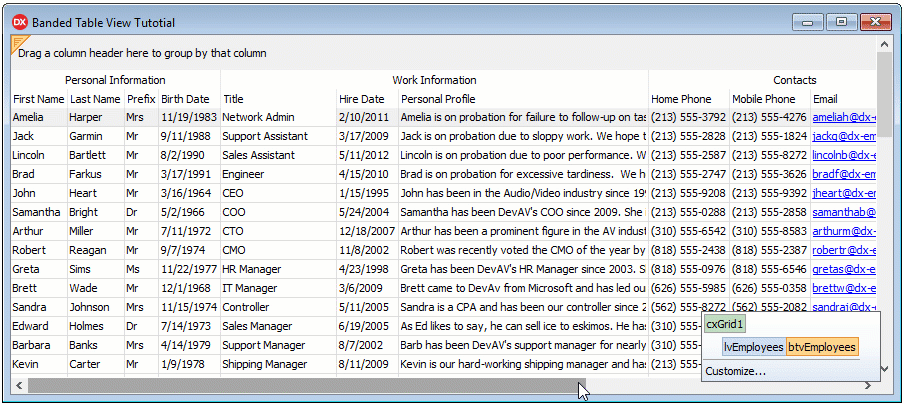
Assign the Personal Information, Work Information, Contacts, and Full Address captions to the Caption property of each band (in band index ascending order).
Assign a Band to a Column
Now you can categorize columns with bands. The table below displays all bands and the corresponding columns you should link to them.
Personal Information | Work Information | Contacts | Full Address |
|---|---|---|---|
|
|
|
|
Hold Ctrl to select multiple columns. Locate their Position.BandIndex property and choose a band from the drop-down list.
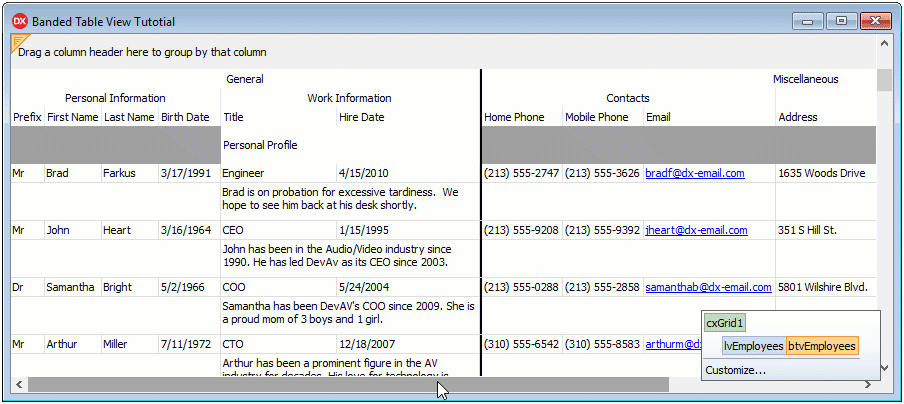
The image below shows banded columns:
Configure Banded Columns
Layout
You can arrange column content in a separate row within a band to display data in a more compact format.
Select the Personal Profile column and use any of the following ways to change its position:
- Drag and Drop
Drag the column header and drop it at the line that splits column headers from data cells.
- Object Inspector
- Set the Position.RowIndex property to 1. This operation moves the column’s content to a separate row.
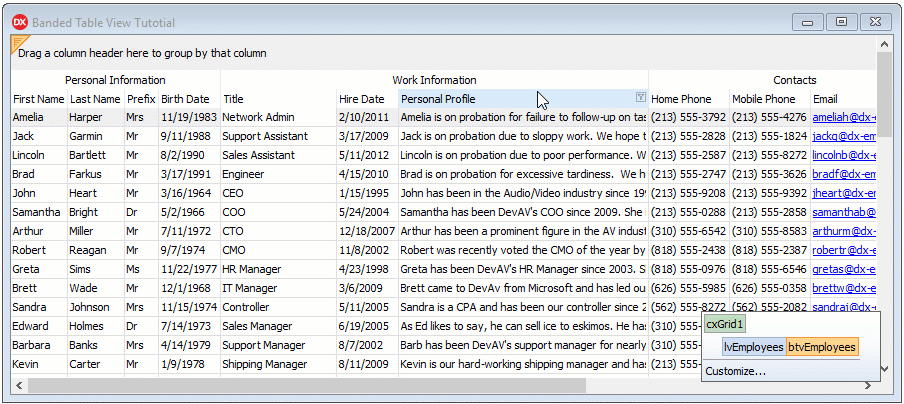
The column displays content partially. You can arrange content in multiple rows to fit it to the column’s width.
Assign 2 to the column’s Position.LineCount to arrange the column content in two rows instead of one.
The image below shows the result:

Order
You can rearrange columns within bands. Select the Prefix column and use any of the following ways to move it:
Drag and drop the column. The column should precede the
First Namecolumn.Assign 0 to the column’s Position.ColIndex property.
The Prefix column is now at the first position in the Personal Information band.

Nested Bands
The View allows you to create parent bands and arrange child bands under these bands.
Create the General and Miscellaneous parent bands and arrange child bands within them as follows:
- General:
Personal InformationandWork Information - Miscellaneous:
ContactsandFull Address
Select the Personal Information and Work Information bands, right-click any of these bands, and select “Create Parent Band” in the context menu.

This action adds a top-level band and associates the selected bands with it.
Assign the General caption to the band’s Caption property.
Create the Miscellaneous band in the same manner.
The image shows General and Miscellaneous parent bands.

Fixed Bands
You can pin bands to the View’s left or right edge. This feature allows you to keep a band’s content anchored to the View’s edges when a user scrolls the View horizontally.
Select the General band and assign fkLeft to its FixedKind property.
The image shows the result:
The View now displays configured banded columns. The next step explains how to customize the View’s appearance.