Use DevExpress Templates to Create an ASP.NET Core App with a Report Designer
- 5 minutes to read
You can use DevExpress templates to create an ASP.NET Core application with a Web Document Viewer and/or Web Report Designer.
Project Template Kit (Visual Studio, Visual Studio Code, JetBrains Rider)
The DevExpress Template Kit offers a unified project creation experience for Microsoft Visual Studio, Visual Studio Code, and JetBrains Rider.
To create an ASP.NET Core application with a Web Document Viewer, follow the steps below:
Install the DevExpress Project Template Kit extension. Refer to the following sections in the Project Template Kit help topic for instructions based on your IDE:
Select ASP.NET Core or Reporting in the Platforms list. Select the ASP.NET Core Reporting Application template:
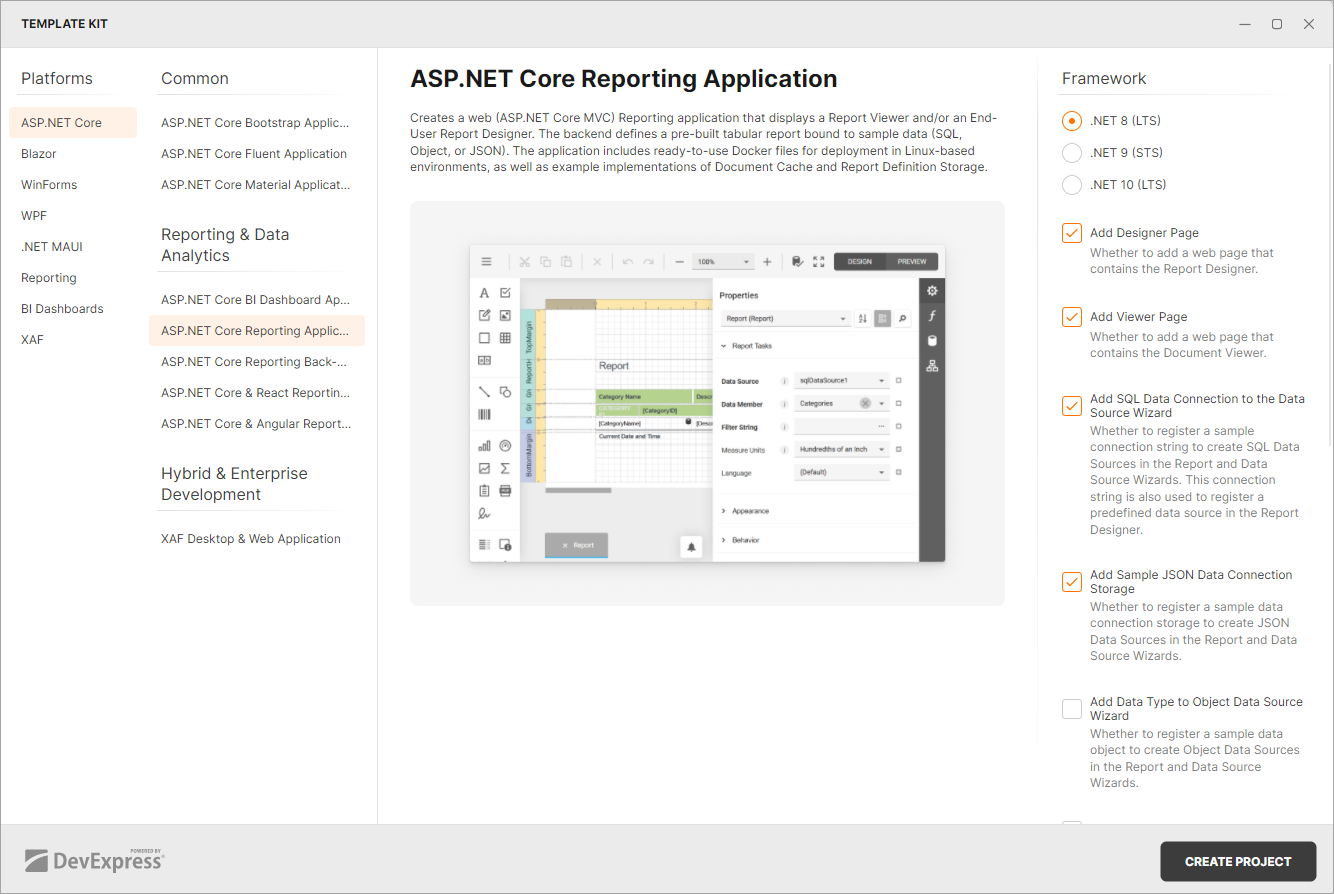
Enable the Add Designer Page checkbox to create an application with the Report Designer.
Specify additional options.
CLI Templates
Install Templates
DevExpress ASP.NET Core project templates are included in our Unified Component Installer.
You can also install the templates from nuget.org or the DevExpress NuGet Gallery (nuget.devexpress.com). Execute the following command to install DevExpress ASP.NET Core project templates from nuget.org:
dotnet new install DevExpress.AspNetCore.ProjectTemplates
Ensure that the nuget.org source is enabled. If it is disabled, you may encounter error NU1101: Unable to find package DevExpress.AspNetCore.ProjectTemplates. To list sources with their status, run dotnet nuget list source. To enable a source, run dotnet nuget enable source <source name>.
If you are new to NuGet, visit the following page for more information about package management prerequisites: An Introduction to NuGet.
Create a Project
To create an ASP.NET Core application with the Web Document Viewer, execute the following command:
dotnet new dx.aspnetcore.reporting -n DxReportingApp --add-viewer false
The command creates an ASP.NET Core application called DxReportingApp in the current directory.
You can use the following parameters to see available command options: -? | -h | --help. For example, execute the following command:
dotnet new dx.aspnetcore.reporting --help
Refer to the following documents for information on template options:
- dotnet new command - Options
- Standard options for .NET CLI templates.
- Template Options
- Options specific to the DevExpress ASP.NET Core Reporting template.
Run the Project
Navigate to the newly created application folder and use the following command to restore dependencies, run the application, and display the application’s URL:
cd DxReportingApp
dotnet run
The command output contains the application URL, which can be different on different hosts:
Now listening on: http://localhost:2009
Open your browser and navigate to the URL specified in the command output to see the result.
Template Options
The following table lists options you can specify when creating DevExpress ASP.NET Core Reporting project templates:
| CLI Option | Template Kit Option | Description |
|---|---|---|
--framework <TFM> |
Target Framework | Specifies the target framework. It expects a target framework moniker (TFM). Example: net8.0. |
-ad, --add-designer |
Add Designer Page | Specifies whether to create a web page with the Report Designer. The default value is true. |
-av, --add-viewer |
Add Viewer Page | Specifies whether to create a web page with the Document Viewer. The default value is true. |
-ads, --add-data-source |
Add SQL Data Connection to the Data Source Wizard | Specifies whether to create a sample connection string and register it in the Report Designer to create SQL Data Sources in the Report Wizard and Data Source Wizard. The connection string is also used to register a predefined data source. The default value is true. |
-ajs, --add-json-data-connection-storage |
Add Sample JSON Data Connection Storage | Specifies whether to create a storage and register it to create JSON Data Sources in the Report Wizard and Data Source Wizard. The default value is true. |
-ao, --add-data-object |
Add Data Type to Object Data Source Wizard | Specifies whether to add a sample data object to an application and register this data object to create Object Data Sources in the Report Wizard and Data Source Wizard. The default value is false. |
-rte, --enable-rich-text-editor |
Enable Rich Text Editor | Specifies whether to add an in-line Rich Text Editor for the RichText control. The default value is false. |
-dfb, --Dockerfile <None\|Debian\|...> |
Enable Docker Support for Selected OS | Creates a Dockerfile based on the selected OS. Review the following online example for additional information: How to Use the SkiaSharp-Based DevExpress Drawing Engine. Select None to skip Docker support.- None (default) - Skip docker support. - Debian - Debian-based Dockerfile. - Alpine - Alpine-based Dockerfile. - Ubuntu - Ubuntu-based Dockerfile. - openSUSE - openSUSE-based Dockerfile. - Amazon Linux - Amazon Linux-based Dockerfile. |
-D, --DocumentStorage <InMemory\|XPO\|...> |
Specify Document Cache Storage Type | Specifies the storage type to cache documents that the report creates. For more information, review the following help topic: Web Document Viewer Cache Management. - InMemoryStorage (default) - Default cache that stores objects directly in memory without serialization, optimized for frequent operations. - XPOStorage - Implements a database cache based on the XPO library, designed for multi-instance applications to prevent cache data loss. - FileStorage - Configures the reporting engine to store documents generated by reports on disk instead of in memory. - DistributedCache - Configures the cache as an external service that uses an ASP.NET Core distributed caching mechanism and can be shared by multiple application servers. - AzureStorage - Configures the application to use Azure caching services. |
-mcp, --use-devexpress-mcp |
Use DevExpress MCP | Installs the DevExpress Documentation MCP Server for the generated solution. GitHub Copilot queries DevExpress documentation through this server to improve response accuracy and reduce model hallucinations. Refer to DevExpress Documentation MCP Server for setup details. |
-prerelease, --use-prerelease-dx-version |
– | A flag that indicates whether to use a pre-release DevExpress package version in the project. |
--dx-version <version> |
– | Specifies DevExpress package version to be used in the project. Examples: 25.2.3, 25.2.*, 25.2.*-* |
--dx-nuget-feed <feed> |
– | Specifies the NuGet Feed URL. Refer to nuget.devexpress.com to obtain your personal feed URL (available for registered users). |
Troubleshooting
The following article lists common issues that can occur in a Web Reporting application and describes solutions: Troubleshooting
For information on how to identify the cause of an issue, refer to the following topic: Reporting Application Diagnostics.