Token Edit Control
- 9 minutes to read
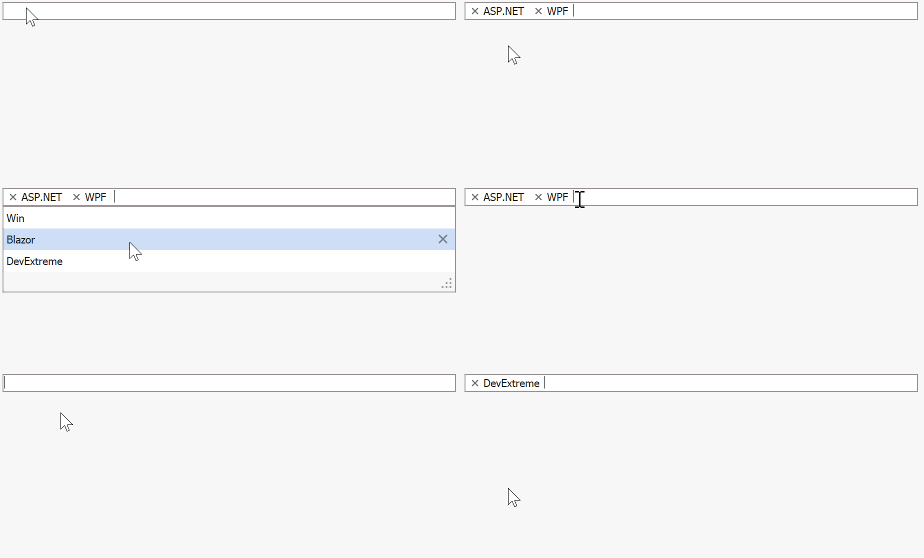
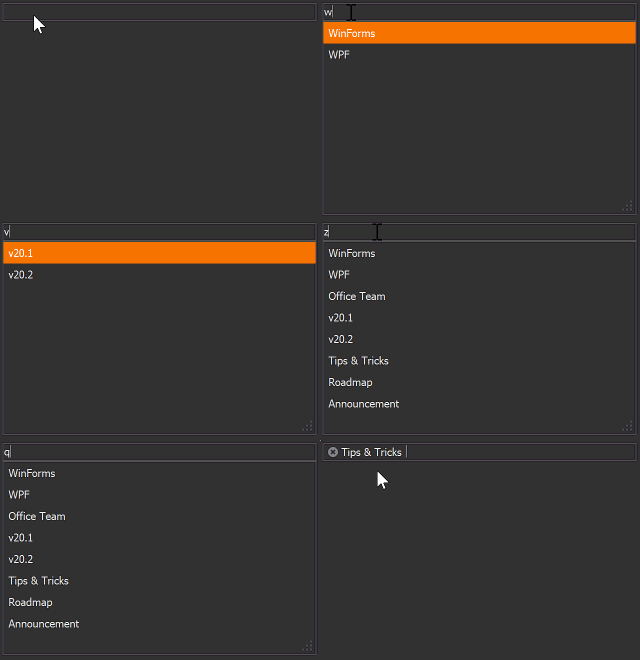
The WinForms Token Edit Control allows users to select items from a drop-down menu. Selected items are displayed as blocks called tokens.

Tokens
Each token stores a unique value. At runtime, tokens show a description string, an optional image, and a hover background. Tokens are instances of the TokenEditToken class.
Description
Token descriptions are stored in the TokenEditToken.Description property. You can also handle the TokenEdit.CustomDrawTokenText event to customize token text.
private void tokenEdit1_CustomDrawTokenText(object sender, TokenEditCustomDrawTokenTextEventArgs e) {
    if (. . .) e.Info.PaintAppearance.DrawString(
        e.Cache, "Custom Text", e.Info.DescriptionBounds, e.Info.PaintAppearance.Font,
        Brushes.Black, e.Info.PaintAppearance.GetStringFormat());
    e.Handled = true;
}
Value
Tokens store values in their TokenEditToken.Value properties. When a user selects a token, the control adds this token value to its BaseEdit.EditValue property. Depending on the Properties.EditValueType property value, the control’s EditValue can be a string, a BindingList, or an enumeration.
Important
- Every token must have a value.
- Token values must be unique.
- TokenEdit uses the
ToString()method to compare token values. If you use objects of a custom class as token values, override the classToString()method so that every object returns a unique value. The following help topic contains an example: How to: Use complex objects as token values.
Image
Tokens can show images (glyphs) before or after their descriptions. When a user clicks an image, the control deselects this token.

- Properties.ShowTokenGlyph
- Specifies whether tokens should display their icons.
- Properties.TokenGlyphLocation
- Gets or sets whether tokens should display their icons before or after descriptions.
- Properties.DeleteTokenOnGlyphClick
- Specifies whether the Token Edit should deselect tokens when a user clicks their icons.
- Properties.CustomDrawTokenGlyph
Allows you to replace default cross icons with custom images.
Separators
Token Edit separators divide the entered text into multiple text blocks. The RepositoryItemTokenEdit.ValidateToken event validates each block. Blocks that pass this validation are transformed into tokens (others remain as simple editable text).
The Token Editor uses a character assigned to the RepositoryItemTokenEdit.EditValueSeparatorChar property as a default separator. You can define a collection of additional separators in code (the RepositoryItemTokenEdit.Separators property) or at design time:

A character assigned to the EditValueSeparatorChar property is always treated as a separator, regardless of whether the Separators collection contains it.
Appearance
The following table lists APIs that customize appearance settings of the Token Edit and tokens:
| API | Description |
|---|---|
| Properties.Appearance | Gets the appearance settings used to paint the editor. |
| Properties.AppearanceDisabled | Gets the appearance settings used to paint the editor when it is disabled. |
| Properties.AppearanceDropDown | Gets the appearance settings of the dropdown. |
| Properties.AppearanceFocused | Gets the appearance settings used to paint the editor when it is focused. |
| Properties.AppearanceReadOnly | Gets the appearance settings used to paint the read-only editor. |
| CustomDrawTokenBackground | Allows you to manually paint the background of tokens. |
| CustomDrawTokenText | Allows you to paint the text area of tokens. |
Add Tokens
Token Edit supports two token types:
- Unbound tokens that you add at design time or in code.
- Bound tokens that the control generates based on data source records.
Note that you cannot mix token types: if a control has a data source, unbound tokens are disabled.
Unbound Tokens
Unbound tokens are stored in the Properties.Tokens collection. To add unbound tokens, click the ellipsis button next to the Tokens property in the Visual Studio Properties window and use the Collection Editor dialog.

To add unbound tokens in code, call Tokens collection methods between BeginUpdate-EndUpdate method calls.
tokenEdit1.Properties.BeginUpdate();
tokenEdit1.Properties.Tokens.AddToken("Description string", "value");
// ... add more tokens
tokenEdit1.Properties.EndUpdate();
Bound Tokens
- Use the Properties.DataSource property to bind a control to a data source.
- Use the Properties.DisplayMember property to specify the data field that stores token descriptions.
- Use the Properties.ValueMember property to specify the field that stores token values. Token values must be unique.

tokenEdit1.Properties.DataSource = queryBindingSource;
tokenEdit1.Properties.DisplayMember = "EmailAddress";
tokenEdit1.Properties.ValueMember = "EmailAddressID";
Drop-down Menu
The drop-down window with tokens opens if the following options are enabled:
- ShowDropDown
- Specifies whether the drop-down window appears when the user starts typing into the edit box. The drop-down window contains only tokens that start with the entered text. If there are no tokens that start with this text, all tokens are shown.
- ShowDropDownOnClick
- Specifies whether the drop-down window appears when the user clicks within the edit box. The drop-down window contains all available tokens.

If the user has selected all available tokens, the drop-down window does not appear. You can also use the MaxTokenCount property to specify the maximum number of tokens that the user can select. If this value is reached, the drop-down window does not appear.
The list below enumerates drop-down menu settings.
- Properties.DropDownRowCount
- The maximum number of tokens a menu can show. The default value is 7.
- Properties.DropDownShowMode
- Allows you to choose between Regular and Outlook display modes.
In Regular mode, the drop-down menu width is always equal to the editor width.

In Outlook mode, the drop-down menu width is limited by the longest token. The menu is displayed under the current cursor position.

- Properties.ShowRemoveTokenButtons
Specifies whether users can remove tokens from the drop-down menu list.

When a user clicks this button, the RemoveTokenButtonClick event fires. Handle this event to ignore the user click action and leave the item in the drop-down menu. If the Token Edit has a data source, use this event to remove data source records.
- Properties.CustomDropDownControl
- Specifies a custom panel as a drop-down menu. The following help topic contains an example: TokenEdit with Custom Drop-Down Control.
- TokenEdit.ShowPopup()
- Call this method to open the Token Edit drop-down menu.
Add Tokens at Runtime
To allow users to add new tokens at runtime, switch the Properties.EditMode property to TokenEditMode.Manual. In this mode, users can type any text in the editor text box. When they type a separator character, the editor fires an event that allows you to process user input. The default separator is a comma (“,”). You can add more separators to the Separators collection.
In unbound mode (when a Token Edit has no data source), the editor fires the ValidateToken event. If you set the e.IsValid event parameter to true, the editor accepts the entered text as a new token.
In the following code snippet, the Token Edit accepts only email addresses as tokens.

using System.Text.RegularExpressions;

Regex MailRegex =
    new Regex(@"^[-a-z0-9!#$%&'*+/=?^_`{|}~]+(?:\.[-a-z0-9!#$%&'*+/=?^_`{|}~]+)*" +
    "@(?:[a-z0-9]([-a-z0-9]{0,61}[a-z0-9])?\\.)*" +
    "(?:aero|arpa|asia|biz|cat|com|coop|edu|gov|" +
    "info|int|jobs|mil|mobi|museum|name|net|org|pro|tel|travel|[a-z][a-z])$",
    RegexOptions.Compiled);

private void ValidateToken(object sender, TokenEditValidateTokenEventArgs e) {
    e.IsValid = MailRegex.IsMatch(e.Description);
}
In bound mode, the editor fires the ProcessNewValue event. Handle it to process user input. If you accept the input as a valid token, add a corresponding new record to the data source.
void TokenEdit1_ProcessNewValue(object sender, TokenEditProcessNewValueEventArgs e) {
    if (MailRegex.IsMatch(e.Text)) {
        //Use data source API to post changes
        e.Handled = true;
    }
}
Select and Remove Tokens in Code
The Token Editor stores its selected tokens within the read-only SelectedItems collection. Use SelectItem(Object) and RemoveItem(Object) methods to select and remove tokens.
Note
This technique works only for unbound token editors (in data-bound mode, you must assign a new value to the EditValue property).
using DevExpress.XtraEditors;

// Selects the specified token.
tokenEdit1.SelectItem("Value3");

// Removes the specified token.
tokenEdit1.RemoveItem("Value1");
The following example removes checked tokens.
using DevExpress.XtraEditors;

// Removes the checked tokens.
List<TokenEditToken> checkedTokens = tokenEdit1.CheckedItems.ToList<TokenEditToken>();
foreach(TokenEditToken token in checkedTokens)
    tokenEdit1.RemoveItem(token.Value);
Peek Panel
To display a Peek Panel when a user moves the mouse pointer over a token, assign a FlyoutPanel to the Properties.PopupPanel property.
Before a panel is displayed on-screen, the editor fires the RepositoryItemTokenEdit.BeforeShowPopupPanel event.
Event arguments include the following properties:
e.Token- The hovered token.
e.Value,e.Description- The value and description of the hovered token.
e.DataObject- In bound mode, returns an object that is the data source record. In unbound mode, returns the hovered token as an object.
e.DataSourceIndex- In bound mode, returns the index of a data source record. In unbound mode, returns the index of the hovered token within the RepositoryItemTokenEdit.Tokens collection.
e.Bounds- The flyout panel bounds.
The following code snippet populates two flyout panel labels with the token description and the value of the corresponding data source record’s “Modified Date” column.

void TokenEdit1_BeforeShowPopupPanel(object sender, TokenEditBeforeShowPopupPanelEventArgs e) {
    labelControl2.Text = e.Token.Description;
    labelControl4.Text = (e.DataObject as DevExpress.DataAccess.Sql.DataApi.IRow)["ModifiedDate"].ToString();
}
Optional Peek Panel settings:
- Properties.PopupPanelOptions.ShowPopupPanel
- Disable this property to hide Peek Panels.
- Properties.PopupPanelOptions.Location
- Specifies whether Peek Panels should appear above or below tokens, or at the current cursor position.
End User Capabilities
Mouse Actions
Users can perform the following actions with the mouse:
Action | Effect |
|---|---|
Click an added token. | Select the token. |
Click an added token’s | Delete the token. |
Click added tokens while holding Ctrl. | Select all clicked tokens (if the Properties.CheckMode property is set to |
Hold the left mouse button and move the cursor across tokens. | Select all tokens within the range (if the Properties.CheckMode property is set to |
Keyboard Capabilities
Users can press the following keys/key combinations to manipulate tokens:
Keys | Effect |
|---|---|
←/→/↑/↓ | Navigate between added tokens. |
Ctrl+A | Select all added tokens. |
Ctrl+←/→/↑/↓ | Extend or shrink the token selection based on the direction of the arrow key pressed (if the Properties.CheckMode property is set to |
Backspace | Delete the selected token(s) or the last added token (if no token is selected). |
Delete | Delete the selected token(s). |
Ctrl+Delete | Delete all added tokens. |
 button.