How To: Create a Digital Gauge (Design-time)
- 3 minutes to read
This is the third tutorial of the XtraGauges Getting Started series. It will guide you through the process of creating a Digital Gauge and adjusting its common settings.
This tutorial consists of the following steps.
- Prerequisite
- Load the Required Gauge Preset
- Specify the Digital Gauge Main Properties
- Add a Layer Effect
- Add a Custom Label and Customize its Appearance
- Result
Step 1. Prerequisite
Create a new Windows Forms Application in Visual Studio or open an existing one, add a GaugeControl and run its Preset Manager (as you would do it for circular or linear gauge).
Step 2. Load the Required Gauge Preset
The Preset Manager contains lots of style presets allowing you to quickly customize the gauge appearance.
Let’s apply the Cosmic style preset to the digital gauge.
To do this, select this style on the right list of the Preset Manager. After that, you can click either this preset or the Load button below.

The digital gauge appears on the form window with an appearance corresponding to the chosen style preset.
Let’s change the current preset style (e.g., to Dark Night).
To do thos, click the smart tag and select Change Style, as shown below.

Then, in the invoked the Style Chooser manager, select the Dark Night style and click OK.

Step 3. Specify the Digital Gauge Main Properties
Let’s customize a digital gauge. For this, locate the property window and set the gauge properties as follows:
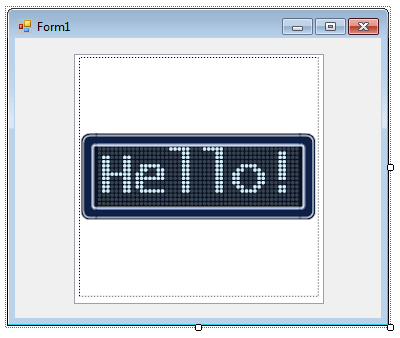
- set the DigitalGauge.DisplayMode property to Matrix8x14;
- set the DigitalGauge.DigitCount property to 6 (this value corresponds to the number of text characters);
set the DigitalGauge.Text property to “Hello!” (to see this text in the gauge).

Then, the Form should look like the following.
Step 4. Add a Layer Effect
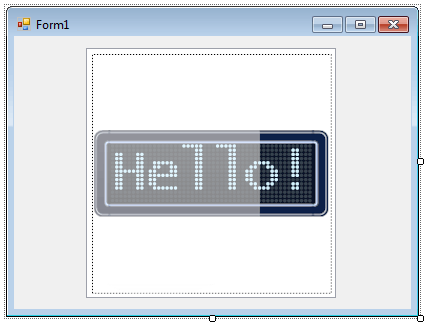
To add a visual effect to the digital gauge, locate the smart tag and click Add Effect Layer, as shown below:

Now the Digital Gauge control should look as shown in the image below.
Step 5. Add a Custom Label and Customize its Appearance
Finally, add a label to the gauge. To accomplish this, locate the smart tag and click the Add Label option.

To customize a label on the gauge, it is necessary to locate it on the form and select Run Designer via the smart tag. See the image below.

In the invoked designer, change the label’s font, position and text, as shown below. Then, click the Ok button.

Then, you will see the following confirmation window.

Note
The confirmation window occurs in the Gauge Designer every time the current layout is changed.
- click Yes to confirm the operation, as shown above.
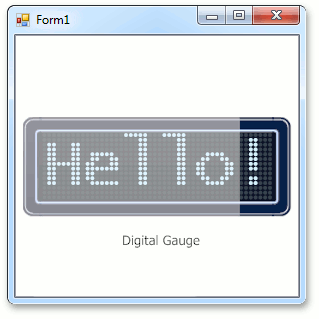
Step 6. Result
Run the application to see the result.