Preset Manager
- 2 minutes to read
The Preset Manager allows you to create and customize gauges from pre-built presets at design time. This is the most common way to create a completely new gauge.

To create a gauge based on a preset, do the following:
- Open the Gauge control’s smart tag menu and click “Run Preset Manager”.
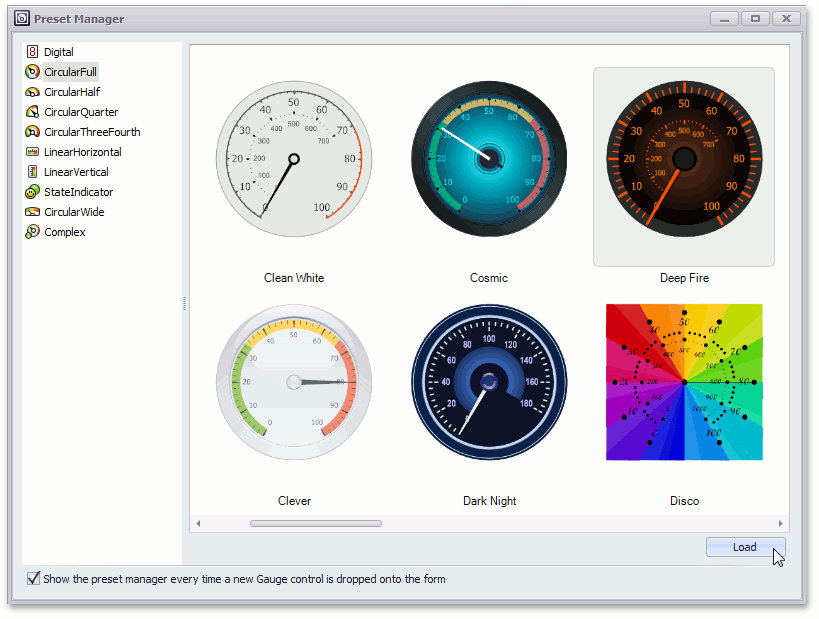
- Select a gauge category from the list on the left. This displays available gauge types within the right pane.
- Select the gauge type to be loaded and click the Load button (see the image above).
Important
Applying a different preset to a GaugeControl completely removes all currently added gauges and replaces them with the selected gauge preset. Use this approach if you have only one gauge within the control. If multiple gauges are added, use styles to customize each particular gauge.
Note
Certain gauge styles are not compatible with specific gauge presets. For instance, you cannot apply a traditional needle-based gauge style for Ignis and Haze gauge presets. And vice versa, Ignis and Haze styles are disabled for traditional gauge presets.
Accessing the Preset Manager
The Preset Manager is automatically opened when adding a GaugeControl onto a form. If the Preset Manager automatic running has been disabled, or if you subsequently want to run the Preset Manager, you can open it using one of the following methods:
Select a GaugeControl on the form and click Run Preset Manager from the command list in the Property Grid.

Select a GaugeControl on the form, then click the smart tag to open the menu and click Run Preset Manager:

Right-click a Gauge Control’s region that is not occupied by any gauge and select Run Preset Manager from the context menu that appears:

Tip
See Also: Apply Gauge Styles in Code