About The User Event
- 10 minutes to read
This topic describes a user event that is an entry in the schedule of a user (resource) in the scheduling area:

The TcxSchedulerEvent and its descendant (the TcxSchedulerControlEvent class) implement the user event. The first represents the persistent user event and the latter the in-memory user event that mirrors the persistent user event.
The user event’s elements
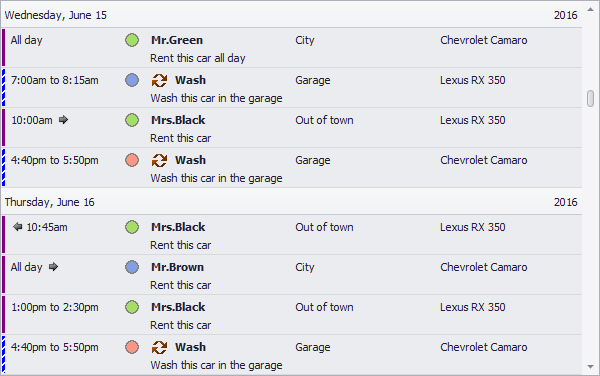
Below are images demonstrating the user event’s appearance under different time Views:

The timeline bar residing to the left of the rectangle of the user event, that lasts less than 24 hours and occupies the time block, indicates the user’s availability status. The timeline bar is only visible in the time View.


The scheduled user event contains the following elements, which appear from left to right in the user event’s rectangle:
Day View:
A bell icon which indicates that the reminder is on.
A chasing-arrows icon indicating that the user event is recurring (see the TcxSchedulerEvent.IsRecurring method) or a chasing-arrows icon with a strike-through if the user event is out of series (the etCustom flag on the TcxSchedulerEvent.EventType property is active).
The user event’s start and end times if they do not match the time blocks that are currently shown in the scheduling area (see the TcxSchedulerEvent.Start, TcxSchedulerEvent.Finish and TcxSchedulerDayView.TimeScale properties). Note: the user event’s start and end times are always displayed if the TcxSchedulerDayView.AlwaysShowEventTime property is set to True.
The user event’s subject entered in the Subject text box in the Event dialog or in the in-place editor (see the TcxSchedulerEvent.Caption property).
The location of the user event (in parentheses), that was entered in the Location text box in the Event dialog (see the TcxSchedulerEvent.Location property).
On the next line in the user event’s rectangle the description of the user event, that was entered by an end-user in the memo box in the Event dialog (see the TcxSchedulerEvent.Message property).
Note
to show minutes in the time ruler the TcxSchedulerDayView.TimeRulerMinutes property is set to True (the TcxSchedulerDayView.TimeScale property is set to less than 60).
Week View:
- The user event’s start and end times (see the TcxSchedulerEvent.Start and TcxSchedulerEvent.Finish properties) displayed in the plain format or as the miniature clocks, if the TcxSchedulerCustomResourceView.ShowTimeAsClock property is set to True, as shown in the image below:

The user event’s subject entered in the Subject text box in the Event dialog or in the in-place editor (see the TcxSchedulerEvent.Caption property).
The location of the user event (in parentheses), that was entered in the Location text box in the Event dialog (see the TcxSchedulerEvent.Location property).
Weeks View:
The user event’s start time (see the TcxSchedulerEvent.Start property) displayed in the plain format or as the miniature clock, if the TcxSchedulerCustomResourceView.ShowTimeAsClock property is set to True.
The user event’s subject entered in the Subject text box in the Event dialog or in the in-place editor (see the TcxSchedulerEvent.Caption property).
TimeGrid View:
A bell icon which indicates that the reminder is on.
A chasing-arrows icon indicating that the user event is recurring (see the TcxSchedulerEvent.IsRecurring method) or a chasing-arrows icon with a strike-through if the user event is out of series (the etCustom flag on the TcxSchedulerEvent.EventType property is active).
The user event’s start and end times (see the TcxSchedulerEvent.Start and TcxSchedulerEvent.Finish) displayed in the plain format or as the miniature clocks, if the TcxSchedulerCustomResourceView.ShowTimeAsClock property is set to True and the TcxSchedulerTimeGridView.EventDetailInfo property is set to False. The start and end times are only visible if they do not match the time blocks that are currently shown in the View.
The user event’s subject entered in the Subject text box in the Event dialog or in the in-place editor (see the TcxSchedulerEvent.Caption property).
The location of the user event (in parentheses), that was entered in the Location text box in the Event dialog (see the TcxSchedulerEvent.Location property).
On the next line in the user event’s rectangle the description of the user event, that was entered by an end-user in the memo box in the Event dialog (see the TcxSchedulerEvent.Message property).
The user event, which lasts 24 hours or longer (the all-day user event), resides in the all-day event area, located on the top of each day. This event contains the following elements, which appear from left to right in the user event’s rectangle:
The user event’s start time (see the TcxSchedulerEvent.Start property) if this user event is not an all-day event (see the TcxSchedulerEvent.AllDayEvent property). The start time is always shown as the miniature clock and doesn’t depend on the TcxSchedulerCustomResourceView.ShowTimeAsClock property (except for the TimeGrid View);
A bell icon if the reminder is on;
A chasing-arrows icon indicating that the user event is recurring (see the TcxSchedulerEvent.IsRecurring method) or a chasing-arrows icon with a strike-through if the user event is out of series (the etCustom flag on the TcxSchedulerEvent.EventType property is active);
The user event’s subject entered in the Subject text box in the Event dialog or in the in-place editor (see the TcxSchedulerEvent.Caption property);
The location of the user event (in parentheses), that was entered in the Location text box in the Event dialog (see the TcxSchedulerEvent.Location property);
The user event’s end time (see the TcxSchedulerEvent.Finish property) if this user event is not an all-day event (see the TcxSchedulerEvent.AllDayEvent property). The end time is always shown as the miniature clock and doesn’t depend on the TcxSchedulerCustomResourceView.ShowTimeAsClock property.
Note
the TimeGrid View displays the all-day user event’s start and end times next to the chasing-arrows icon.
Scheduling a user event
To schedule a new user event an end-user needs to double-click any time block or invoke the pop-up menu and select the New Event item. The Event dialog then appears to describe the user event in detail:

Note
if the TcxSchedulerDBStorage component is bound to the scheduler and the TcxSchedulerEvent‘s properties are not bound to the dataset field (see the Bound Mode topic), the editing controls, that are used to edit those properties, will be disabled in the Event dialog. The Resource check combo box is only displayed in the Event dialog if the TcxSchedulerEventOperations.SharingBetweenResources property is set to True.
After the Event dialog exits, if the OK button in the Event dialog was pressed, the newly created user event appears in the scheduling area. To initialize the Event dialog programmatically either the TcxCustomScheduler.CreateEventUsingDialog method or the cxShowEventEditorEx function can be used.
As an alternative to using the Event dialog (if no details are required) an end-user can select the desired time block and drag it down to the end time required using the mouse, then press the Enter key (or just start entering the subject without pressing this key), enter a subject for the user event, and press the Enter key to finish creating the event.
The following example shows how to create the user event programmatically:
// ...
   with Storage.CreateEvent do
    begin
      Caption := 'Meeting'; // specify the subject
      Start := Date + 10 * HourToTime; // the start time of the user event (the HourToTime constant is defined in the cxSchedulerUtils unit)
      Duration := 30 * MinuteToTime; // the duration of the user event (the MinuteToTime constant is defined in the cxSchedulerUtils unit)
      State := tlsBusy; // the availability status is "busy"
      Post; // synchronize with storage
    end;
Availability status
The availability status is used to identify whether a person is available to others. An end-user can specify this status via the Event dialog’s Show time as image combo box or via the Show Time As item of the pop-up menu invoked on the scheduled user event.
Coloring the user event
Color labels allow different types of user events to be quickly identified visually in the scheduler. An end-user can assign (or change) a color label using the Label image combo box in the Event dialog or selecting the Label item of the pop-up menu invoked on the scheduled user event. To set or change a color label for the user event when coding the TcxSchedulerEvent.LabelColor property is used.
Recurrence
User events that occur repeatedly are called recurring. If a user event is recurring a chasing-arrows icon appears in its header. An end-user can set the recurrence for the user event in the Event recurrence dialog. The Event recurrence dialog can be invoked by clicking the Recurrence button in the Event dialog:

To initialize the Event recurrence dialog programmatically, call the cxShowRecurrenceEditor function.
Refer to the Applying The Recurrence Pattern topic for details on recurring user events.
Reminder
The scheduler control enables setting a reminder and its time – how long before the actual user event’s scheduled time will alarm activate. If the reminder is set for the user event a bell icon appears in the user event’s header (as shown in the above images). The user event’s Reminder property is responsible for setting the reminder, while the user event’s ReminderMinutesBeforeStart property specifies lead-time. An end-user can switch the reminder on using the Reminder check box and assign it a time using combo box next to the Reminder check box (located in the Event dialog).
Moving and resizing the user event
In the Day or TimeGrid View, any user event can be resized by dragging the start or end time boundary of the user event or the left or right boundary if the user event lasts 24 hours or longer. In the Week or Weeks View, an end-user can only resize the user event that lasts 24 hours or longer. This way an end-user can visually modify the start and end times of a user event. To check the kind of dragging being performed use the TcxSchedulerCustomResourceViewHitTest.GetDragKind method that returns the edkResizeStart or edkResizeEnd flag, respectively.
Any user event can be rescheduled using drag and drop. To place the user event on a new time block an end-user can drag its timeline bar (in the Day View), the user event’s time rectangle (in the Week, Weeks, or TimeGrid View) or the user event’s caption rectangle. The TcxSchedulerCustomResourceViewHitTest.GetDragKind method returns the edkEventDragRect or edkMoveEvent flag, respectively. The end-user can also drag the user event from the time block to the all-day event area to make this event the all-day event and vice versa.
Any user event can be copied to another date not currently exposed in the scheduling area. To do this, an end-user can drag the user event to the Date Navigator to drop it onto the desired date. Another way of copying the user event is using the scheduler clipboard. To copy (or even to move) the user event, an end-user can use the standard shortcuts – Ctrl+C (Ctrl+Ins) or Ctrl+X (Shift+Del), and the Ctrl+V (Shift+Ins). In code, you can perform these clipboard operations via the scheduler’s CopyToClipboard, CutToClipboard, and PasteFromClipboard methods.
Moving and resizing is an alternative way of changing the user event’s times by entering new ones in the Start time or End time combo box in the Event dialog.
Note
moving and resizing are allowed if the scheduler’s EventOperations.Moving and EventOperations.Sizing properties are set to True. Moving between resources is allowed if the scheduler’s EventOperations.MovingBetweenResources property is set to True.