How To: Create a Modal Message Box Flyout
- 2 minutes to read
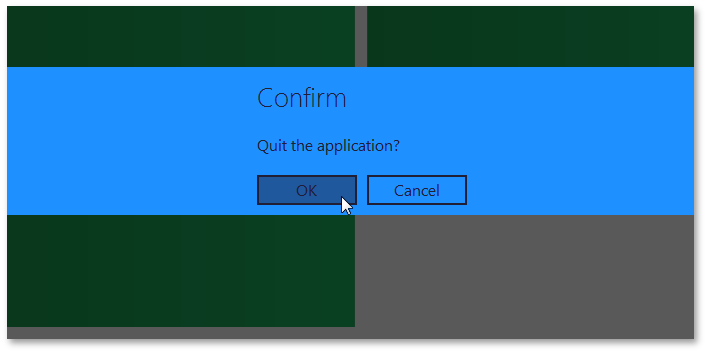
This example demonstrates how to create a simple modal Windows8-like message box via a Flyout.
- Create a new WindowsUI View application, or open an existing one.
- Open the DocumentManager’s context menu and run the Designer.
Switch to the ‘Elements’ section and select ‘Content Containers’. Click the ‘Add New Container’ button and choose ‘Flyout’ from the drop-down list.

- Select the newly created Flyout and change its name to closeAppFlyout via the property grid.
Switch to the code view and create a FlyoutAction object that will display message text and buttons for the Flyout.
DevExpress.XtraBars.Docking2010.Views.WindowsUI.FlyoutAction closeAppAction = new DevExpress.XtraBars.Docking2010.Views.WindowsUI.FlyoutAction() { Caption = "Confirm", Description = "Quit the application?" }; public Form1() { InitializeComponent(); closeAppAction.Commands.Add(FlyoutCommand.OK); closeAppAction.Commands.Add(FlyoutCommand.Cancel); . . . }Note that you can set the Flyout.FlyoutButtons property to OKCancel. In this case, you do not need to manually add the required buttons to the FlyoutAction.Commands collection.
Optionally you can specify the background color for the solid bar that will display the message box. To do so, customize the Appearance section, which is accessed via the WindowsUIView.FlyoutProperties property.

Associate the FlyoutAction with the Flyout via the Flyout.Action property.
Now handle the main form’s FormClosing event. Use the WindowsUIView.ShowFlyoutDialog method to call the Flyout. This method will freeze the form’s thread, and show the Flyout in a separate thread. The ShowFlyoutDialog method returns a System.Windows.Forms.DialogResult value that indicates which button was clicked by the end-user. Depending on this value, you can allow or cancel form closing.
Start your application and try to close the form. A modal message box Flyout will appear.
