Configure a Report in the Visual Studio Code Designer
- 4 minutes to read
The DevExpress Reporting suite ships with the Report Designer for Visual Studio Code. Once you download the IDE extension from the Visual Studio Marketplace, you can create and edit report documents in applications that target any supported operating system (Linux, macOS, or Windows) and any .NET-based platform. You need an active license to use this extension.
This topic explains how to use the Report Designer for Visual Studio Code in your .NET MAUI app to create a table report and bind it to a JSON data source.
Install Report Designer for Visual Studio Code
The Report Designer for Visual Studio Code is distributed as an extension for Visual Studio Code. Refer to the following link to install the Report Designer:
Create a .NET MAUI App
Follow the instructions in the following help topic to create a new .NET MAUI project with DevExpress .NET MAUI controls in Visual Studio Code: Create Your First App with DevExpress Mobile UI for .NET MAUI (Visual Studio Code).
Note that the DevExpress library for .NET MAUI targets only Android and iOS platforms (See also: Supported Platforms).
Create a Report
In the VS Code command palette, run the DX Reporting: New Report command to create a new report:

Enter the report name. This tutorial uses the default newReport name:

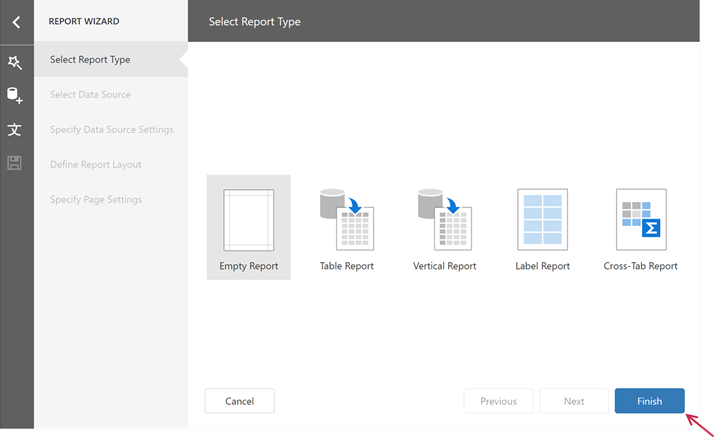
This runs the Report Wizard. Select Empty Report and click Finish:
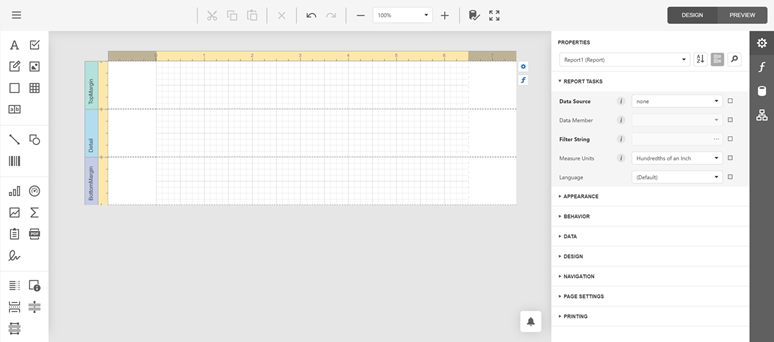
Once you click Finish, the DevExpress Report Designer for VS Code appears with a blank report. The designer surface is broken down into bands that help you build the report flow. A band can appear at the beginning or end of the report, on every printed page, once for each data record, and so on. The designer allows you to add components to the report, configure a data source, specify print page settings, and much more:
If you already have a ready-to-use report definition file (*.repx), you can add it to the project. To open the report definition file (*.repx) in the Report Designer, click it in the Visual Studio Code Explorer tab.
Bind the Report to a Source and Configure Report Settings
The Report Designer automatically adds the reporting.config.json file used to store connection strings. The designer uses them to retrieve data in the report preview. Add a new “JsonConnection” as follows:
{
  "SqlConnectionStrings": {},
  "JsonConnectionStrings": {
    "JsonConnection": "Uri=https://raw.githubusercontent.com/DevExpress-Examples/DataSources/master/JSON/customers.json"
  }
}
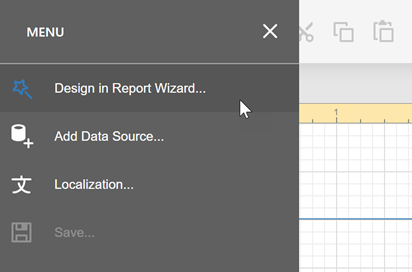
Click the hamburger button in the designer’s top-left corner and select the Design in Report Wizard option in the menu:
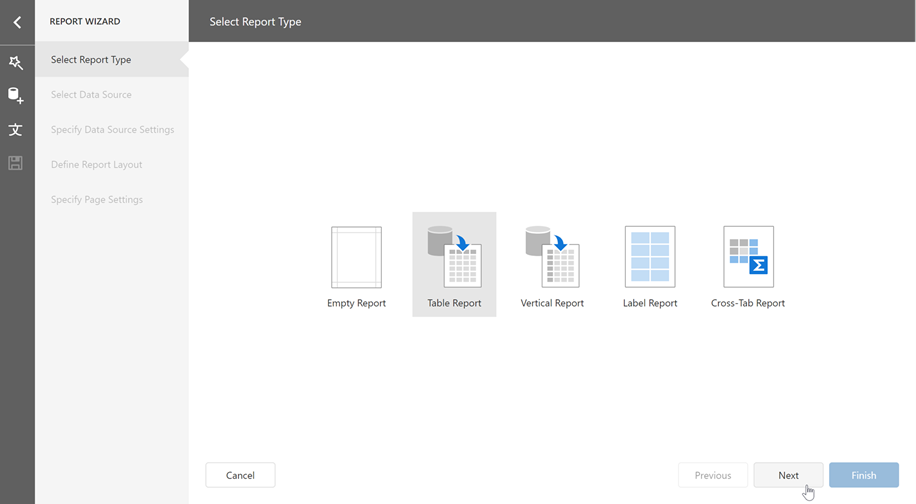
Select the Table Report option and click Next:
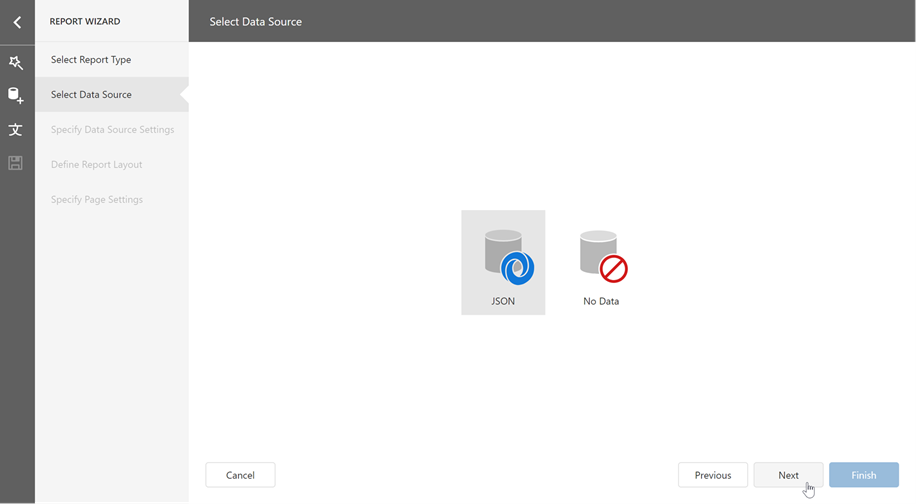
On the Select Data Source page, choose JSON and click Next:
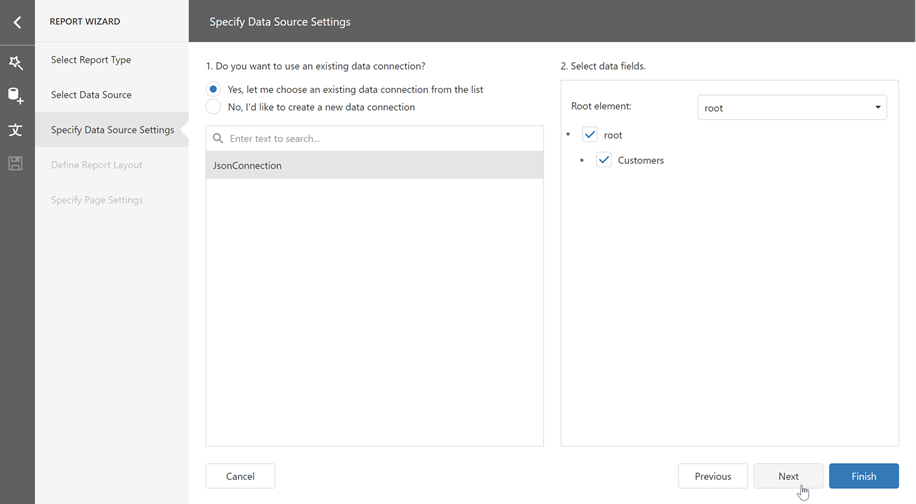
On the Specify Data Source Settings page, ensure that the Yes, let me choose an existing data connection from the list option and JsonConnection are selected in section 1. In section 2 (Select data fields), select the root element and click Next:
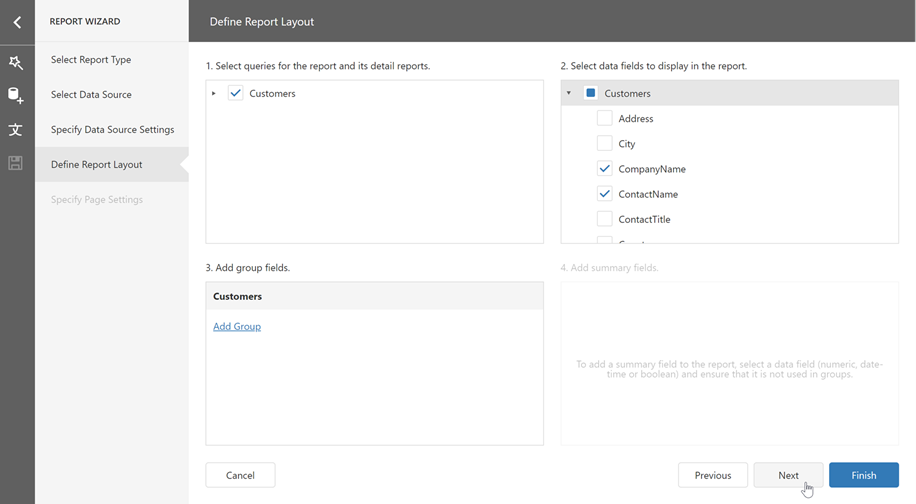
On the Define Report Layout page, select the CompanyName, ContactName, and Phone data fields. Click Next.
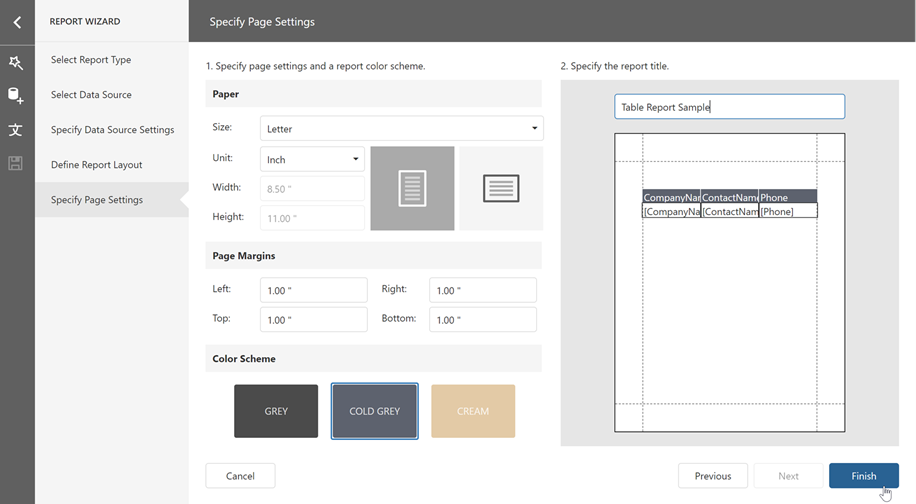
On the Specify Page Settings page, select a color scheme and enter the report title. Click Finish.
Show the Report in the PDF Viewer
In this tutorial, the resulting report is converted to a PDF file and then displayed in the DevExpress PDF viewer for .NET MAUI. Follow the steps below to convert the report to PDF and display it in the PDF viewer:
Move the newReport.repx file to the Resources/Raw folder.
Add the PdfViewer component to the page. For more information, refer to the following section: Add a PDF Viewer to the Page.
<ContentPage ...
            xmlns:dx="http://schemas.devexpress.com/maui">
    <dx:PdfViewer x:Name="pdfViewer"/>
</ContentPage>
Use the following code to export the report to a PDF file and then show it in the PDF viewer.
using DevExpress.Maui.Pdf;
using DevExpress.XtraReports.UI;

namespace Maui_reporting_vscode;

public partial class MainPage : ContentPage {
    public MainPage() {
        InitializeComponent();
        InitReport();
    }
    async void InitReport() {
        await ShowReportInPdf("newReport.repx", "newReport.pdf");
    }
    public async Task<string> CopyWorkingFilesToAppData(string fileName) {
        using Stream fileStream = await FileSystem.Current.OpenAppPackageFileAsync(fileName);
        string targetFile = Path.Combine(FileSystem.Current.AppDataDirectory, fileName);
        if (File.Exists(targetFile)) {
            File.Delete(targetFile);
        }
        using FileStream outputStream = File.OpenWrite(targetFile);
        fileStream.CopyTo(outputStream);
        return targetFile;
    }
    private async Task ShowReportInPdf(string reportFileName, string outputFileName) {
        string reportTemplateFileName = await CopyWorkingFilesToAppData(reportFileName);
        XtraReport report = XtraReport.FromXmlFile(reportTemplateFileName);
        string outputFilePath = Path.Combine(FileSystem.Current.AppDataDirectory, outputFileName);
        report.ExportToPdf(outputFilePath);
        pdfViewer.DocumentSource = PdfDocumentSource.FromFile(outputFilePath);
    }
}
Add the following code lines to the MauiProgram class to be able to connect to the JSON data source at runtime:
using DevExpress.DataAccess;
using DevExpress.Maui;
using DevExpress.Maui.Core;
using DotNet.Meteor.HotReload.Plugin;
using SkiaSharp.Views.Maui.Controls.Hosting;

namespace Maui_reporting_vscode;

public static class MauiProgram {
    public static MauiApp CreateMauiApp() {
        ThemeManager.ApplyThemeToSystemBars = true;
        var builder = MauiApp.CreateBuilder();
        builder
            .UseMauiApp<App>()
            .UseDevExpress(useLocalization: true)
            .UseSkiaSharp()
            .EnableHotReload()
            .ConfigureFonts(fonts => {
                fonts.AddFont("OpenSans-Regular.ttf", "OpenSansRegular");
                fonts.AddFont("univia-pro-regular.ttf", "Univia-Pro");
                fonts.AddFont("roboto-bold.ttf", "Roboto-Bold");
                fonts.AddFont("roboto-regular.ttf", "Roboto");
            });
        DefaultConnectionStringProvider.AssignConnectionStrings(GetGlobalConnectionStrings());
        return builder.Build();
    }
    public static IDictionary<string, string> GetGlobalConnectionStrings() {
        return new Dictionary<string, string>() {
            { "JsonConnection", "Uri=https://raw.githubusercontent.com/DevExpress-Examples/DataSources/master/JSON/customers.json"}
        };
    }
}
Run the project to see the results:
