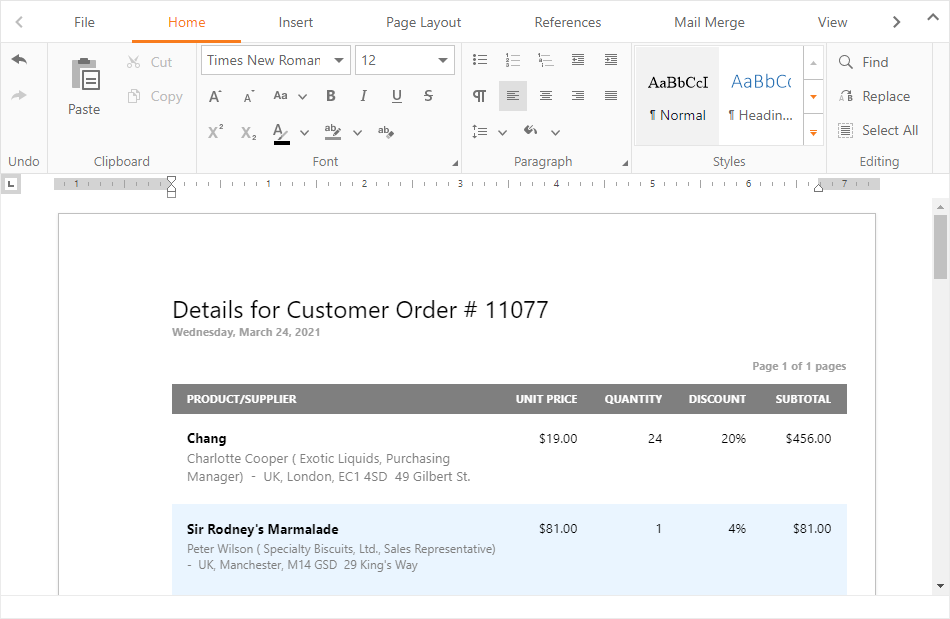
ASPxRichEdit Class
A rich text editor.
Namespace: DevExpress.Web.ASPxRichEdit
Assembly: DevExpress.Web.ASPxRichEdit.v25.1.dll
NuGet Package: DevExpress.Web.Office
Declaration
public class ASPxRichEdit :
    ASPxDataWebControl,
    OfficeWorkSessionControl,
    IParentSkinOwner,
    ISkinOwner,
    IPropertiesOwner,
    IControlDesigner,
    IAutoSaveControl,
    IDialogUtilsOwner,
IStyleSheetManagerImagesProviderRelated API Members
The following members return ASPxRichEdit objects:
Remarks
The ASPxRichEdit control’s visual interface allows you to create, load, modify, print, save, and convert rich-formatted text files.

Create a Rich Text Editor
Design Time
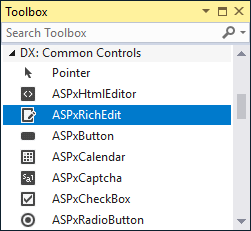
The ASPxRichEdit control is available on the DX.25.1: Common Controls toolbox tab in the Microsoft Visual Studio IDE.

Drag the control onto a form and customize the control’s settings, or paste the control markup in the page’s source code.
<dx:ASPxRichEdit ID="RichEdit" runat="server" WorkDirectory="~\App_Data\WorkDirectory">
</dx:ASPxRichEdit>
Run Time
using DevExpress.Web.ASPxRichEdit;
...
protected void Page_Load(object sender, EventArgs e) {
    ASPxRichEdit richEdit = new ASPxRichEdit();
    richEdit.ID = "RichEdit";
    richEdit.WorkDirectory = "~/App_Data/WorkDirectory";
    // Add the created control to the page
    Page.Form.Controls.Add(richEdit);
}
Note
DevExpress controls require that you register special modules, handlers, and options in the Web.config file. You can change this file or switch to the Design tab in the Microsoft Visual Studio IDE to automatically update the Web.config file. Note that this information is automatically registered if you use the DevExpress Template Gallery to create a project.
Client-Side API
The ASPxRichEdit‘s client-side API is implemented with JavaScript and exposed by the ASPxClientRichEdit object.
Availability | Available if the EnableClientSideAPI property is set to |
Client object type | |
Access name | |
Events |
Document Structure
The Rich Text Editor builds a document model while loading a document. The model defines a logical document structure. The editor’s layout engine converts the document model into a document layout structure which represents the appearance of physical entities (such as text, picture, and table) in a document. Then, the control renders HTML code to create the document layout.
Supported Document Formats
The ASPxRichEdit control supports the following file extensions:
- DOC, DOCX, RTF, TXT, ODT, XML
- HTML, MHT - open/save with limitations
- PDF - programmatic export only
More details | See demo: Load/Save | See demo: Export to PDF
Document Management
The Rich Text Editor allows users to create, edit, and save rich-text documents in a browser. The editor provides ribbon command buttons that allow users to manage a document. You can customize the default UI and manage file operations in code.
More details | See demo: Load/Save | See demo: Custom Document Management
Document Editing
The Rich Text Editor ships with a comprehensive set of document editing tools. You can modify documents via the UI or in code. The main document features are listed below.
- Character Formatting (More details | See demo)
- Paragraph Formatting (More details | See demo)
- Text Styles (See demo)
- Sections (See demo)
- Bullets And Numbering (See demo)
- Hyperlinks and Bookmarks (See demo)
- Tables (See demo)
- Headers and Footers (See demo)
- Find and Replace (See demo)
- Floating Objects (See demo)
- Table of Contents (More details | See demo)
- Auto Correct (More details | See demo)
- Spell Checking (More details | See demo)
Document Protection
The ASPxRichEdit control allows users to open and view protected documents. You can identify users and enable text ranges permitted for the specified user or group.
Developer API
- Server-Side API. You can modify a document on the server side with a non-visual cross-platform .NET library Office File API.
- Client-Side API. The Rich Text Editor provides a comprehensive client API that allows you to modify the open document programmatically on the client side.
More details: Office File API | More details: Client API | See demo
Fields
You can insert special placeholders fields which are replaced with actual data when the document is displayed or printed.
Mail Merge
The Mail Merge retrieves data from a bound data source and fills in the fields in a document template. This feature can be used to compose, preview, and generate catalogues, reports, or personalized letters.
Use the DataSourceID or DataSource property to specify a bound data source. To initialize a mail merge, use the UI or call the MailMerge method.
Ribbon
The ASPxRichEdit control allows you to customize its ribbon at design and run time, provides display styles (RibbonMode), supports external ribbon. You can also enable the one-line mode that is optimized for touch devices.
Context Menu
The ASPxRichEdit provides a context menu. Handle the PopupMenuShowing client-side event to add, modify, and remove menu items, or prevent the context menu from being displayed.
<script>
function RichEditPopupMenuShowing(s, e) {
    e.menuItems.Clear();
    var insertDateItem = new ASPxClientRichEditPopupMenuItem();
    insertDateItem.name = "addDate";
    insertDateItem.text = "Insert the Current Date";
    e.menuItems.Insert(0, insertDateItem);
    ...
}
function RichEditCustomCommandExecuted(s, e) {
    switch(e.commandName) {
        case "addDate":
            s.commands.createDateField.execute();
            break;
        ...
    }
}
</script>

<dx:ASPxRichEdit ID="DemoRichEdit" runat="server">
    <ClientSideEvents
        PopupMenuShowing="function(s, e) { RichEditPopupMenuShowing(s, e); }"
        CustomCommandExecuted="function(s, e) { RichEditCustomCommandExecuted(s, e); }">
    </ClientSideEvents>
</dx:ASPxRichEdit>
Simple View
In Simple View mode, the control ignores a page’s layout and a document occupies all the available area inside the control. Users can enable/disable Simple View mode via ribbon commands.
To enable the mode programmatically, do one of the following:
- Set the server ViewType property to Simple.
richEdit.Settings.Views.ViewType = RichEditViewType.Simple;
- Execute the client ChangeViewTypeCommand command.
richEdit.commands.changeViewType.execute(ASPx.ViewType.Simple);
Online Demos
Rich Text Editor - Introduction