How to: Create a Master-Detail Report Without Coding
- 4 minutes to read
This tutorial uses DevExpress project templates and mail merge functionality to create a master-detail report (without a single line of code).
Create a Spreadsheet Application
In Visual Studio, go to “File | New | Project” to create a new project. Select DevExpress v25.1 Template Kit and click Next:
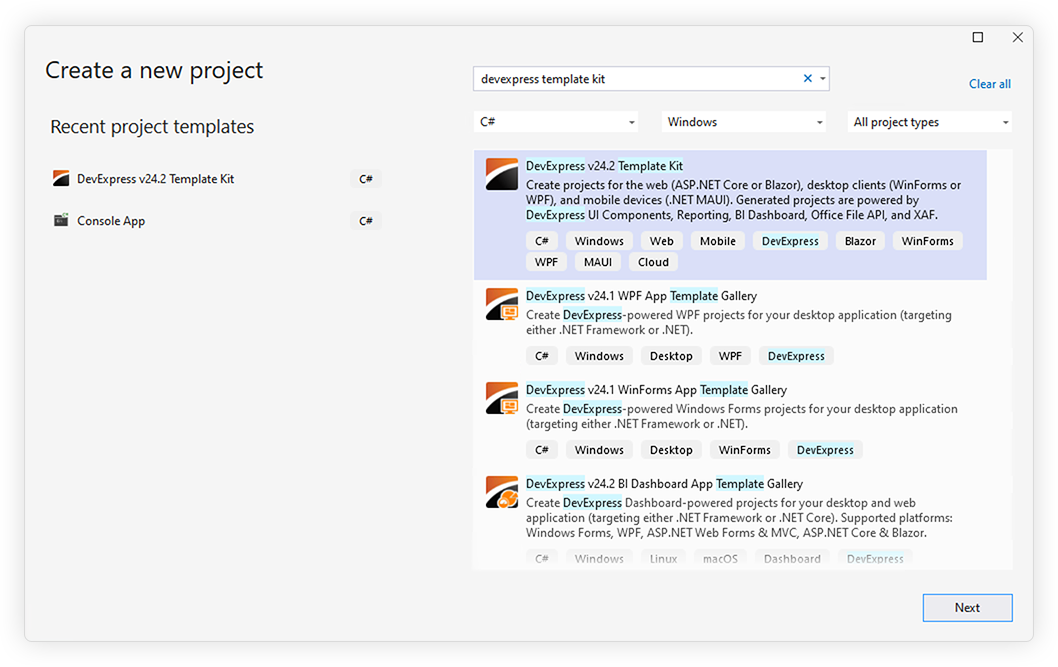
Tip
The application targets .NET 8+.
Refer to the following help topic for information on how to download and install the DevExpress Template Kit: Install DevExpress Template Kit.
Note
Use the DevExpress Project Template Gallery to create applications based on templates that target the .NET Framework.
- Specify project settings and click Create to run the DevExpress Project Wizard.
Select the WinForms platform. Scroll down to the Office-inspired Controls section and select Spreadsheet Application. Click Create Project.

Run the application to see the result.

Enable the Mail Merge UI
Invoke the Spreadsheet’s smart tag menu and click Create Mail Merge Bars to add a Mail Merge tab.

- Click Create Field List Panel in the smart tag menu to create a Field List Panel.
- Click Create Parameters Panel in the smart tag menu to create a Parameters Panel.
Run the application to see the result.

Bind a Worksheet to Data using the Data Source Wizard
Create a new workbook. Modify a document by entering captions, changing cell fonts and backgrounds, and formatting cell ranges as shown in the following image.

- Activate the Mail Merge Design View to display the template structure. To do this, click the Mail Merge Design View button on the Mail Merge tab, in the Design group.
- Click Add Data Source to invoke the Data Source Wizard.
Select Database as the data source type. Click Next.

- Select an option to create a new data connection. Click Next.
- Select the MS Access 97 data provider and locate the database file nwind.mdb in the Data subfolder of the DevExpress demos. Click Next.
- Select an option that does not save credentials. Click Next.
- Click Run Query Builder to invoke the Query Designer window that enables you to select data from the data source.
Add the Suppliers table and include all columns in the query.

Click OK to close the Query Designer.
- Click Next to save the query.
- Click OK to select the newly created data source.
- Click Manage Relations -> Manage Queries to invoke the Query Designer and create a new query for the Products table.
- Click Manage Relations -> Manage Queries to invoke the Query Designer and create a new query for the Order Details table.
Specify Relationships
- Click Manage Relations to invoke the Master-Detail Relations Editor.
Add relations to the Suppliers and Products tables. The editor suggests appropriate relations automatically.

Specify Template Ranges
- Select the “B3:I13” cell range and click the Detail button on the Mail Merge tab, in the Template Ranges group. This cell range will be repeated for each record of the data source.
- Click Select Data Member to invoke a dialog to select Suppliers as the data member in the worksheet data source.
- Specify a header to display above all detail range instances in the resulting worksheet. Select the “B3:I3” range. Click the Header button on the Mail Merge tab.
- Add a nested level to the detail range to display the detail-level data from the SuppliersProducts child table. Select the “B9:I13” cell range, click the Master-Detail button, and then click Detail Level in the invoked submenu. The DetailLevel0 range will be created.
- Select Master-Detail->Data Member to specify SuppliersProducts nested data member for the Detail Level 0.
- Select the “D13:I13” cell range for the next level sub-detail area (Detail Level 1) and click Master-Detail->Detail Level to mark it up.
- Select Master-Detail->Data Member to specify the ProductsOrder Details nested data member for DetailLevel1.
The resulting template is shown below:

Insert Mail Merge Fields
Select a cell and double-click the field in the Field List panel. Make sure that the fields are selected from the nested data member that has been previously specified for the area to which a field is inserted. The resulting template will look as illustrated in the following image.

Preview the Result
- Select the Mail Merge mode. Click Multiple Sheets to place a report for each supplier into an individual worksheet.
Click the Mail Merge Preview button on the Mail Merge tab, in the Design group. A new window with the resulting document opened in a new SpreadsheetControl instance will be invoked.

You can save the resulting workbook to a file and edit it later.
- You can also save a data-bound template to a file in .xls or .xlsx format. All data bindings are saved and will be restored when the spreadsheet control loads a template again.