Add a JavaScript-Based Report Designer to a Blazor Web App (Interactive WebAssembly) with an ASP.NET Core Backend (Visual Studio)
- 7 minutes to read
This tutorial adds a Report Designer (DxWasmReportDesigner) to an application created with the Blazor Web App (Interactive WebAssembly) template.
Create a New Project from a Template
This section describes how to create a new Blazor project. If you wish to start this tutorial using an existing application, go to Step 2.
Click Create a new project on Visual Studio’s start page and select the Blazor Web App template. Select WebAssembly from the Interactive Render Mode drop-down list.
Click Next.
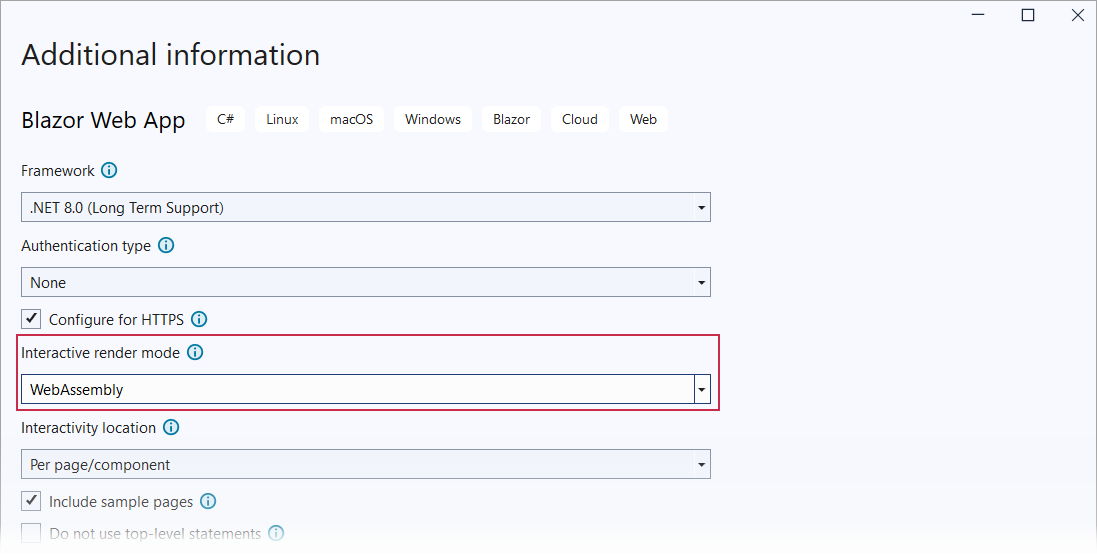
Specify the project name and location, and click Next.
Specify additional options and click Create.
You can use this tutorial to integrate the Standalone Report Parameters Panel into a Blazor WebAssembly Hosted (available in ASP.NET Core 7.0 or earlier) template.
For additional information on available Blazor templates, refer to the following help topic: Tooling for ASP.NET Core Blazor.
Install NuGet Packages
Install the following NuGet packages to the projects:
Project Package BlazorWasmReportingApp DevExpress.AspNetCore.Reporting BlazorWasmReportingApp.Client DevExpress.Blazor.Reporting.JSBasedControls.WebAssembly For additional information on how to install NuGet packages for DevExpress components, review the following help topic: How to Install DevExpress Products.
Build the project.
Register DevExpress Resources
In the Program.cs file of the main project, add the following code:
using BlazorWasmReportingApp.Server;
using DevExpress.AspNetCore;
using DevExpress.AspNetCore.Reporting;
using DevExpress.XtraReports.Web.Extensions;
using Microsoft.AspNetCore.ResponseCompression;

var builder = WebApplication.CreateBuilder(args);

// Add services to the container.
builder.Services.AddControllersWithViews();
builder.Services.AddRazorPages();
builder.Services.AddDevExpressControls();

var app = builder.Build();

// ...
app.UseDevExpressControls();
// ...
app.Run();
In the _Imports.razor file of the main project, register the DevExpress.Blazor namespace:
@using DevExpress.BlazorIn the App.razor file of the main project, call the RegisterScripts(Action<ResourcesConfigurator>) method to register DevExpress client resources:
<head>
@*...*@
@DxResourceManager.RegisterScripts()
@*...*@
</head>
Implement Reporting Controllers
- Create a Controllers folder in the main project.
In the created folder, add a new ReportingControllers.cs class file with the following content:
using DevExpress.AspNetCore.Reporting.QueryBuilder;
using DevExpress.AspNetCore.Reporting.QueryBuilder;
using DevExpress.AspNetCore.Reporting.QueryBuilder.Native.Services;
using DevExpress.AspNetCore.Reporting.ReportDesigner;
using DevExpress.AspNetCore.Reporting.ReportDesigner.Native.Services;
using DevExpress.AspNetCore.Reporting.WebDocumentViewer;
using DevExpress.AspNetCore.Reporting.WebDocumentViewer.Native.Services;


public class CustomWebDocumentViewerController : WebDocumentViewerController {
    public CustomWebDocumentViewerController(IWebDocumentViewerMvcControllerService controllerService)
        : base(controllerService) {    }
}

public class CustomReportDesignerController(IReportDesignerMvcControllerService controllerService)
    : ReportDesignerController(controllerService) {
    [HttpPost("[action]")]
    public async Task<object> GetReportDesignerModel(
        [FromForm] string reportUrl,
        [FromForm] ReportDesignerSettingsBase designerModelSettings,
        [FromServices] IReportDesignerClientSideModelGenerator designerClientSideModelGenerator) {
        Dictionary<string, object> dataSources = new();
        ReportDesignerModel model = string.IsNullOrEmpty(reportUrl) ?
            await designerClientSideModelGenerator.GetModelAsync(new XtraReport(), dataSources, "/DXXRD", "/DXXRDV", "/DXXQB") :
            await designerClientSideModelGenerator.GetModelAsync(reportUrl, dataSources, "/DXXRD", "/DXXRDV", "/DXXQB");
        model.WizardSettings.EnableSqlDataSource = true;
        model.Assign(designerModelSettings);
        var modelJsonScript = designerClientSideModelGenerator.GetJsonModelScript(model);
        return Content(modelJsonScript, "application/json");
    }
}

public class CustomQueryBuilderController : QueryBuilderController {
    public CustomQueryBuilderController(IQueryBuilderMvcControllerService controllerService)
        : base(controllerService) {    }
}
Create a Sample Report
Note
To perform this step, you should install DevExpress Reporting on your machine. Refer to the following topic for additional information: Run the Installation Wizard - DevExpress Unified Component Installer.
Switch to the BlazorWasmReportingApp project. Select Project -> Add New Item… to invoke the Add New Item dialog. Navigate to the Reporting node and select the DevExpress v.26.1 Report item template.

Name the report TestReport.cs and click Add.
Select Blank in the invoked Report Wizard page and click Finish.

Modify the newly created report in the Visual Studio Report Designer. Add a label and type Hello, World!:

Click the report’s smart tag and select Save…:

In the invoked Save As dialog, specify the Reports project folder, the Report XML Files (.repx) file type, and the TestReport.repx file name.
Implement a Report Storage
Implement the ReportStorageWebExtension descendant to save and load reports.
Important
This tutorial uses the file system to store reports for demonstration purposes only. In a production application, use a database or other secure storage to save reports. For more information, refer to the following help topic: Add a Report Storage.
The following code is a sample storage that uses the file system to store reports. Add the ReportStorage.cs class file to your server project with following content:
using DevExpress.XtraReports.UI;

public class ReportStorage : DevExpress.XtraReports.Web.Extensions.ReportStorageWebExtension {
    readonly string ReportDirectory;
    const string FileExtension = ".repx";

    public ReportStorage(IWebHostEnvironment env) {
        ReportDirectory = Path.Combine(env.ContentRootPath, "Reports");
        if (!Directory.Exists(ReportDirectory)) {
            Directory.CreateDirectory(ReportDirectory);
        }
    }

    public override bool CanSetData(string url) {
        // Determines whether or not it is possible to store a report by a given URL.
        // For instance, make the CanSetData method return false for reports that should be read-only in your storage.
        // This method is called only for valid URLs (i.e., if the IsValidUrl method returned true) before the SetData method is called.

        return true;
    }

    public override bool IsValidUrl(string url) {
        // Determines whether or not the URL passed to the current Report Storage is valid.
        // For instance, implement your own logic to prohibit URLs that contain white spaces or some other special characters.
        // This method is called before the CanSetData and GetData methods.

        return Path.GetFileName(url) == url;
    }

    public override byte[] GetData(string url) {
        // Returns report layout data stored in a Report Storage using the specified URL.
        // This method is called only for valid URLs after the IsValidUrl method is called.
        try {
            if (Directory.EnumerateFiles(ReportDirectory).Select(Path.GetFileNameWithoutExtension).Contains(url)) {
                return File.ReadAllBytes(Path.Combine(ReportDirectory, url + FileExtension));
            }
            if (ReportFactory.Reports.ContainsKey(url)) {
                using (MemoryStream ms = new MemoryStream()) {
                    ReportFactory.Reports[url]().SaveLayoutToXml(ms);
                    return ms.ToArray();
                }
            }
        }
        catch (Exception ex) {
            throw new DevExpress.XtraReports.Web.ClientControls.FaultException("Could not get report data.", ex);
        }
        throw new DevExpress.XtraReports.Web.ClientControls.FaultException(string.Format("Could not find report '{0}'.", url));
    }

    public override Dictionary<string, string> GetUrls() {
        // Returns a dictionary of the existing report URLs and display names.
        // This method is called when running the Report Designer
        // before the Open Report and Save Report dialogs are shown and after a new report is saved to a storage.

        return Directory.GetFiles(ReportDirectory, "*" + FileExtension)
                                .Select(Path.GetFileNameWithoutExtension)
                                .Union(ReportFactory.Reports.Select(x => x.Key))
                                .ToDictionary<string, string>(x => x);
    }

    public override void SetData(XtraReport report, string url) {
        // Stores the specified report to a Report Storage using the specified URL.
        // This method is called only after the IsValidUrl and CanSetData methods are called.
        var resolvedUrl = Path.GetFullPath(Path.Combine(ReportDirectory, url + FileExtension));
        if (!resolvedUrl.StartsWith(ReportDirectory + Path.DirectorySeparatorChar)) {
            throw new DevExpress.XtraReports.Web.ClientControls.FaultException("Invalid report name.");
        }

        report.SaveLayoutToXml(resolvedUrl);
    }

    public override string SetNewData(XtraReport report, string defaultUrl) {
        // Stores the specified report using a new URL.
        // The IsValidUrl and CanSetData methods are never called before this method.
        // You can validate and correct the specified URL directly in the SetNewData method implementation
        // and return the resulting URL used to save a report in your storage.
        SetData(report, defaultUrl);
        return defaultUrl;
    }
}
Add the ReportFactory.cs class file to the server project with the following code:
using BlazorWasmReportingApp.Server;
using DevExpress.XtraReports.UI;
public static class ReportFactory {
    public static Dictionary<string, Func<XtraReport>> Reports = new Dictionary<string, Func<XtraReport>>() {
        ["TestReport"] = () => new TestReport()
    };
}
In the Program.cs file, register the
ReportStorageservice:using BlazorWasmReportingApp; using DevExpress.AspNetCore; using DevExpress.AspNetCore.Reporting; using DevExpress.XtraReports.Web.Extensions; var builder = WebApplication.CreateBuilder(args); // Add services to the container. builder.Services.AddControllersWithViews(); builder.Services.AddRazorPages(); builder.Services.AddDevExpressControls(); // Register the service that works for the Document Viewer (name resolution) // and Report Designer (loads and saves reports). builder.Services.AddScoped<ReportStorageWebExtension, ReportStorage>(); //...
Create a Page With the Report Designer
In the BlazorWasmReportingApp.Client/Pages folder, create a new Razor component (ReportDesigner.razor) with the following content:
@page "/designer"
@using DevExpress.Blazor.Reporting
@rendermode InteractiveWebAssembly

<DxWasmReportDesigner ReportName="TestReport" Height="700px" Width="100%" DevelopmentMode=true>
    <DxWasmReportDesignerRequestOptions GetDesignerModelAction="DXXRD/GetReportDesignerModel">
    </DxWasmReportDesignerRequestOptions>
</DxWasmReportDesigner>
The DxWasmReportDesigner component loads the TestReport report.
Add Navigation Links
Modify the NavMenu.razor file to include links to the newly created page:
Run the Project
Run the project and see the result. The Report Designer displays the TestReport:

Next Steps
- Use Data Sources
- Learn how to use data sources in the JavaScript-based Report Designer.
- Customize the Report Designer UI and Behavior
Refer to the following topics to learn how to customize the Report Designer UI and behavior:
- Troubleshooting
- This topic lists common issues that can occur in a Web Reporting application and describes solutions. For information on how to identify the cause of an issue, refer to the following topic: Reporting Application Diagnostics.