How to: Lock the size of a layout item
- 3 minutes to read
When the Layout Control is resized all its layout items are resized proportionally (the size constraints are taken into account). There are many cases when you need to lock the size of a layout item, so that it’s not resized when the Layout Control is resized. To do so, you need to:
- set the layout item’s MaxSize property to the required size that the item must have;
- set the layout item’s MinSize property to the same value as the MaxSize property.
Now the layout item’s size is locked. Again, alternatively you can use the ControlMinSize and ControlMaxSize properties.
To lock the layout item’s height, but still allow the item’s width to be freely changed, do the following:
- set the item’s MaxSize.Height and then the MinSize.Height properties to the required height;
- set the item’s MaxSize.Width and MinSize.Width properties to 0.
To allow the layout item’s height to be freely changed set the MaxSize.Height and MinSize.Height properties to 0.
Example
This example shows how to lock the size of a layout item at design time and runtime.
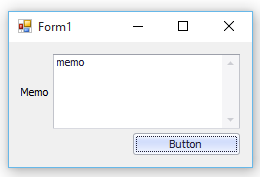
Assume that a layout control is docked to the form so that it fills this form. It contains three layout items: 1) the item that displays a MemoEdit control; 2) an Empty Space Items and 3) the item that contains a button:
When the form is resized, all the items are resized proportionally:
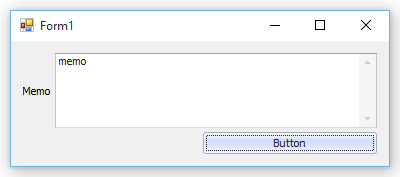
It would be better to prevent the layout item that contains the button from being resized. To perform this at design time, you can use the Context Menu provided by the Layout Control. Also see the Custom Size Constraints topic for information on the menu’s commands related to imposing size constraints on layout items.
Design-Time Example
To lock the item’s size do the following:
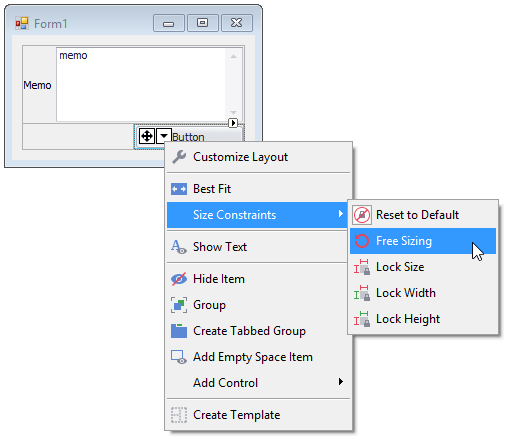
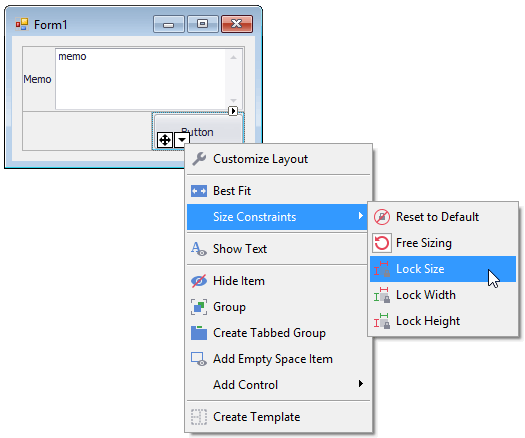
Apply the Free Sizing command to the layout item that contains the button:
Resize this layout item on the form, so that it takes the required size
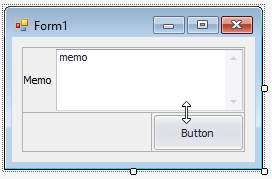
Apply the Lock Size command to this item:
Now when the form is resized the button retains its original size:

Note that the Size Constraints menu is also available at runtime in customization mode. To invoke this mode at runtime an end-user can activate the Customization Form.
Runtime Example
To lock the size of a layout item in code, set the LayoutControlItem.SizeConstraintsType to Custom and then set the layout item’s LayoutControlItem.MaxSize and LayoutControlItem.MinSize properties to the required size. The following code is equivalent to the design-time sample shown above:
// Get the layout item that contains the button.
DevExpress.XtraLayout.LayoutControlItem item = layoutControlItemButton;
// Allow applying custom size constraints.
item.SizeConstraintsType =  DevExpress.XtraLayout.SizeConstraintsType.Custom;
// The new size for the layout item.
Size newSize = new Size(105, 41);
// Set the MaxSize and MinSize properties to newSize and so lock the item's size.
item.MaxSize = newSize;
item.MinSize = newSize;