Lesson 2 - Create a Sunburst and Bind it to Data
- 5 minutes to read
This tutorial explains how to create an application with a sunburst, bind it to data, and configure the sunburst’s center label and colorizer settings.
- Step 1. Create an Application and Add the Sunburst to the Form
- Step 2. Describe Data Objects
- Step 3. Configure a Data Source
- Step 4. Specify the Sunburst’s Data Adapter
- Step 5. Change the Center Label Text
- Step 6. Configure Colorizer Settings
- Result
Step 1. Create an Application and Add the Sunburst to the Form
Run the Microsoft® Visual Studio® 2015 or 2017. Create a Windows Forms project and add the SunburstControl to the Form (see the Steps 1-3 in Lesson 1).
Step 2. Describe Data Objects
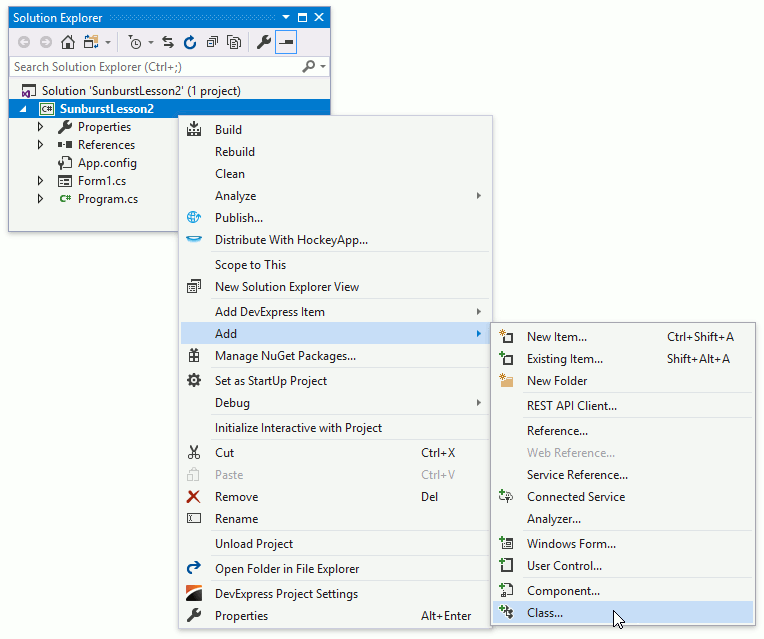
Right-click the project in the Solution Explorer window and select the Add | Class… item.
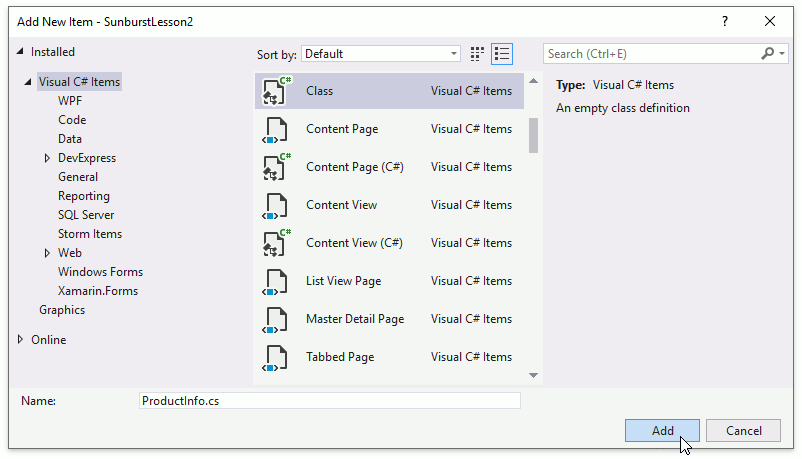
The Add New Item dialog appears.
Specify the class name as ProductInfo.cs in the Add New Item dialog and click Add.
Replace the auto-generated ProductInfo class declaration with the following code.
public class ProductInfo {
    public string Product { get; set; }
    public string Category { get; set; }
    public string Country { get; set; }
    public double Income { get; set; }
}
Step 3. Configure a Data Source
Create the method that returns the data objects list that will be used as the sunburst’s data source. Add the method’s code to the Form class.
List<ProductInfo> CreateProductInfos() {
    return new List<ProductInfo> {
        new ProductInfo {Product = "Wheat",         Country = "China",  Income = 129770, Category = "Cereals"},
        new ProductInfo {Product = "Maize",         Country = "USA",    Income = 370971, Category = "Cereals"},
        new ProductInfo {Product = "Rice",          Country = "China",  Income = 142864, Category = "Cereals"},
        new ProductInfo {Product = "Soybean",       Country = "USA",    Income = 119533, Category = "Oilseeds"},
        new ProductInfo {Product = "Protein meals", Country = "China", Income = 93306,  Category = "Oilseeds"},
        new ProductInfo {Product = "Sugar (tq)",    Country = "India",  Income = 26000,  Category = "Sugar"},
        new ProductInfo {Product = "Sugar beet",    Country = "Russia", Income = 49473,  Category = "Sugar"},
        new ProductInfo {Product = "Sugar cane",    Country = "India",  Income = 384795, Category = "Sugar"},
        new ProductInfo {Product = "Milk",          Country = "India",  Income = 169320, Category = "Dairy"}
     };
}
Step 4. Specify the Sunburst’s Data Adapter
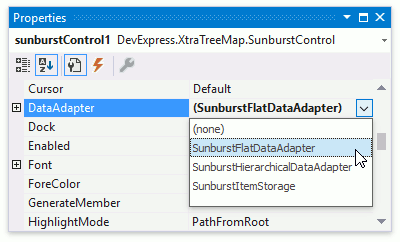
Assign the SunburstFlatDataAdapter to the SunburstControl.DataAdapter property.
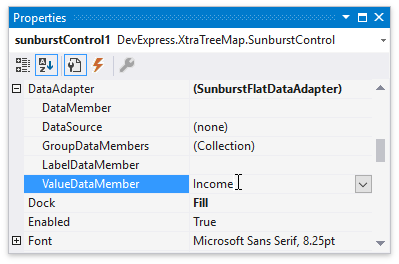
Set the SunburstFlatDataAdapter.ValueDataMember property to Income.
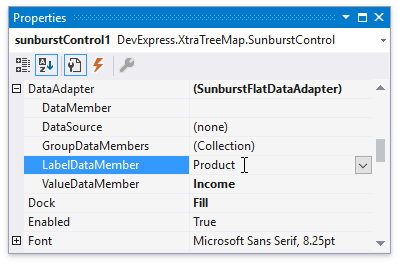
Set the SunburstFlatDataAdapter.LabelDataMember property to Product.
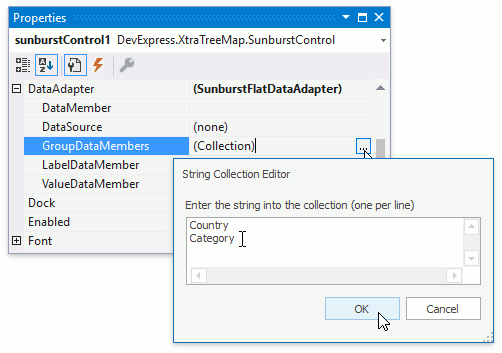
Click the SunburstFlatDataAdapter.GroupDataMembers property’s ellipsis button. In the invoked editor, add the following lines to group products by countries and categories.
Country
Category
In this step, use the CreateProductInfos method (Step 3) to specify SunburstFlatDataAdapter.DataSource. Handle the Form.Load event and change the event handler’s code as follows.
using DevExpress.XtraTreeMap;
// ...
private void Form1_Load(object sender, EventArgs e) {
    SunburstFlatDataAdapter dataAdapter = sunburstControl1.DataAdapter as SunburstFlatDataAdapter;
    if(dataAdapter != null) {
        dataAdapter.DataSource = CreateProductInfos();
    }
}
Step 5. Change the Center Label Text
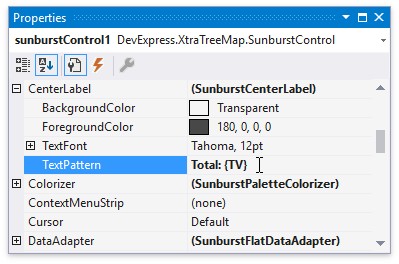
Specify the SunburstCenterLabel.TextPattern property to Total: {TV} to modify the Center Label’s text. The {TV} placeholder allows you to display the sum of top-level item values.
Step 6. Configure Colorizer Settings
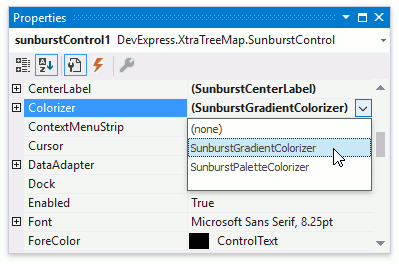
Colorizers automatically provide sunburst items with colors. You use the Gradient Colorizer in this step. Assign SunburstGradientColorizer to the SunburstControl.Colorizer property.
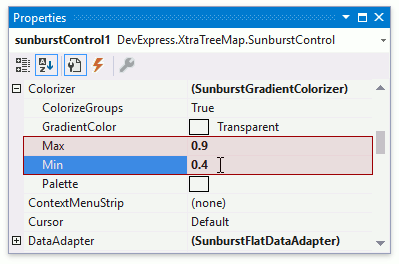
Define how color transparency should change from top-level items to their child items. Set the SunburstGradientColorizer.Max property to 0.9 and SunburstGradientColorizer.Min to 0.4.
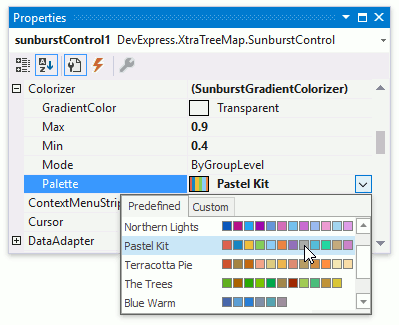
Select the Pastel Kit palette in the SunburstPaletteColorizerBase.Palette property’s drop-down list.
Result
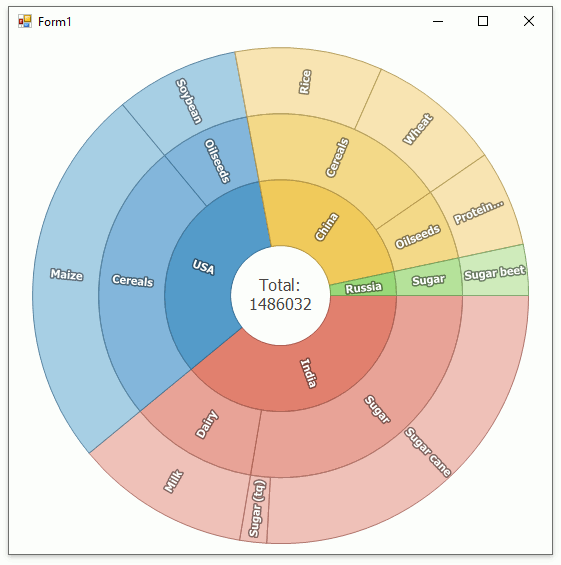
Run the project to see the result.
