Get Started with Blazor Rich Text Editor
- 2 minutes to read
This topic describes how to create a new project or configure an existing project to use a DevExpress Rich Text Editor component.
Create a New Project (DevExpress Templates)
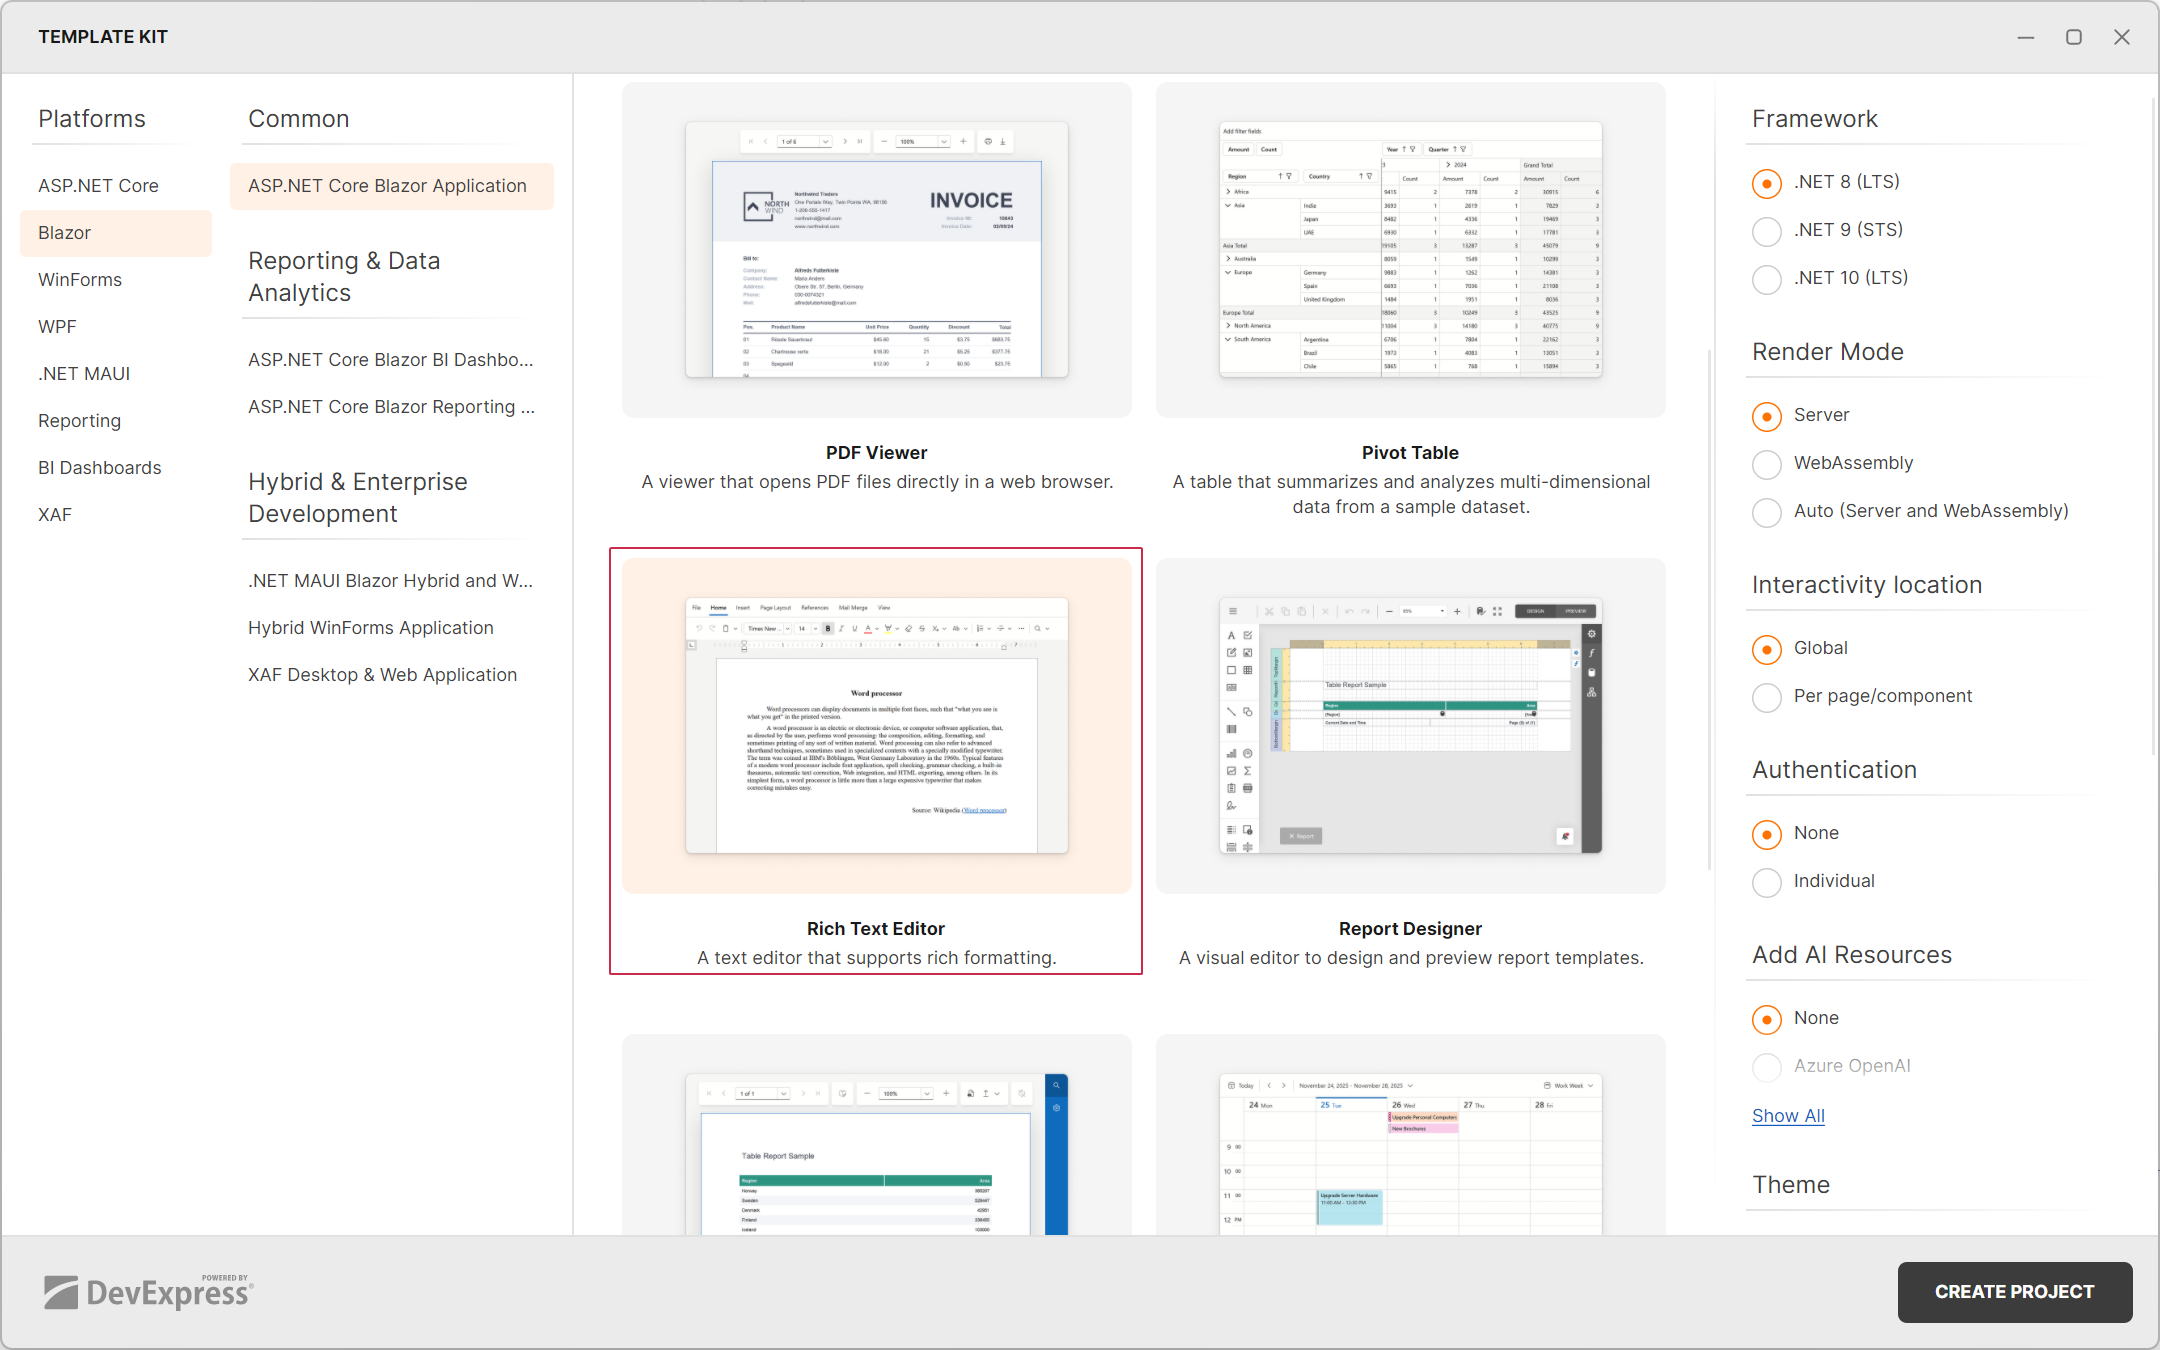
Follow this tutorial to create a Blazor application using the DevExpress Template Kit. To add the Rich Text Editor to the application, choose the correponding option in the Kit.
Configure an Existing Project
Follow the steps below to incorporate the Rich Text Editor into a Blazor app created with a Microsoft template.
1. Register Common DevExpress Resources
Create an application as described in the following topic: Get Started With DevExpress Components for Blazor.
2. Register Rich Text Editor Resources
Install the DevExpress.Blazor.RichEdit NuGet package.
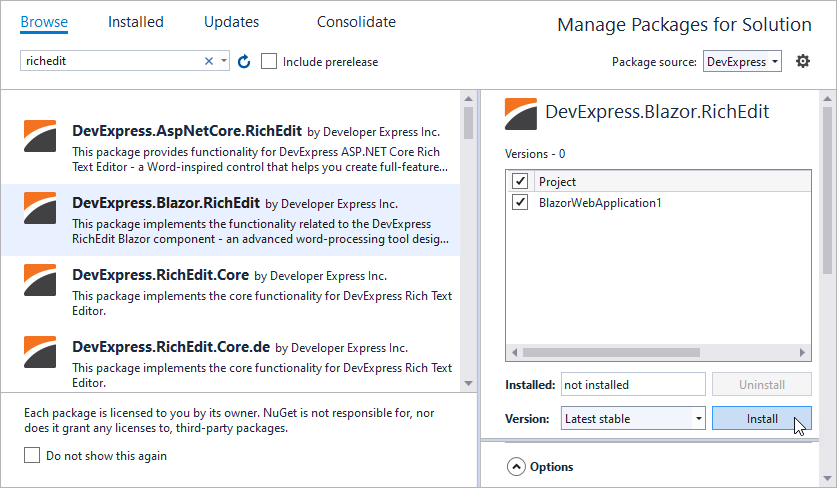
Select Tools → NuGet Package Manager → Manage NuGet Packages for Solution.
In the invoked dialog, open the Browse tab, select the DevExpress package source, and install the DevExpress.Blazor.RichEdit NuGet package.
The DevExpress package is automatically added as a package source to your NuGet configuration files if you use the DevExpress .NET Product Installer.
Register the DevExpress.Blazor.Office and DevExpress.Blazor.RichEdit namespaces in the Components/Imports.razor file:
@using DevExpress.Blazor.Office
@using DevExpress.Blazor.RichEdit
Optional. Set up the Rich Text Editor’s culture. See the following topic for details: Localization.
Note that RichEdit styles are added automatically once you apply a theme.
Add a Rich Text Editor
Add the <DxRichEdit /> tag to the Pages/Index.razor page. Blazor Rich Text Editor does not support static render mode. You need to enable interactivity on a Razor page to allow Blazor Rich Text Editor to execute scripts and display data.
@rendermode InteractiveServer

<DxRichEdit />
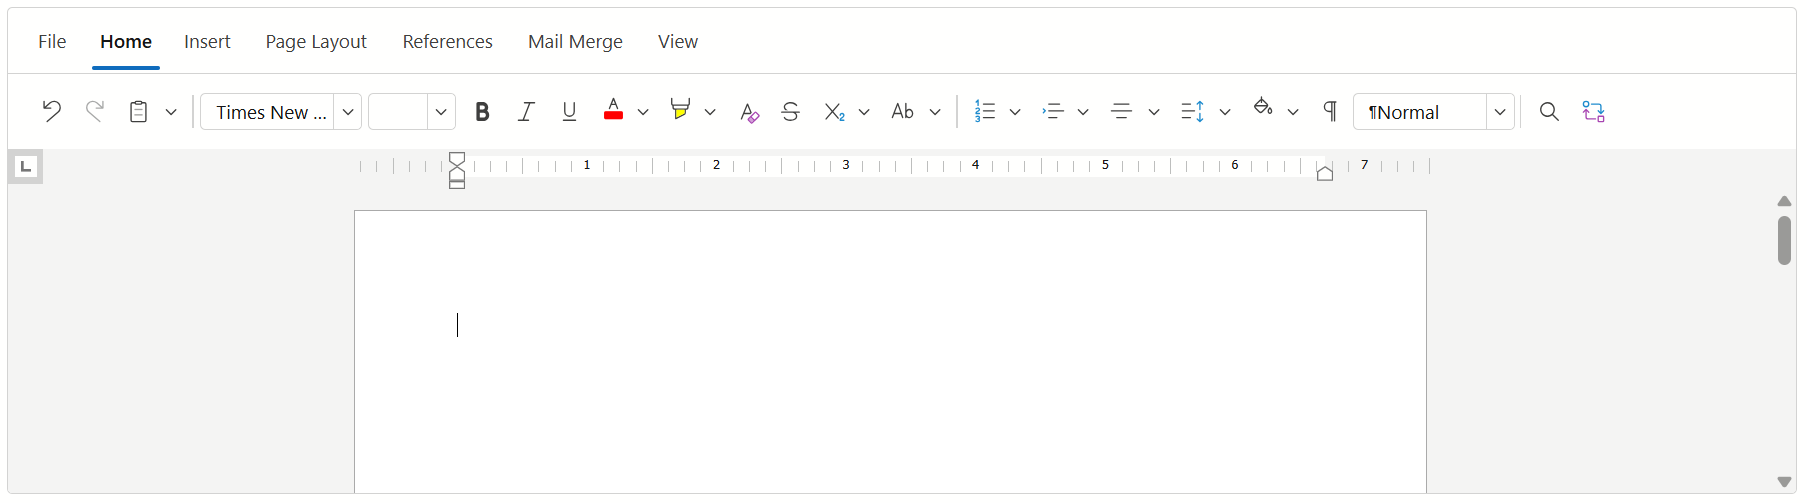
Run the application to see the result: