Tutorial: Creating a Simple Layout
- 7 minutes to read
This tutorial walks through the steps needed to create a simple layout using the Layout Control at design time. It demonstrates how to:
- add controls to the Layout Control;
- arrange them in a specific manner;
- add empty regions to the layout;
- apply size constraints to the controls.
At the end of the tutorial you will find a form that contains a Layout Control with a text editor and two buttons on it.
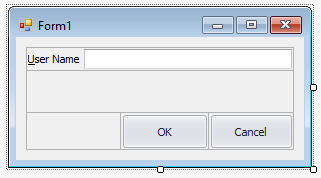
The Layout Control will maintain a consistent arrangement of the controls. Whenever the form is resized or the font settings are changed the controls will never overlap. Adding new controls or removing the existing ones will not damage the layout either.
- Create a new Windows Forms Application project.
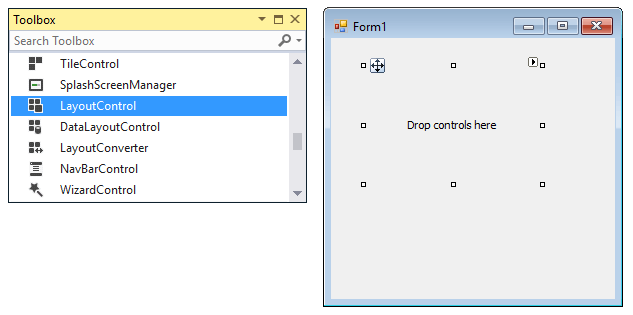
Locate the LayoutControl component within the Toolbox and drop it onto the form.
Tip
When you drop a Layout Control onto a form, it provides a surface to which controls can be added - the root layout group (in the image above the root group displays the “Drop controls here” label).
Controls can be easily added to the LayoutControl at design time using drag-and-drop operations. When a control is dropped, it is automatically wrapped with a layout item and this layout item is added to the root group. From here on, the control’s position, size and dock style are entirely controlled by the parent layout item and you can only change these settings using dedicated properties of the layout item object. Thus, the purpose of layout items is to arrange controls within the LayoutControl and manipulate their size, position, visibility and appearance settings. A layout item can also display a text label next to the embedded control.
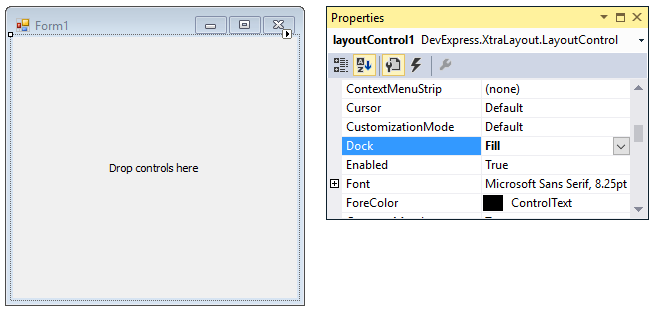
Click the added Layout Control on the form and press the F4 key to open the Properties grid. Then set the LayoutControl’s Dock property to Fill, so that the control occupies the entire form:
Locate the TextEdit control within the ToolBox and drop it onto the LayoutControl.
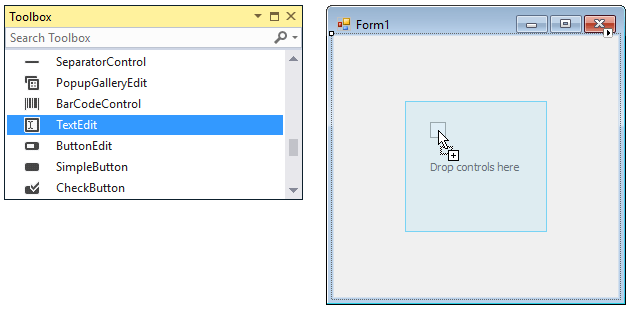
Once the TextEdit control has been dropped a new layout item (layoutControlItem1) is created. The layout item’s caption (“layoutControlItem1”) matches its name by default:
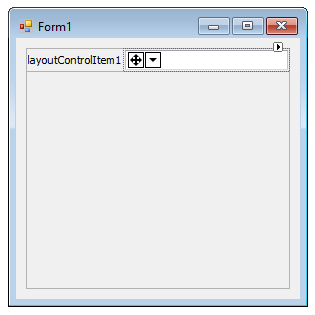
The layout item’s settings can be accessed and modified in the Properties window. Set the item’s Text property to “&User Name”.
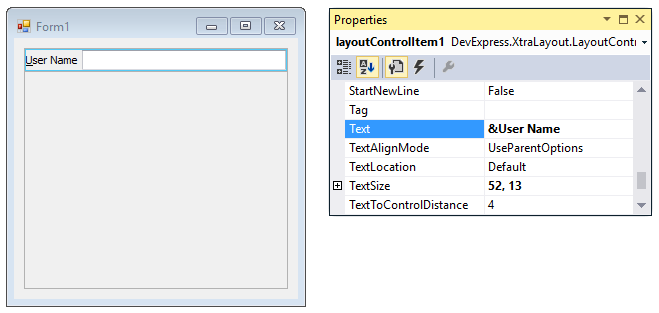
You can see that the first character of the layout item’s label is underscored (as it is preceded with an ampersand). At runtime, this will enable an end-user to quickly move focus to the TextEdit control by pressing the ALT+U shortcut.
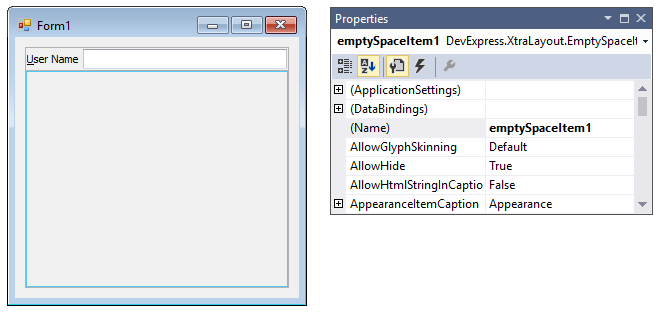
Make note of the automatically created Empty Space Item below the Text Editor. Empty Space Items are resizable items that display nothing. You can use Empty Space Items to add space between items in the Layout Control.
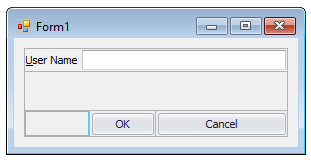
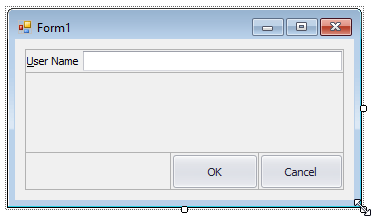
Let’s add two buttons (OK and Cancel) to the LayoutControl. Locate SimpleButton in the ToolBox and drop it onto the Layout Control. Repeat this to add the second button. The final result will look like the image below:
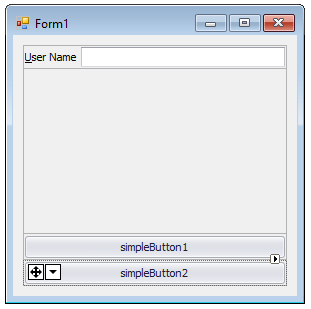
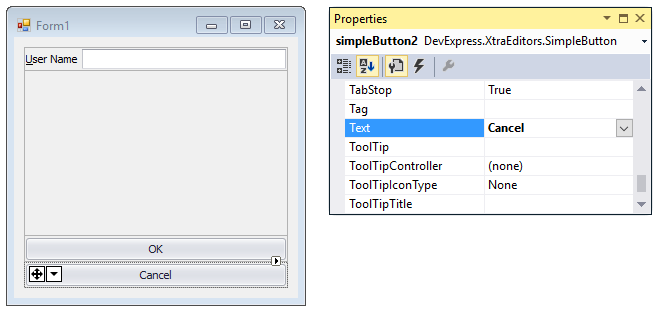
To assign meaningful captions (“OK” and “Cancel”) to the buttons, use their Text properties.
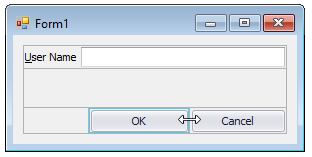
The Cancel button needs to be displayed to the right of the OK button, so it must be moved to this position. The Layout Control allows you to quickly rearrange items at design time using drag-and-drop operations.
Tip
To move any control within the Layout Control at design time, you need to drag and drop its layout item. Do not drag and drop the control itself.
If the layout item’s label is visible, you can drag the layout item by its label.
If a control occupies the layout item almost entirely (for instance, when the item’s label is too small or hidden), it is not easy to grab the layout item to perform drag-and-drop. In this case, click the layout item’s control and then drag the item with the
 icon that will appear.
The following animation shows how to drag the Cancel button using the
icon.
Layout items tend to occupy all available empty space, unless their size constrains prevent free sizing.
Tip
The Layout Control allows you to set size constraints to layout items and their controls. For certain controls (when they reside within the Layout Control) specific size constraints are applied by default. For instance, the default size constraints are applied to the TextEdit and SimpleButton controls. They limit the heights of these controls, but not widths.
Thus, the layout items that display the OK and Cancel buttons are stretched horizontally. These buttons, however, are not vertically resizable due to their default size constraints.
Tip
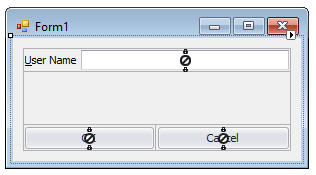
When you select the Layout Control, it will indicate the controls to which size constraints are applied with crossed circle icons.
The resizable Empty Space Item displayed above the buttons anchors these buttons to the bottom of the parent group. You can observe this behavior by resizing the form.
Generally, buttons in a dialog need to be anchored to the form’s right bottom corner. The OK and Cancel buttons are already anchored to the bottom. To anchor them to the right edge, add a resizable Empty Space Item to the left of the OK button. To accomplish this, right-click the Layout Control’s region that is not occupied by embedded controls and select Add Empty Space Item from the Customization Menu.
After the Empty Space Item has been added and moved to the position at the left of the OK button, you may notice that the OK button is shrunk and its width needs to be modified to match the width of the Cancel button.
Use the mouse to resize the OK button.
This step shows how to set a custom size to the buttons and then lock it using the Customization Menu, so that the size of the buttons never changes even if the form is resized.
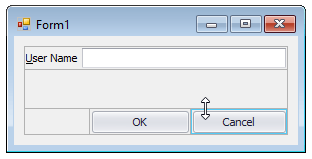
If you try to change the heights of the buttons by dragging the upper edge of their layout items you will have no success, as the default size constraints that are applied to these layout items prevent their heights from being changed.
It’s possible, however, to remove size constraints and apply new ones using dedicated settings of layout items and the Customization Menu.
First, remove the size constraints for the button layout items. Click the OK button and then click the
 icon that will appear. In the Customization Menu that will open select the Size Constraints->Free Sizing command:
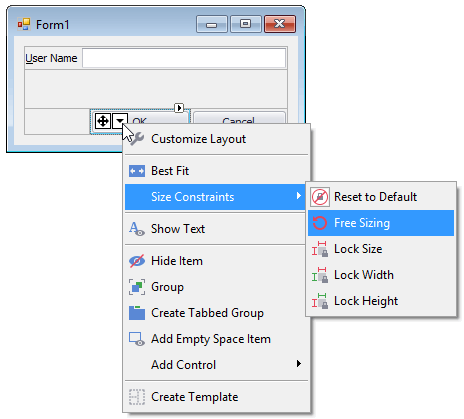
Tip
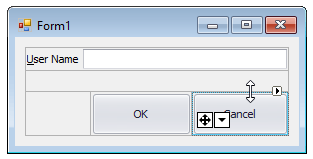
The Customization Menu can also be opened by right-clicking the layout item’s region that is not occupied by the embedded control. However, if the control occupies the layout item almost in its entirety, the
icon is the easiest way to access the Customization Menu.Although the size constraints are now unleashed for the OK button, they are still applied to the Cancel button. So, it’s still impossible to change the height of the OK button that is lined up with the Cancel button. To remove the size constraints for the second button, invoke the Size Constraints->Free Sizing command for its layout item.
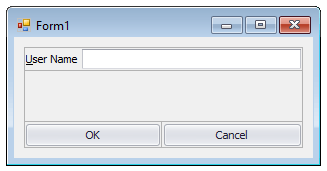
Now, you are able to resize the buttons vertically by dragging the top edge of their layout items:
If you resize the form, the layout items and controls are resized proportionally, while taking size constraints, if any, into account. The following image shows how the layout items are changed when the form gets bigger:
Let’s lock the size of the buttons so that they never resized when the size of the form is changed. To do this, click the OK button and then click
icon that will appear. Select the Size Constraints->Lock Size command from the menu: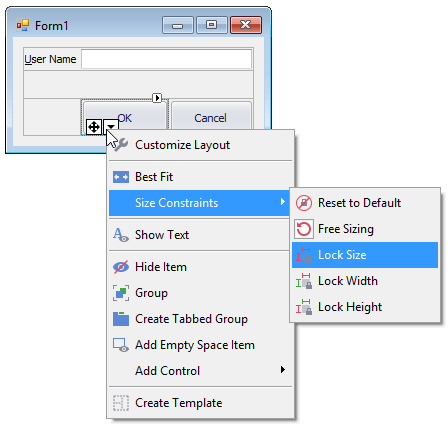
Repeat this for the Cancel button.
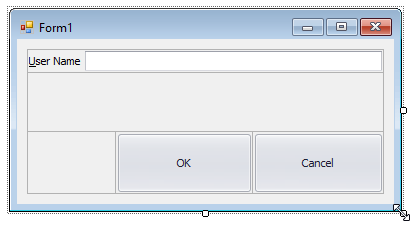
Now, if the form is resized the size of the buttons will not change:
This tutorial has demonstrated the basic principles of working with the LayoutControl. You can try to extend this application by adding new controls to the layout, experiment with size constraints, combine layout items into groups and tabbed groups (using the Customization Menu) and explore the settings of layout items that can be accessed from the Properties grid.