Tutorial: Creating a Simple Data Layout
- 3 minutes to read
This tutorial steps through the process of creating a layout for displaying and editing a table from a data source using DataLayoutControl. It demonstrates how to:
- Connect to a data source and create the initial layout of editors for a data table.
- Arrange the created editors in a specific manner.
- Replace the default editors.
Note
In this tutorial, DataLayoutControl will be bound to the Customers table from the Northwind sample database.
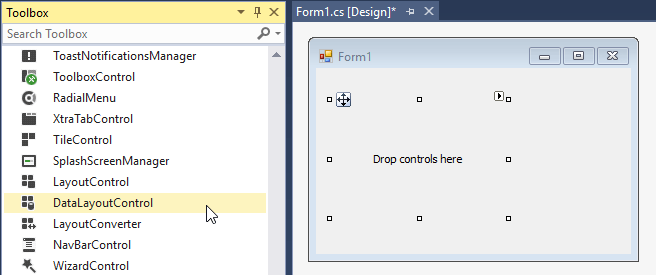
- Create a new Windows Forms Application project.
Locate the DataLayoutControl component in the Toolbox and drop it onto the form.
Click the control’s smart tag.
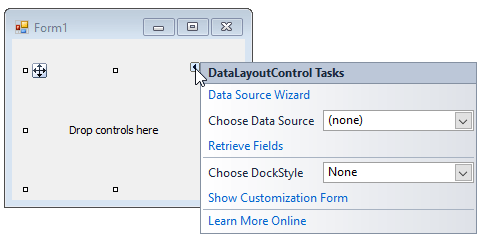
Connect to a data source by using one of three available actions.
- Data Source Wizard - Launches the DevExpress Data Source Configuration Wizard, which allows you to connect to multiple data source types and customize basic options related to the selected data source type.
- Choose Data Source - Invokes the VS data source selection window.
- Retrieve Fields - Invokes the DataLayoutControl’s wizard, which allows you to connect to data, select the fields to retrieve from the data source, and specify editors to display these fields.
In this tutorial, the Retrieve Fields action is used, which invokes the DataLayoutControl’s wizard. The wizard’s first page allows you to select the target data source (or create a new one) and specify layout generation and data source update settings.

Click Next to switch to the next page and select the fields to retrieve from the data source.
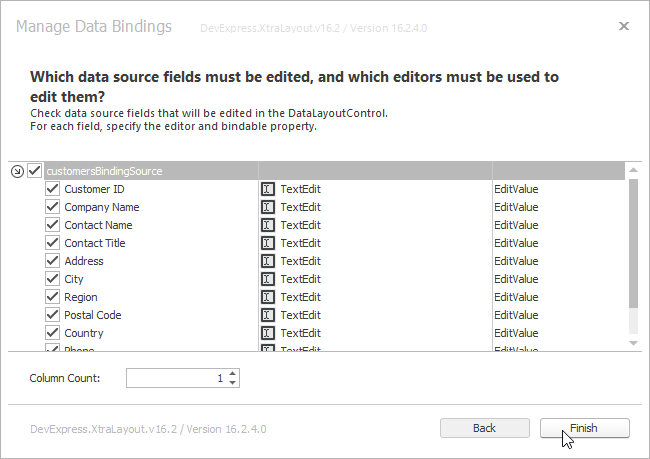
Click Finish to generate the layout.
Tip
The Column Count setting specifies the number of columns for the layout to be generated. If it is set to 1, all created editors will be arranged in a single column.
Tip
At this step, it is possible to change the default editors used to edit field values. In this tutorial, the default editors will be changed later.
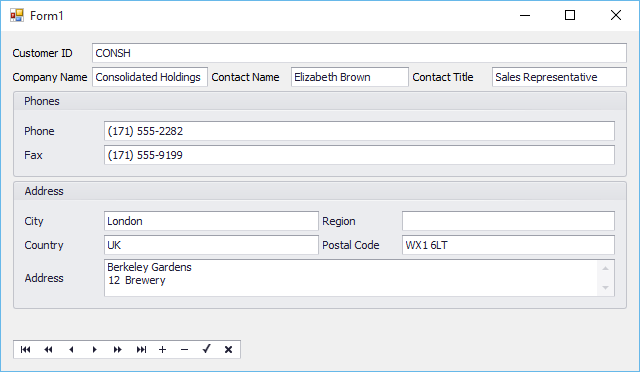
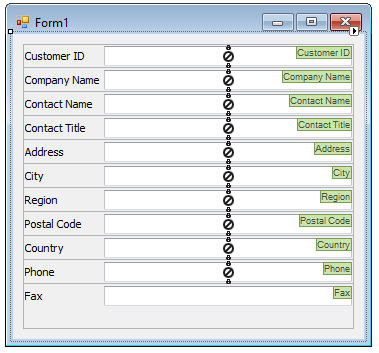
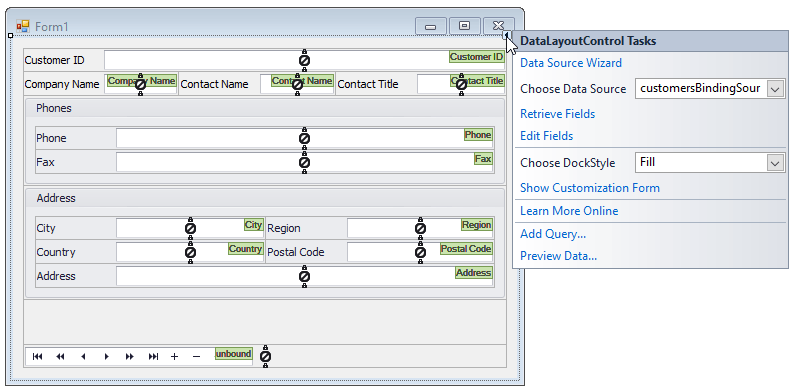
Once the wizard is completed, the DataLayoutControl generates layout items with embedded editors bound to the selected fields.
Customize the layout using the context menu, drag-and-drop and resize operations.
To navigate through the data source records, add the DataNavigator control to the layout and bind it to the target data source.
To anchor the DataNavigator to the bottom of the form, add an Empty Space Item above the DataNavigator.
When the DataLayoutControl generates a layout, it uses certain default editors to present data source fields (for instance, the TextEdit control, which is a single-line text editor, is used to present text fields). When required, you can replace the default controls with other DevExpress editors by clicking the DataLayoutControl’s smart tag and selecting the Edit Fields command.
The invoked Data Source Binding Manager allows you to specify editors and binding properties for all data source fields. The following animation shows how to replace the default editor for the Address field with the MemoEdit control (a multi-line text editor).
Run the application to see the result.