Selection Embedding Settings
- 4 minutes to read
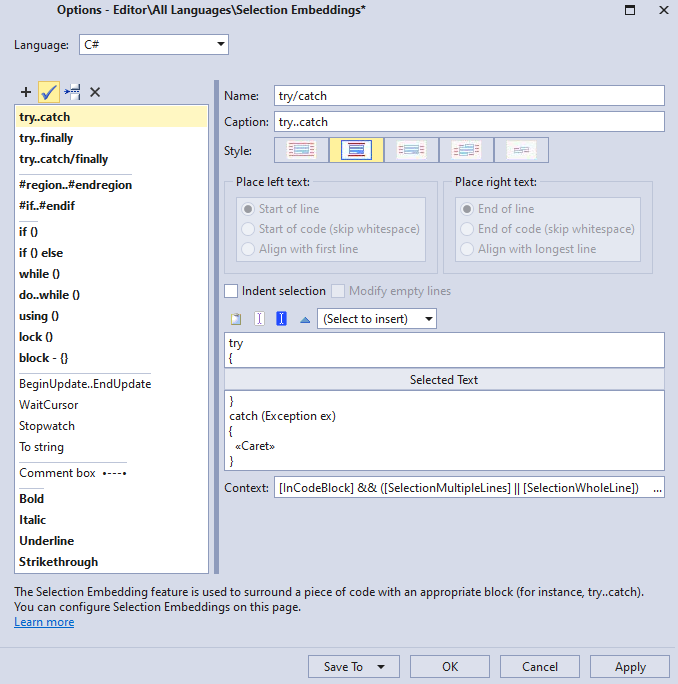
You can access the Selection Embedding settings on the Editor | All Languages | Selection Embeddings options page.

CodeRush includes predefined selection embeddings for C#, Visual Basic, and XAML. You can also extend the embedding list for all supported languages.
Use the “Language” drop-down list to choose the corresponding language.

Embedding Toolbar
You can use the following toolbar buttons to manage embeddings:
“Add a new embedding” - adds an embedding to the list. The new embedding follows the existing selected embedding.

“Visible in the Code Actions (light bulb) menu” - specifies whether a selected embedding is available in the Code Actions menu. For example, this option is initially enabled for the “try…catch” item.

The following screenshot shows the “try…catch” item is visible in the Code Actions menu:

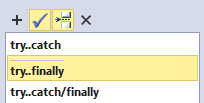
“Start a new group” - specifies whether CodeRush inserts a group delimiter before the selected embedding.

The screenshot below shows the delimiter inserted before the “try..finally” embedding:

“Delete the selected embedding” - deletes the selected embedding from the list.

Embedding Options
The selection embeddings configuration page includes the following options:

Name
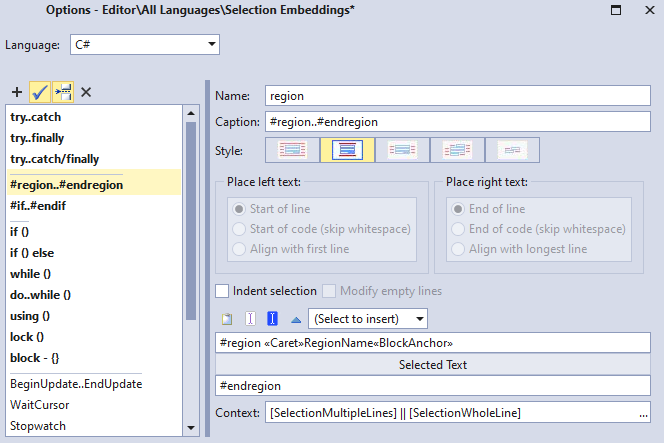
Specifies the embedding name. You can use the embedding name as a parameter for the SelectionEmbed command in the Shortcuts options page when you specify a shortcut for the embedding. The following screenshot shows the Ctrl + 3 shortcut settings:

The Ctrl + 3 shortcut is used to embed a selection between the #region and #endregion directives and it also selects the region name placeholder.
Caption
Specifies the embedding caption that CodeRush shows in the Code Actions menu when you select the Embed Selection code provider.

Style
Specifies the position of the embedded text within generated code. You can choose one of the following values:
| Icon | Description |
|---|---|
 |
Text or code can be placed at the top, bottom, and on the left and on the right of the selection. You can use “Place Left Text” and “Place Right Text” options to specify the left and right text positions. |
 |
Text or code can be placed above and below the selection. |
 |
Text or code can be placed to the right and to the left of each line of a selection. You can use “Place Left Text” and “Place Right Text” options to specify the left and right text positions. |
 |
Text or code can be placed at the beginning and end of the selected lines, and to the left and right of each selected line. You can use “Place Left Text” and “Place Right Text” options to specify the left and right text positions. |
 |
Text or code can be placed at the beginning and at the end of selected lines. |
Place Left Text
This option specifies the position of the text placed to the left of a string. The available values are:
- Start of line - places the text at the start of a code line.
- Start of code (skip whitespace) - places the text right before another code and skips the whitespace characters.
- Align with first line - aligns the text with the text of the first selected line.
Note
CodeRush can apply code style formatting to this setting.
Place Right Text
This option specifies the position of the text placed to the right of a string. The available values are:
- End of line - places the text at the end of a code line.
- End of code (skip whitespace) - places the text at the end of code and skips the whitespace characters.
- Align with longest line - aligns the text with the longest line.
Indent Selection
Specifies whether CodeRush adds an indent to the right of the embedding.
Modify Empty Lines
Specifies whether CodeRush changes empty lines and lines with text.
Embedding Editor
This editor allows you to customize embedding code.

You can use context menu to insert text commands and string providers into the embedding code.
The editor’s toolbar allows you to access to the following text commands:
The “(Select to insert)” combo box allows you to insert other text commands in the code embedding.
Context
This setting specifies the conditions when a selection embedding is available.

Click the ellipsis button to open the “Select Context Provider” dialog. This dialog allows you to choose a context provider and insert it in the embedding code.
