Make a List View Editable
- 2 minutes to read
In this lesson, you will learn how to make a List View editable. For this purpose, the DemoTask List View will be used.
Note
Before proceeding, take a moment to review the following lessons.
Invoke the Model Editor for the MySolution.Module project. Navigate to the Views | MySolution.Module.BusinessObjects | DemoTask_ListView node. It defines the List View that is used for DemoTask objects with the properties to the right. In the AllowEdit property’s dropdown list, select “True”. When this property is set to “True”, the List View is editable.
When List Views are displayed in edit mode, you can apply the NewItemRow functionality of the XtraGrid that displays ListViews in XAF applications. This functionality allows end-users to create new objects directly in a List View without a Detail View. To add this functionality, set the NewItemRowPosition property to Top or Bottom.

Tip
In ASP.NET applications, there are several modes for editing. To set the required mode, use the IModelListViewWeb.InlineEditMode property in the Model Editor invoked for the MySolution.Module.Web project. Various edit modes are illustrated in the List View Edit Modes topic (ASP.NET-Specific Functionality section).
Run the WinForms or ASP.NET application and edit one of the DemoTask objects within the List View.

To edit one of the DemoTask objects in an ASP.NET application, click Edit(
 ) or click New(
 ) to create a new Task.
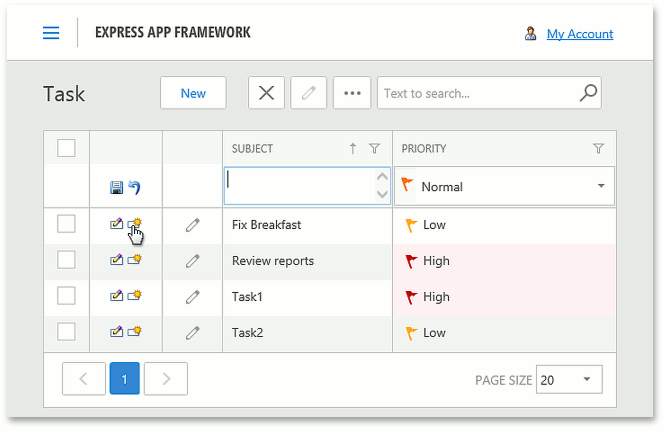
In a WinForms application, to save the changes made to an object, click the Save (
 ) or SaveAndClose (
 ) button on the toolbar. To cancel the changes, click the Cancel (
 ) button.
In the ASP.NET application, to save changes, click Update (
). To cancel the changes, click Cancel ().
Note
You can set the edit mode in code. To do this, apply the DefaultListViewOptionsAttribute attribute to the DemoTask class.
To see the changes made in this lesson, invoke the Model Editor for the Main Demo’s MainDemo.Module, MainDemo.Module.Win and MainDemo.Module.Web projects. The MainDemo application is installed in %PUBLIC%\Documents\DevExpress Demos 18.2\Components\eXpressApp Framework\MainDemo by default. The ASP.NET version of this demo is available online at https://demos.devexpress.com/XAF/MainDemo.
Next Lesson: Add a Preview to a List View