Assign a Custom Image
- 3 minutes to read
In this lesson, you will learn how to associate a business class with a custom image. This image will represent the class in the navigation control, including detail and list form headers. For this purpose, the Contact class will be used. By default, it is associated with the image of its ancestor (the Person class). You will provide a custom image for the Contact class.
Note
Before proceeding, take a moment to review the following lessons.
In the Solution Explorer, navigate to the Images folder in MySolution.Module project. XAF loads images from this folder.
If you are reading this tutorial online, you can right-click the images below and save them to the Images folder using the “Save As“ command in your browser (e.g., “Save picture as…“ in Internet Explorer).
Save the following image as \MySolution.Module\Images\Employee.png (if you are building a Visual C# application) or as \MySolution.Module\Images\MySolution.Module.Images.Employee.png (if you are building a Visual Basic application).

Save the next image as MySolution.Module\Images\Employee_32x32.png (if you are building a Visual C# application) or as \MySolution.Module\Images\MySolution.Module.Images.Employee_32x32.png (if you are building a Visual Basic application).

If you are reading a PDF version or a hard copy of this tutorial, you can use custom image files, or get them, for instance, from the %PROGRAMFILES(x86)%\DevExpress 18.2\Components\Sources\DevExpress.Images\Images folder.
Note
- The “_32x32” suffix is important, since XAF uses this suffix to search for a larger image.
- In Visual Basic, capitalize “Images”.
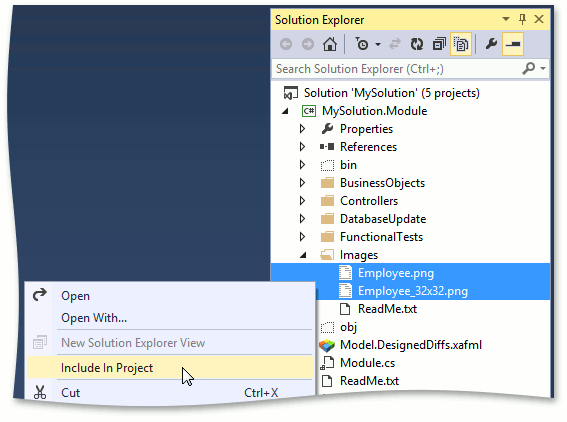
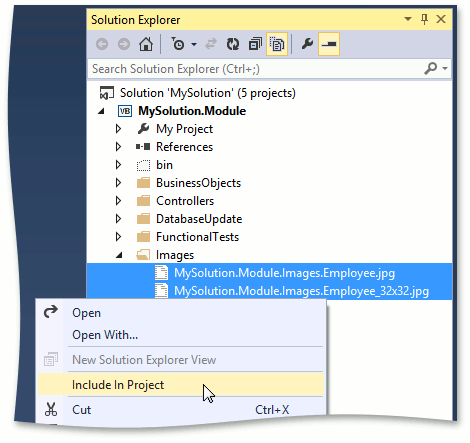
In Solution Explorer, click the Show All Files (
 ) toolbar button. Select the images in the Images subfolder, right-click the selection, and choose Include In Project.
C#
Visual Basic
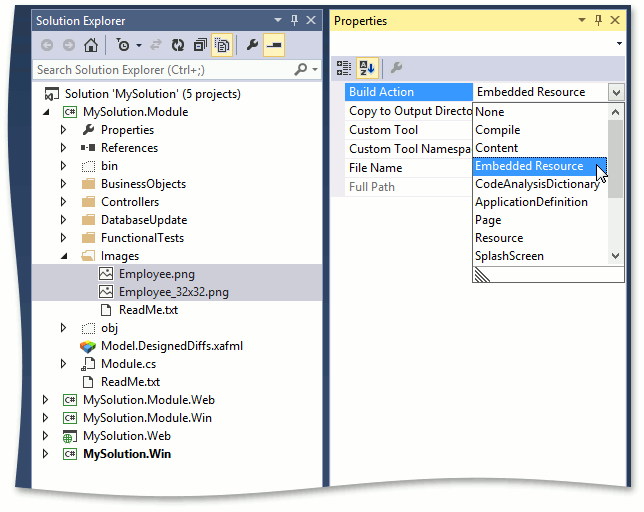
Select both images and switch to the Properties window. Set the Build Action option to Embedded Resource.
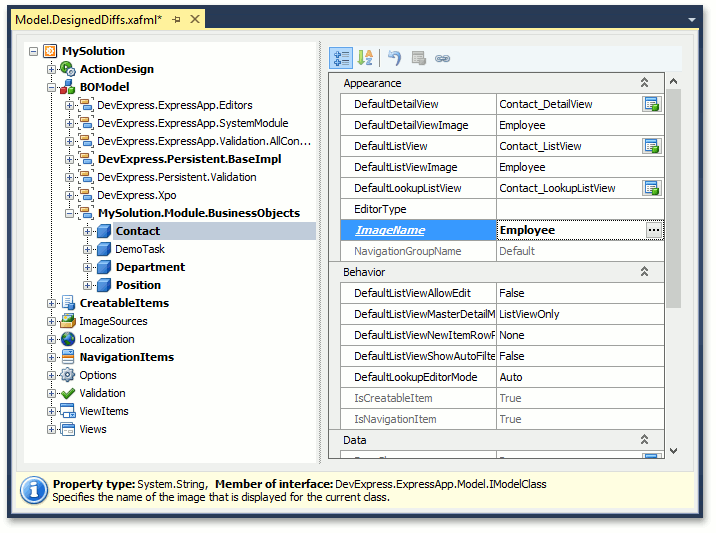
Invoke the Model Editor. Navigate to the BOModel | MySolution.Module.BusinessObjects | Contact node and set its ImageName property to “Employee”.
Note
- When the ImageName property is focused, the ellipsis button (
 ) is displayed to the right of the property value. You can click this button to invoke the Image Picker dialog and browse the available images.
 - You can use the ImageNameAttribute to specify an image in code.
- When the ImageName property is focused, the ellipsis button (
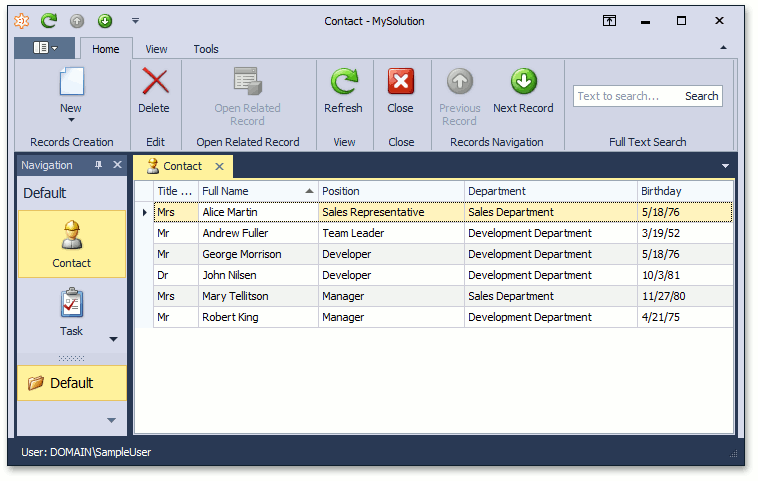
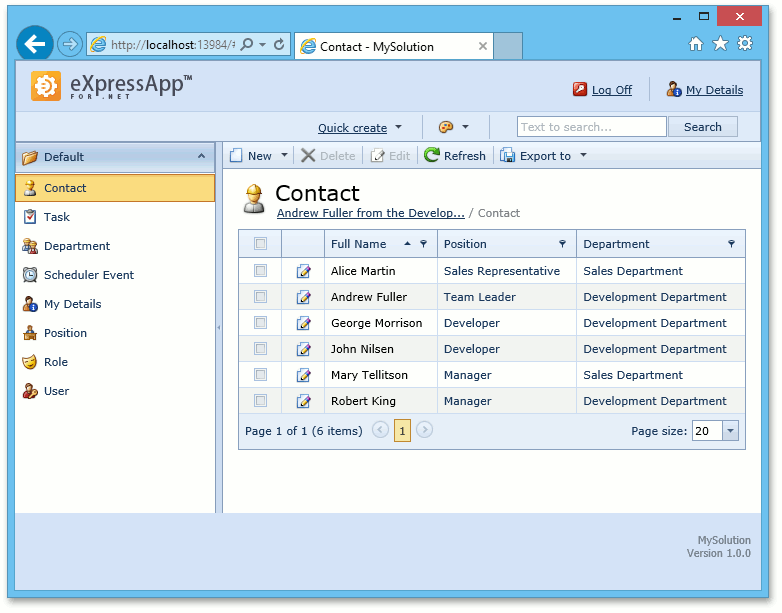
Run the application. Notice that the Contact navigation item now has a custom image assigned.
WinForms Application
ASP.NET Application
You can see the changes made in this lesson in the Main Demo | MainDemo.Module project. The MainDemo application is installed in %PUBLIC%\Documents\DevExpress Demos 18.2\Components\eXpressApp Framework\MainDemo by default. The ASP.NET version of this demo is available online at https://demos.devexpress.com/XAF/MainDemo.
Next Lesson: Make a Property Calculable