Specify Action Settings
- 3 minutes to read
In this lesson, you will learn how to modify Action properties. The ClearTasks Action will be used. To see how the Action was implemented, refer to the Add a Simple Action lesson. In this lesson, you will add a tooltip, confirmation message and shortcut to it.
Note
Before proceeding, take a moment to review the following lessons.
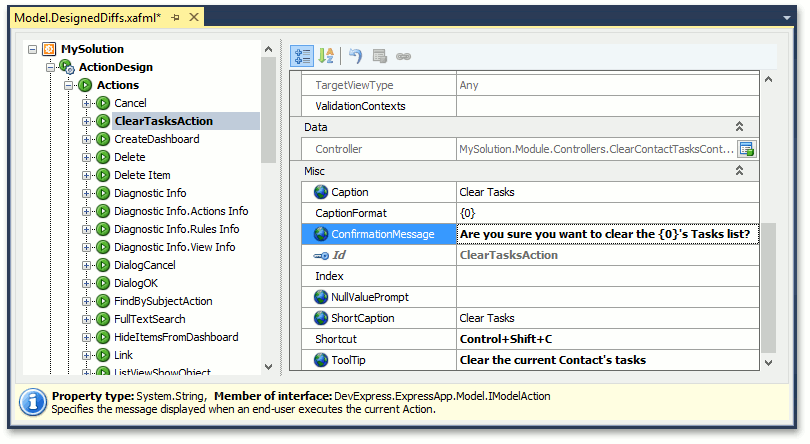
- Since the ClearTasksAction is implemented in the common application module, you can specify its properties directly in this module. To do this, invoke the Model Editor by double-clicking the Model.DesignedDiffs.xafml file in the MySolution.Module project:
- In the Model Editor, navigate to the ActionDesign | Actions node. Locate the ClearTasksAction node. To the right, the Action’s settings are represented by properties. These properties are separated into collapsible categories.
Navigate to the Misc category. By default, the Tooltip property is set to Caption. Set it to “Clear the current Contact’s tasks” instead. Set the Shortcut property to “Control+Shift+C”, to specify a shortcut for the Action. Note that the specified shortcut will be displayed along with the Tooltip property value in the Action’s tooltip. By default, the ConfirmationMessage property is set to the Action’s ActionBase.ConfirmationMessage property value, which is specified in code. Replace this value with “Are you sure you want to clear the {0}’s Tasks list?”. The “{0}” format item will be substituted with the object’s default property value. A property can be specified as default via the DefaultProperty property of the BOModel | <Class> node in the Model Editor. Alternatively, the DefaultProperty attribute can be applied to the property’s business class declaration.
Note
Shortcuts are defined by simple strings that you need to type manually. The IModelAction.Shortcut property is used to parse the strings. Note that shortcuts will only work in a WinForms application.
The current object identifier will be inserted into the confirmation message if the Action’s SelectionDependencyType property is not set to “Independent”. So, assign the “RequireSingleObject” value to the SelectionDependencyType property. This property belongs to the Behavior category. You can also set this property to “RequireMultipleObjects”. In this case, the count of selected objects will be substituted to the confirmation message.
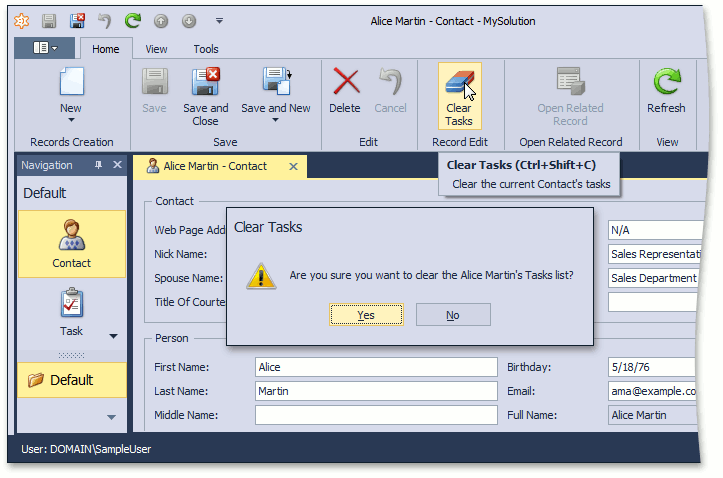
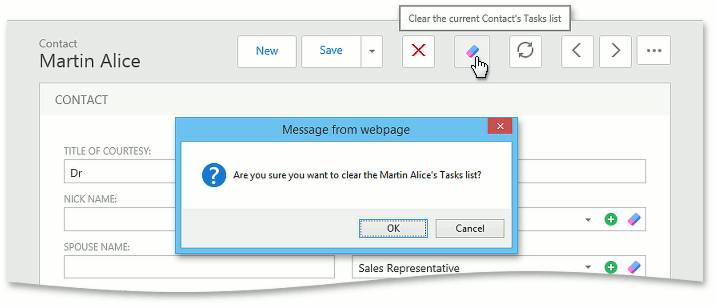
- Run the WinForms or ASP.NET application and invoke the Detail View of any object, by double-clicking an existing one or creating a new one. Check to see if the Clear Tasks button has the required tooltip, can be executed via the specified shortcut, and a confirmation message with the specified text is invoked.
WinForms Application
ASP.NET Application
Note
You can also set an image for an Action. For details, refer to the Assign a Custom Image topic.
You can see the changes made in this lesson in the Model Editor invoked for the Model.DesignedDiffs.xafml file, located in the Main Demo | MainDemo.Module project. The MainDemo application is installed in %PUBLIC%\Documents\DevExpress Demos 18.2\Components\eXpressApp Framework\MainDemo by default. The ASP.NET version of this demo is available online at https://demos.devexpress.com/XAF/MainDemo.
Next Lesson: Format a Business Object Caption