Manage Table Structure
- 2 minutes to read
Insert Table Elements
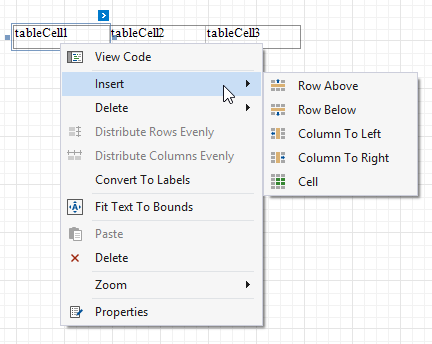
You can use the Insert context menu items to add new rows, columns and cells. The added cells inherit the source cells’ size and appearance settings.

-
Inserts a row above the current cell and shifts the existing rows up if there is enough space above the table (otherwise, shifts the existing rows down).

-
Inserts a row below the current cell and shifts the existing rows down. This command increases the band height to accommodate all the rows if there is not enough space under the table.

-
Inserts a new column to the left of the current cell and shifts the leftmost columns to the left (otherwise, shifts these columns to the right).

-
Inserts a new column to the right of the current cell and shifts the rightmost columns to the right. This command decreases all columns’ width proportionally to accommodate all the columns if there is not enough space to the right of the table.

-
Divides the current cell width in half and inserts a new cell to the right.

Delete Table Elements
Use the Delete context menu items to remove table elements.

-
Deletes a row and shifts the existing rows up.

-
Deletes a column and shifts the existing columns to the left.

-
Deletes a table cell and stretches the previous cell to occupy the remaining space. If this cell is the first in the row, the next cell is stretched.

Manage Table Structure in the End-User Report Designer
Tutorials that explain how to use different report elements in EUD Report Designers for WinForms and Web are included in the End-User Documentation online help section: