Creating Nodes at Design Time
In Unbound Mode, you have to create the hierarchical structure (a tree) manually. This can be done at design time via the Nodes Editor dialog.
You can invoke this dialog by clicking:
- the ellipsis button corresponding to the Nodes property in the Properties window;
- the Nodes… link at the bottom of the Properties window;
- the Nodes… link in the ASPxTreeView Tasks menu.
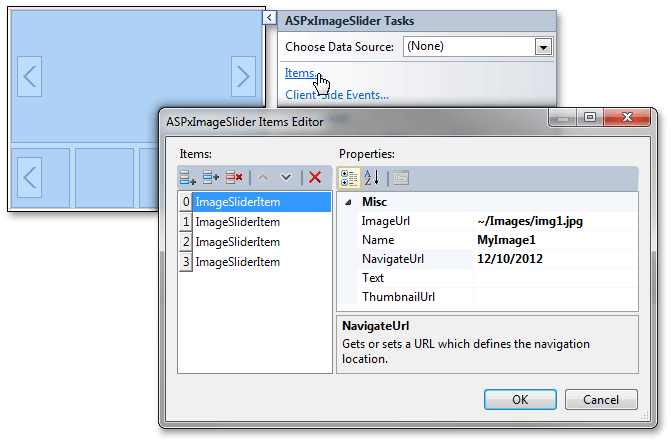
The Nodes Editor dialog allows you to add, delete and rearrange nodes, change node parents, access and customize node settings. The dialog is shown in the image below.
The code below demonstrates how you can create nodes in unbound mode.
        <dx:ASPxTreeView ID="ASPxTreeView1" runat="server" ClientIDMode="AutoID">
            <Nodes>
                <dx:TreeViewNode Text="Inbox">
                </dx:TreeViewNode>
                <dx:TreeViewNode Text="Outbox">
                </dx:TreeViewNode>
                <dx:TreeViewNode Text="Sent Items">
                </dx:TreeViewNode>
                <dx:TreeViewNode Text="Deleted Items">
                </dx:TreeViewNode>
                <dx:TreeViewNode Text="Search Folder">
                    <Nodes>
                        <dx:TreeViewNode Text="Categorized Mail">
                        </dx:TreeViewNode>
                        <dx:TreeViewNode Text="Large Mail">
                        </dx:TreeViewNode>
                    </Nodes>
                </dx:TreeViewNode>
            </Nodes>
        </dx:ASPxTreeView>
The Nodes Editor dialog displays the preview in which you can see a tree being created. When the OK button is clicked, the aspx code that adds the created node structure is generated. The code is listed below.
You can create nodes directly in aspx file, writing a similar code.
The following image shows the result.
