Lesson 7 - Bind the RichEditControl to a Document Source using the MVVM pattern
- 5 minutes to read
The following topic describes how to load a document from a database to the RichEditControl using the Model-View-ViewModel design pattern.
- Create a RichEditControl
- Create a Data Model
- Create a ViewModel
- Specify Bindings in XAML
- Run the Project
Create a RichEditControl
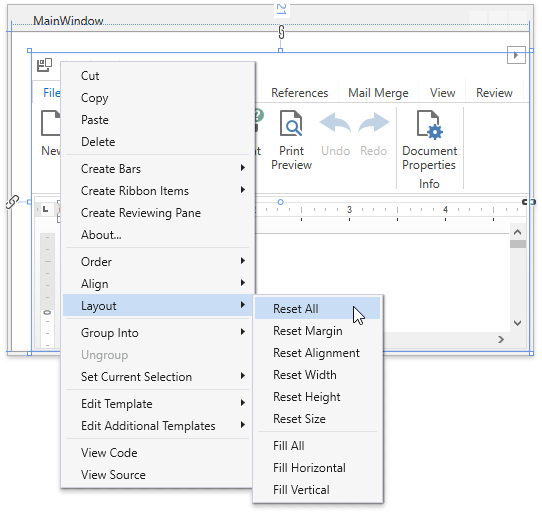
Find the DevExpress 18.2 : Rich Text Editor group on the Toolbox and drop the RichEditControl on the form. Right-click the control and select Layout > Reset All.
- The RichEditControl comes with a built-in ribbon containing all related items. You can disable the ribbon or create only specific ribbon tabs using the RichEditControl’s smart tag. Refer to the Lesson 1 - Create a Simple Rich Text Editor and Lesson 5 - Create Separate Ribbon Pages for a Rich Text Editor topics for more information.
Create a Data Model
In this example, the data model is created from the DevExpress Cars.mdf data source using the Entity Framework Code First from an Existing Data Base approach. Refer to the Entity Framework Code First to an Existing Database topic on MSDN for an example on how to define a data model using this approach.
Note
Make sure that the Entity Framework package is added to Visual Studio before creating a Data Model. Refer to the Get Entity Framework article for details on how to install the Entity Framework package.
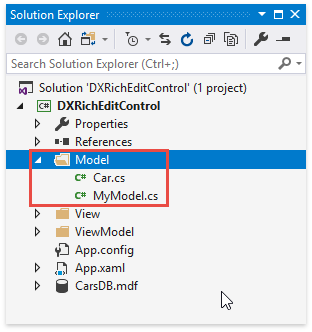
As a result, the Car and MyModel classes are added to the project and moved to the Model folder. The MyModel class is a DBContext class descendant which allows you to query and save entity class instances. The Car class represents an individual database table. It provides the RtfContent property whose value is used as a document source.
Create a ViewModel
Add a new folder to your project. Right-click the project’s name in the Solution Explorer and select Add > New Folder. Change the folder name to ViewModel.
Add a MainViewModel class. In the Solution Explorer, right-click the ViewModel folder and select Add > Class…. In the invoked Add New Item window, assign the MainViewModel name to the class.
Add the following code to handle data interaction:
- Declare Car and MyModel classes’ objects to obtain the data model and a specific data entry.
- Create a DatabaseDocumentSource property used to bind the document from a database to the RichEditControl.
- In the ViewModel constructor, load and fill the data model using the Load method, retrieve the first database entry and set the created DatabaseDocumentSource property to the data object’s RtfContent property value.
Note
A complete sample project is available at https://github.com/DevExpress-Examples/how-to-bind-the-richeditcontrol-to-a-document-source-using-the-mvvm-pattern-t611845.
Private carsModel As MyModel
Private car As Car

Public Overridable Property DataBaseDocumentSource() As Object
Public Sub New()
    'Load the database
    carsModel = New MyModel()
    carsModel.Cars.Load()
    'Use the rtf content from the first database entry
    'and pass it to the DataBaseDocumentSource property
    car = carsModel.Cars.Local(0)
    DataBaseDocumentSource = car.RtfContent
End Sub
Save Changes To the Database
The RichEditControl.DocumentSource property allows you to bind documents loaded from a database to the RichEditControl. However, this approach does not save changes made to the document back to database. To save the changes, access the current document content and use it as a new RtfContent property value. In this example, we implement a custom command which saves changes to the database. The command is executed on a button click.
Follow the steps below to accomplish this task.
Create a new currentText object and implement an UpdateRtfText method which updates the currentText value.
Note
A complete sample project is available at https://github.com/DevExpress-Examples/how-to-bind-the-richeditcontrol-to-a-document-source-using-the-mvvm-pattern-t611845.
Private currentText As String Public Sub UpdateRtfText(ByVal text As String) Me.currentText = text End SubCreate CanSave and Save methods used as CanExecute and Execute command methods. Implement these methods as shown in the code sample below:
Note
A complete sample project is available at https://github.com/DevExpress-Examples/how-to-bind-the-richeditcontrol-to-a-document-source-using-the-mvvm-pattern-t611845.
Public Sub Save()
    'Access the table entry by its model name
    Dim newCar As Car = carsModel.Cars.Where(Function(d) d.Model = "SL500 Roadster").First()

    'Set its Rtf property to the current content
    newCar.RtfContent = currentText
    carsModel.SaveChanges()

    'Reset the current content
    currentText = Nothing
End Sub
Public Function CanSave() As Boolean
    Return currentText IsNot Nothing
End Function
Specify Bindings in XAML
Note
The DevExpress binding mechanisms use a special language described in the Language Specification topic.
Declare the ViewModel and Devexpress.MVVM namespaces.
xmlns:dxmvvm="http://schemas.devexpress.com/winfx/2008/xaml/mvvm"
xmlns:ViewModels="clr-namespace:DXRichEditControl.ViewModel"
Use the ViewModelSource to bind the ViewModel to the DataContext property as follows:
DataContext="{dxmvvm:ViewModelSource Type={x:Type ViewModels:ViewModel}}">Bind the UpdateRtfText method to the RichEditControl.ContentChanged event using the DXEvent binding mechanism to update the currentText object every time the document changes. Use the RichEditControl.RtfText property as the UpdateRtfText method parameter to retrieve the text in RTF format.
Note
A complete sample project is available at https://github.com/DevExpress-Examples/how-to-bind-the-richeditcontrol-to-a-document-source-using-the-mvvm-pattern-t611845.
<dxre:RichEditControl CommandBarStyle="Ribbon"
                      DocumentSource="{Binding DataBaseDocumentSource}"
                      ContentChanged="{DXEvent '@DataContext.UpdateRtfText(@Self.RtfText)'}">
Create a new Save to the Database ribbon item. Refer to the Lesson 6 - Customize the Integrated Ribbon UI topic for details on how to create a new item in the built-in ribbon.
Bind the button’s command property to the CanSave and Save methods using the DXCommand binding mechanism as shown below:
Note
A complete sample project is available at https://github.com/DevExpress-Examples/how-to-bind-the-richeditcontrol-to-a-document-source-using-the-mvvm-pattern-t611845.
<dxb:InsertAction Index="2" ContainerName="{x:Static dxre:DefaultBarItemNames.RibbonGroup_File_Common}">
    <dxb:BarButtonItem Content="Save to the Database"
                       LargeGlyph="{dx:DXImageOffice2013 Image=Save_32x32.png}"
                       Command="{DXCommand Execute='Save()', CanExecute='CanSave()'}">
    </dxb:BarButtonItem>
</dxb:InsertAction>
Run the Project
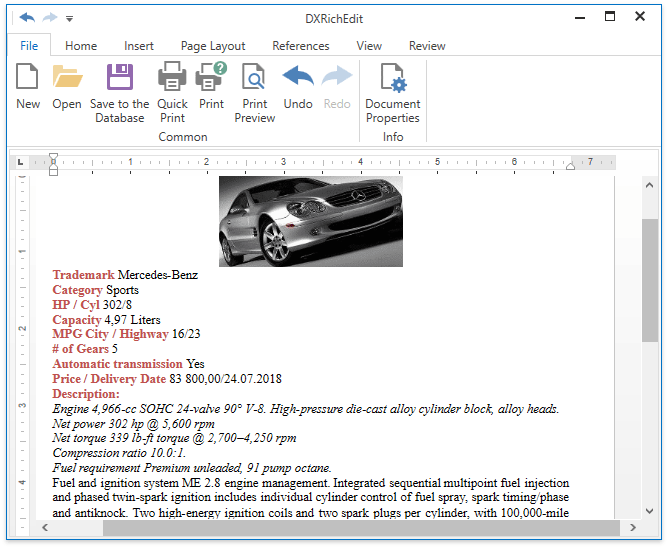
Run the application to see the Rtf content in the RichEditControl. The Save To The DataBase ribbon button becomes available when making changes to the document.