Table Layout Dialogs
- 3 minutes to read
RichEditControl provides a number of dialogs, which allow end-users to work with tables: insert new tables into the document, as well as insert, delete and split individual cells of existing tables.
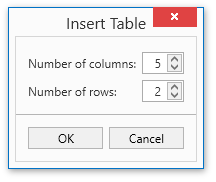
Insert Table
The Insert Table dialog allows end-users to insert a new table with the specified number of rows and columns into a document.
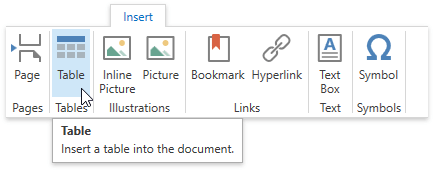
End-users can invoke this dialog by clicking Table on the Insert ribbon tab. Refer to the Lesson 1 - Create a Simple Rich Text Editor topic for details on how to create the Ribbon UI for the RichEditControl. Executing the InsertTableCommand command invokes this dialog as well.
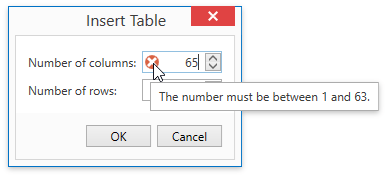
The maximum number of rows in the RichEditControl table is 32767, the maximum number of columns is 63. If an end-user enters the number of rows or columns that exceed the limit, an error icon appears, as shown below.
Also, you can programmatically insert a new table into the document. To do this, call the TableCollection.Create API method.
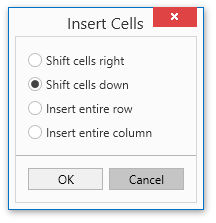
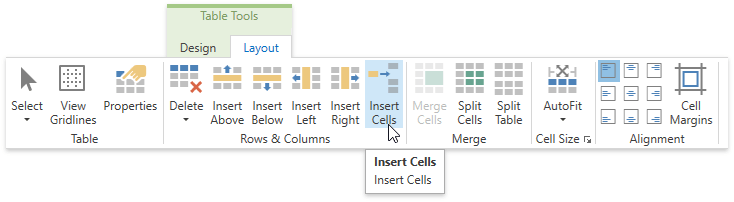
Insert Cells
The Insert Cells dialog enables end-users to insert a cell into the existing table and select the way to adjust table cells.
End-users can invoke this dialog by clicking Insert Cells on the Table Tools | Layout ribbon tab…
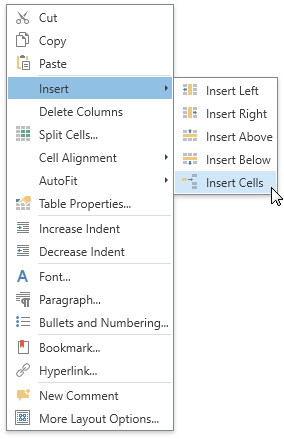
…or from the context menu by selecting Insert > Insert Cells.
Refer to the Lesson 1 - Create a Simple Rich Text Editor topic for details on how to create the Ribbon UI for the RichEditControl. Executing the ShowInsertTableCellsFormCommand command invokes this dialog as well.
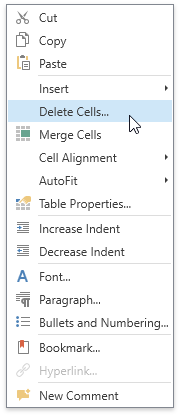
Delete Cells
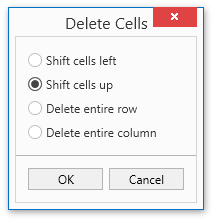
The Delete Cells dialog enables end-users to delete particular cells form a table and select a way of adjusting table cells.
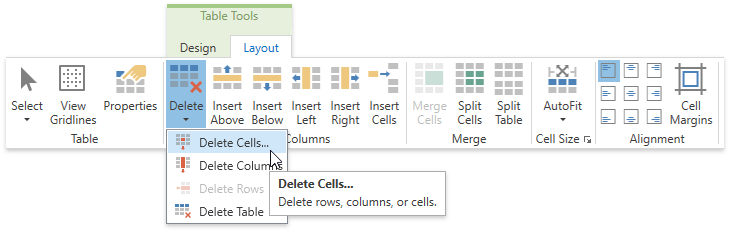
End-users can invoke this dialog by clicking Delete on the Table Tools | Layout ribbon tab and selecting Delete Cells item from the invoked drop-down menu. Refer to the Lesson 1 - Create a Simple Rich Text Editor topic for details on how to create the Ribbon UI for the RichEditControl. Executing the ShowDeleteTableCellsFormCommand command invokes this dialog as well.
The dialog is also available from the context menu.
Split Cells
The Split Cells dialog enables end-users to split the selected cells into the specified number of rows and columns.
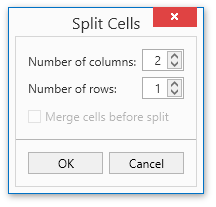
End-users can invoke this dialog by clicking Split Cells on the Table Tools | Layout ribbon tab…
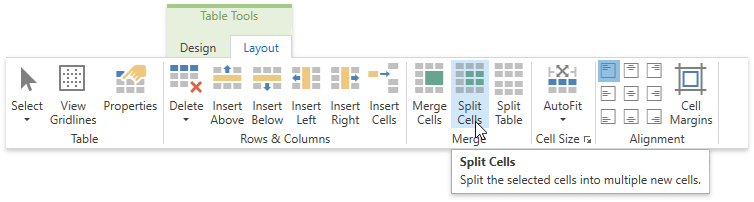
… or from the context menu.
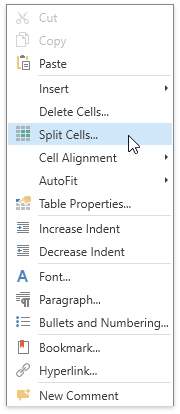
Refer to the Lesson 1 - Create a Simple Rich Text Editor topic for details on how to create the Ribbon UI for the RichEditControl. Executing the ShowSplitTableCellsFormCommand command invokes this dialog as well.