Lesson 1 - Create a Simple Rich Text Editor
- 4 minutes to read
This document describes how to use the WPF Rich Text Editor to create a simple word processing application.
Create a New RichEdit Application
.NET Framework
Create a new WPF App (.NET Framework) project and open the MainWindow.xaml file in the Visual Studio Designer.
Add the RichEditControl object to your project. Drag the RichEditControl item from the DX.20.2: Rich Text Editor Toolbox tab to the canvas.
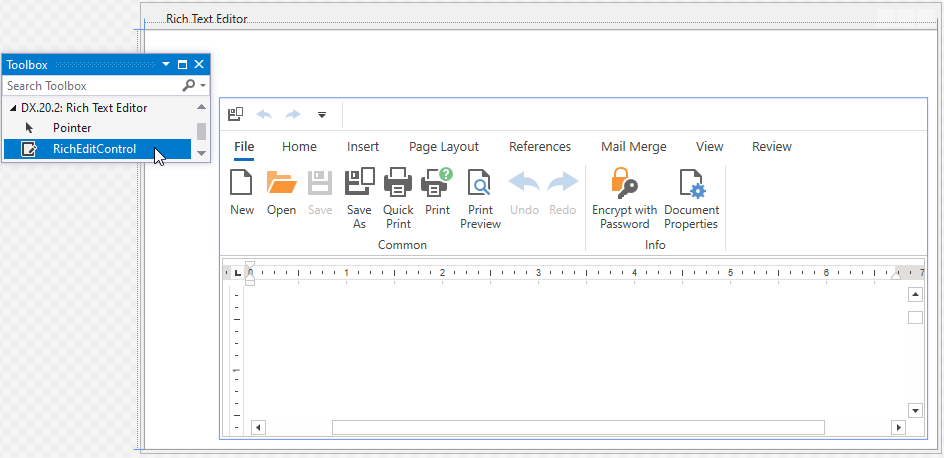
Right-click the RichEditControl object and select Layout | Reset All in the context menu to stretch the RichEditControl to fill the entire window.
After this, your XAML appears as follows:
<Window xmlns="http://schemas.microsoft.com/winfx/2006/xaml/presentation"
        xmlns:x="http://schemas.microsoft.com/winfx/2006/xaml"
        xmlns:d="http://schemas.microsoft.com/expression/blend/2008"
        xmlns:mc="http://schemas.openxmlformats.org/markup-compatibility/2006"
        xmlns:local="clr-namespace:WpfApplication1"
        xmlns:dxre="http://schemas.devexpress.com/winfx/2008/xaml/richedit"
        x:Class="WpfApplication1.MainWindow"
        mc:Ignorable="d"
        Title="MainWindow" Height="350" Width="525">
    <Grid>
        <dxre:RichEditControl CommandBarStyle="Ribbon"/>
    </Grid>
</Window>
You can also overwrite your MainWindow.xaml file with the code above to add the Rich Text Editor control to your application. In this case, add references to the following libraries:
- DevExpress.Data.v20.2.dll
- DevExpress.Data.Desktop.v20.2.dll
- DevExpress.Mvvm.v20.2.dll
- DevExpress.Office.v20.2.Core.dll
- DevExpress.Pdf.v20.2.dll
- DevExpress.Printing.v20.2.Core.dll
- DevExpress.RichEdit.v20.2.Core.dll
- DevExpress.Images.v20.2.dll
- DevExpress.Xpf.Core.v20.2.dll
- DevExpress.Xpf.Docking.v20.2.dll
- DevExpress.Xpf.DocumentViewer.v20.2.dll
- DevExpress.Xpf.Layout.v20.2.Core.dll
- DevExpress.Xpf.Office.v20.2.dll
- DevExpress.Xpf.Printing.v20.2.dll
- DevExpress.Xpf.Ribbon.v20.2.dll
- DevExpress.Xpf.RichEdit.v20.2.dll
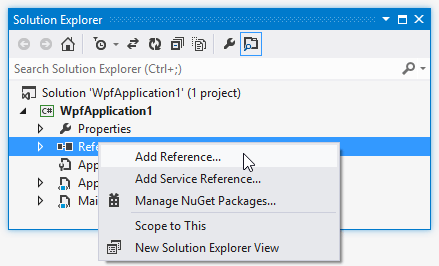
To add references, right-click the References node in the Solution Explorer and select Add Reference… in the invoked context menu. Refer to the Redistribution and Deployment article for a full list or required assemblies.
.NET Core / .NET 5
Open Visual Studio 2019 and create a new WPF Application (.NET Core) project.
The Rich Text Editor requires Windows Forms assemblies. Right-click the project in the Solution Explorer, select Edit Project File and set the
UseWindowsFormskey totrue:<Project Sdk="Microsoft.NET.Sdk"> <PropertyGroup> <OutputType>WinExe</OutputType> <TargetFramework>net5.0-windows</TargetFramework> <UseWPF>true</UseWPF> <UseWindowsForms>true</UseWindowsForms> </PropertyGroup> </Project>Add the DevExpress.WindowsDesktop.Wpf.RichEdit package to your project.
Drag the RichEditControl item from the DX.20.2: Rich Text Editor Toolbox tab to the canvas. After this, your XAML should appear as follows:
<Window xmlns="http://schemas.microsoft.com/winfx/2006/xaml/presentation"
        xmlns:x="http://schemas.microsoft.com/winfx/2006/xaml"
        xmlns:d="http://schemas.microsoft.com/expression/blend/2008"
        xmlns:mc="http://schemas.openxmlformats.org/markup-compatibility/2006"
        xmlns:local="clr-namespace:WpfApplication1"
        xmlns:dxre="http://schemas.devexpress.com/winfx/2008/xaml/richedit"
        x:Class="WpfApplication1.MainWindow"
        mc:Ignorable="d"
        Title="MainWindow" Height="350" Width="525">
    <Grid>
        <dxre:RichEditControl CommandBarStyle="Ribbon"/>
    </Grid>
</Window>
Remove the Integrated Ribbon
The newly created WPF Rich Edit application has an integrated ribbon UI. If you do not require ribbon UI, you can remove it by doing one of the following:
Click the RichEditControl’s smart tag. In the invoked menu, under Integrated Ribbon and Reviewing Pane, select Empty from the CommandBarStyle drop-down list.
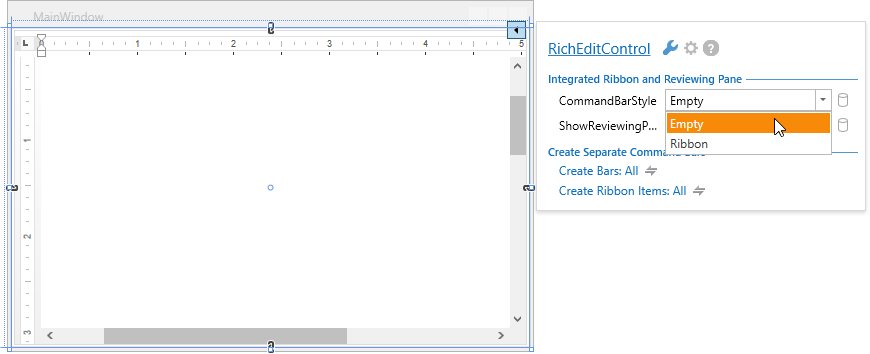
- In XAML, set the RichEditControl.CommandBarStyle property to CommandBarStyle.Empty, or remove it from the markup.
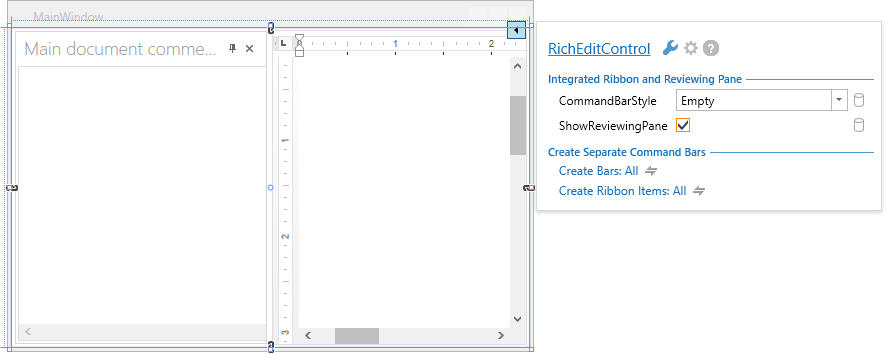
Add Reviewing Pane
Click the RichEditControl’s smart tag and check ShowReviewingPane box to provide the application with the built-in Reviewing Pane.
Load a Document
You can use the RichEditControl.DocumentSource property to load a document in XAML. Documents can be loaded from a stream, byte array or from a location specified by the full file path or Uri. An empty document is created if the RichEditControl.DocumentSource property is null.
The following code snippet uses a pack Uri as a document source to load a sample document that was added to the root of current project as a resource file:
<Grid>
    <dxre:RichEditControl CommandBarStyle="Ribbon"
                        DocumentSource="pack://application:,,,/WpfApplication1;component/Document.docx"/>
</Grid>
In this example, WpfApplication1 is the name of the WPF project, and Document.docx is the loaded document.
Run the project. The image below shows the result.

Change the Application’s Appearance
Change the application’s theme
The WPF Rich Text Editor control uses the Office2019Colorful theme by default, so the DevExpress.Xpf.Themes.Office2019Colorful.v20.2.dll library should be deployed to the client machine. Refer to the Theme List topic for a list of available themes and corresponding assemblies.
Do one of the following to apply a different theme to your application:
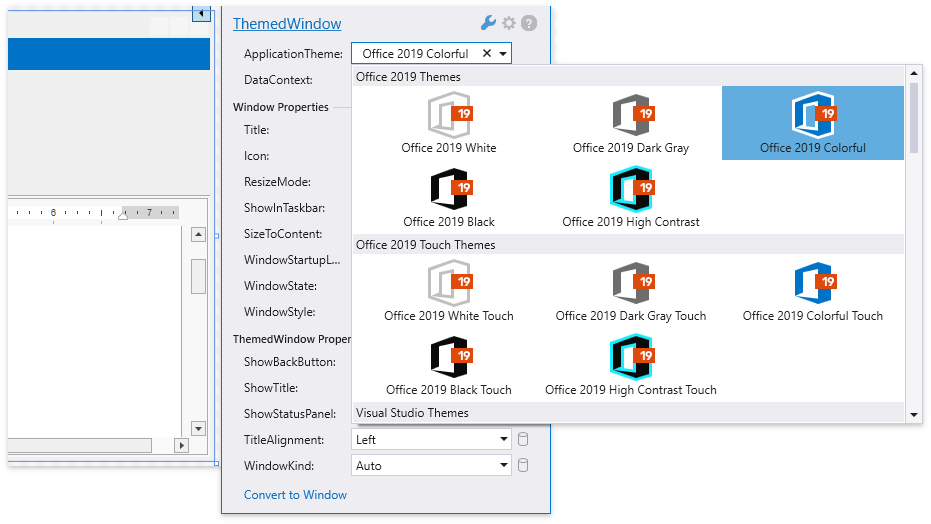
Click the ThemedWindow‘s smart tag, and select a desired theme from the ApplicationTheme drop-down menu.
Set the required theme in code via the ApplicationThemeHelper.ApplicationThemeName property:
Apply a theme to the RichEditControl’s container (e.g., window) using the ThemeManager.ThemeName property:
<dx:ThemedWindow ...
xmlns:dx="http://schemas.devexpress.com/winfx/2008/xaml/core"
dx:ThemeManager.ThemeName="Office2016Colorful">
...
</dx:ThemedWindow>
Use bitmap or vector icons
The WPF Rich Text Editor application with an integrated ribbon uses vector icons by default, which ensures that the application is rendered correctly on high-DPI devices.
Set the ApplicationThemeHelper.UseDefaultSvgImages property to false at application startup to use bitmap icons everywhere in your WPF application’s GUI:
using System.Windows;
using DevExpress.Xpf.Core;

public partial class App : Application
{
    protected override void OnStartup(StartupEventArgs e)
    {
        ApplicationThemeHelper.UseDefaultSvgImages = false;
        base.OnStartup(e);
    }
}
The following images illustrate the standard WPF RichEditControl’s ribbon UI with default vector and bitmap icons.
SVG Icons
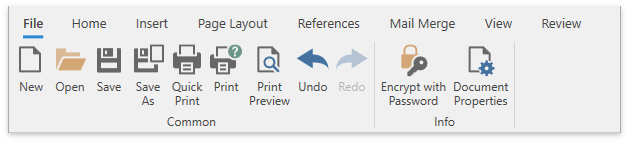
Bitmap Icons
