Fixture Editor
- 2 minutes to read
The Fixture Editor allows you to view and modify a fixture. To open the editor, double-click the fixture label in the Explorer panel.
The editor consists of the following parts:
The toolbar - Provides information about the fixture (name and tested webpage URL) and buttons to perform common tasks.
You can click the webpage’s URL to open the linked page in the browser.
The test list - Displays tests included in the fixture. You can click a test’s row to open the test in the Test Editor.

Common Tasks
Record New Tests
Click ![]() Record a new test on the editor’s toolbar to start recording a new test and add it to the fixture.
Record a new test on the editor’s toolbar to start recording a new test and add it to the fixture.
Run the Fixture or Single Test
Click the ![]() Run all tests button on the editor’s toolbar to run the entire fixture.
Run all tests button on the editor’s toolbar to run the entire fixture.
To run a single test, hover the mouse cursor over the test’s row and click ![]() Run test displayed to the right of it.
Run test displayed to the right of it.
Create an Empty Test
Click Create a new test on the editor’s toolbar to add an empty test to the fixture.
Navigate to a Hook
The Fixture Editor displays the before each and after each items if this fixture contains a corresponding hook. You can click them to navigate to this hook.

Convert the Fixture to JavaScript
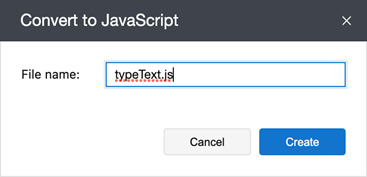
Click Convert to JavaScript Code on the editor’s toolbar to convert the fixture to a .js file. This invokes the Convert to JavaScript dialog that allows you to specify the file’s name.

TestCafe Studio creates the test file in the same test directory and displays it in the Explorer panel.
Modify the Fixture’s Properties
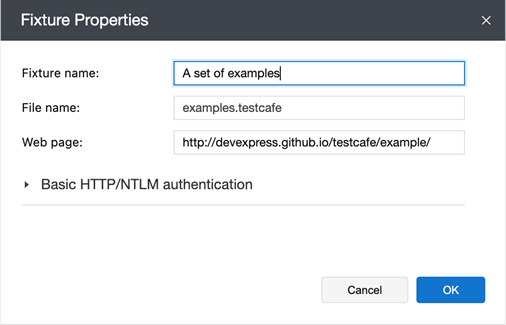
Click on the editor’s toolbar to modify the fixture’s properties. This invokes the Fixture Properties dialog where you can change the fixture name, file name, target webpage, and authentication credentials. To save the changes, click OK.

Delete Tests and Hooks
Click Remove all tests on the editor’s toolbar to delete all tests in this fixture. This does not remove hooks.
To delete a single test or hook from the fixture, hover the mouse cursor over the row and click the Remove test/hook button.