Filter List Views
- 3 minutes to read
This lesson describes three techniques used to filter a List View. Filters will be applied to the Contact List View.
Note
Before you proceed, take a moment to review the following lessons:
- Inherit from the Business Class Library Class (XPO/EF core)
- Implement Custom Business Classes and Reference Properties (XPO/EF core)
- Set a One-to-Many Relationship (XPO/EF)
- Place an Action in a Different Location
- Filter Lookup Editor Data Source
Activate a Filter Action
This technique allows end-users to apply predefined filters to a List View.
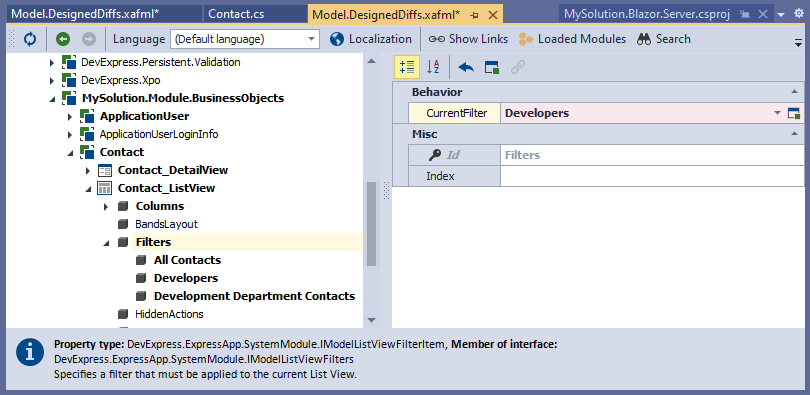
In the MySolution.Module project, open the Model.DesignedDiffs.xafml file in the Model Editor. Navigate to the Views | MySolution.Module.BusinessObjects | Contact_ListView node. Right-click the Filters child node and select New | ListViewFilterItem. For the new node, set the Id property to Development Department Contacts. Set the Criteria property to
[Department.Title] = 'Development Department'.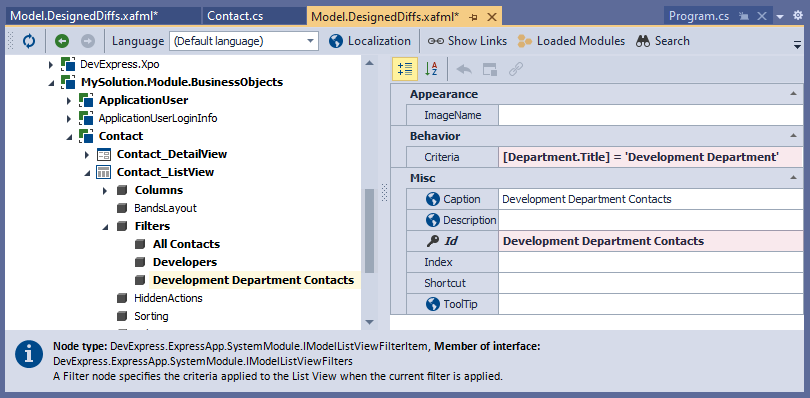
It is necessary to use the Criteria Language Syntax to specify Criteria properties. See the following help topic for more information: Criteria Language Syntax. You can also invoke the Filter Builder dialog to simplify the process used to create the filter criteria. Click the ellipsis button (
 ) to the right of the Criteria value. Within this dialog, you can visually design a criteria expression.
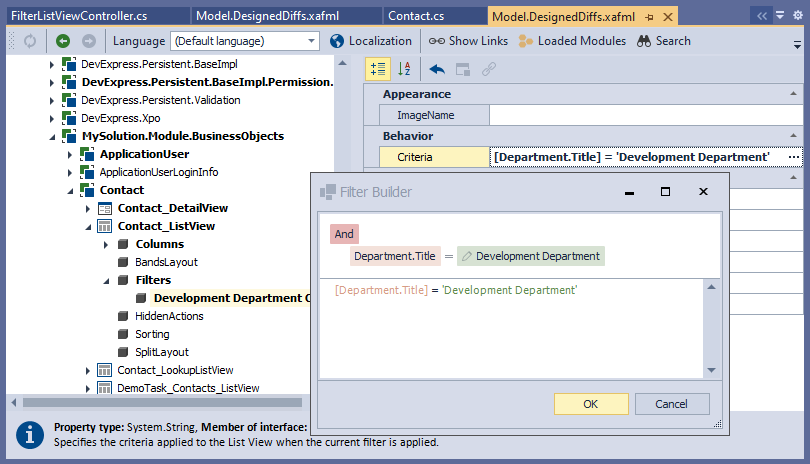
Add another child node to the Filters node. Set the Id property to Developers and the Criteria property - to
[Position.Title] = 'Developer'.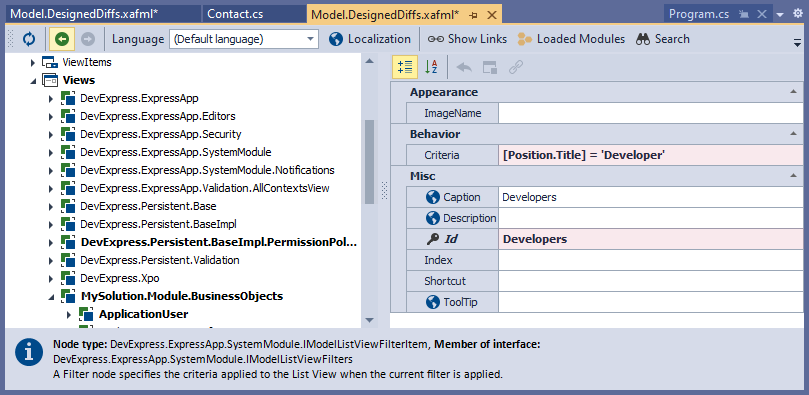
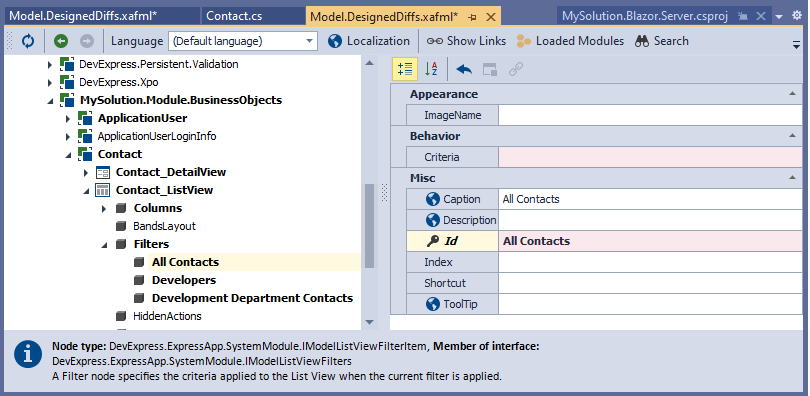
Add one more child node to the Filters node. Set the Id property to All Contacts and leave the Criteria property empty. This item will display all Contact objects in the List View.
For the Filters node, set the CurrentFilter property to Developers. The Developers filter will be initially applied to the Contact List View.
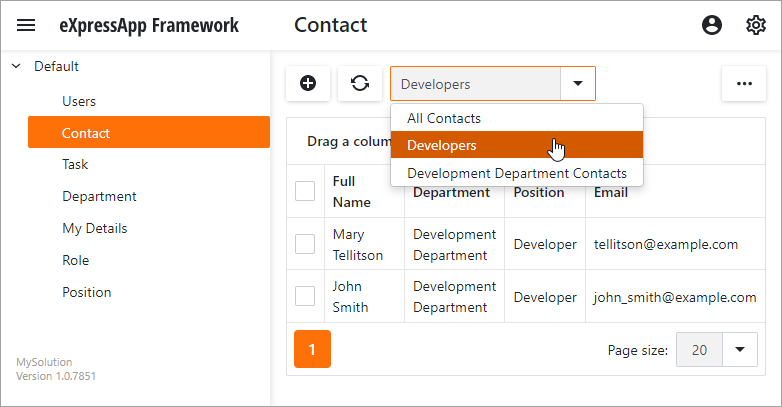
Run the application and check that the SetFilter Action is available.
Use the Model Editor to filter a List View
You can apply filters to a List View in the Model Editor. End-users cannot change these filters.
In the MySolution.Module project, open the Model.DesignedDiffs.xafml file in the Model Editor. Navigate to the Views | MySolution.Module.BusinessObjects | Contact_ListView node. Set its Criteria property to
Position.Title = 'Developer'.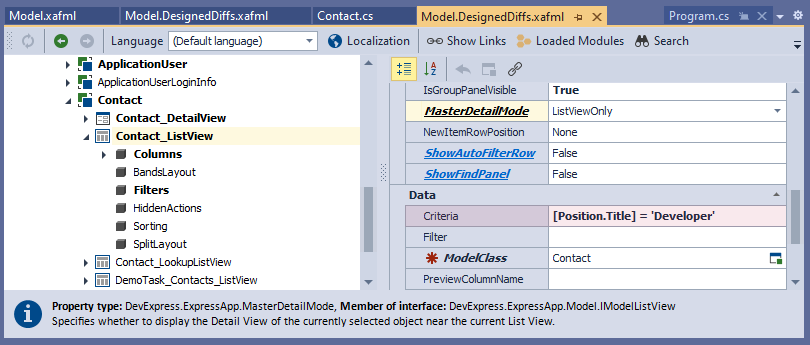
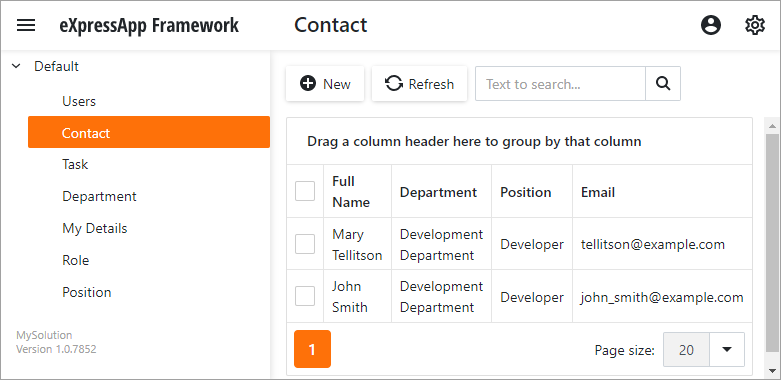
Run the application and check that the Contact List View displays only developers.
Filter on Data Source Level
You can create filters that cannot be changed at runtime or in the Model Editor.
In the Solution Explorer, right-click the Controllers folder in the MySolution.Module project, and choose Add DevExpress Item | New Item… to invoke the Template Gallery. Select the XAF Controllers | View Controller Visual Studio template, specify FilterListViewController as the new item’s name and click Add Item. As a result, you will get an autogenerated FilterListViewController.cs file with a single View Controller declaration.
Derive the controller from the ObjectViewController<ViewType, ObjectType> as shown below:
using DevExpress.Data.Filtering;
using DevExpress.ExpressApp;
using MySolution.Module.BusinessObjects;
// ...

public partial class FilterListViewController : ObjectViewController<DetailView, Contact> {
    public FilterListViewController() {
        InitializeComponent();
    }
    // ...
}
Override the OnActivated method. Use the CollectionSourceBase.Criteria property to specify a filter criteria:
public partial class FilterListViewController : ObjectViewController<DetailView, Contact> {
    // ...
    protected override void OnActivated() {
        base.OnActivated();
        View.CollectionSource.Criteria["Developers"] = CriteriaOperator.FromLambda<Contact>(c => c.Position.Title == "Developer");
    }
    // ...
}
Run the application and check that the Contact List View is filtered.