Change Field Visibility in a List View
This lesson explains how to select columns displayed in a List View. We will customize the Contact List View at design-time.
Note
Before you proceed, take a moment to review the following lesson:
Step-by-Step Instructions
In the MySolution.Module project, open the Model.DesignedDiffs.xafml file in the Model Editor.
Click the Views | MySolution.Module.BusinessObjects | Contact_ListView | Columns node to open the Grid List Editor Designer. Right-click the table header and select the Column Chooser.
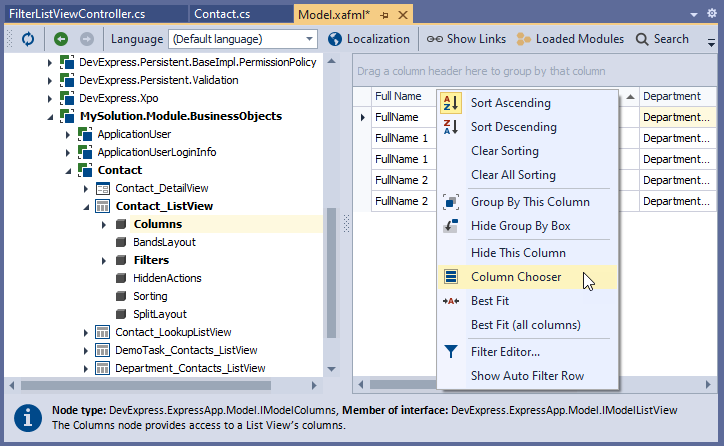
Drag columns to and from the Customization window to display the following columns in the List View: FullName, Department, Position, and Email.

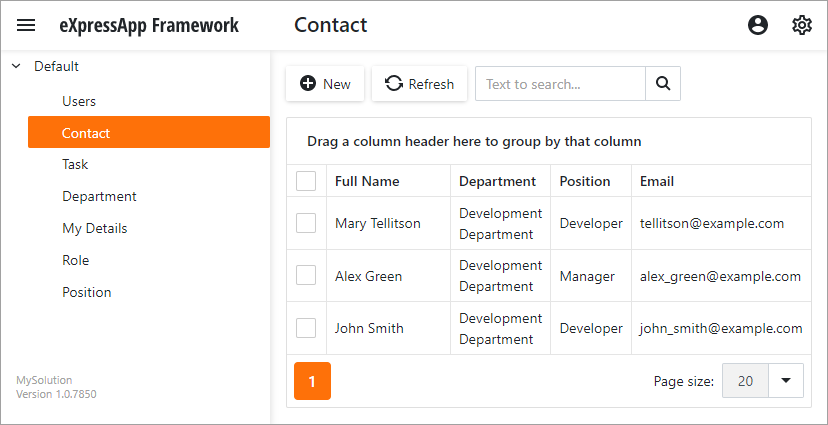
Run the application. The FullName, Department, Position, and Email columns are displayed in the Contact List View.
Detailed Explanation
Additional Layout Customization
You can also resize and group columns in the Grid List Editor Designer. See the following help section for more information: Design-Time Customization.
Reset Column Settings
Invoke the Model Editor right-click the Views | Contact_ListView node and select Reset Differences to display the List View with the default column settings.