Group List View Data
- 2 minutes to read
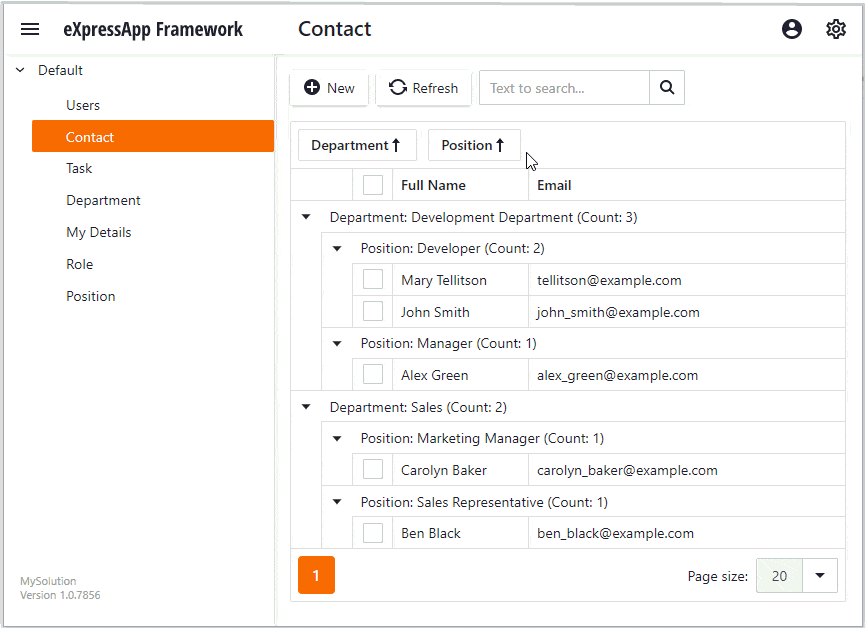
This topic explains how to group List View data, and uses the Department and Position properties created in previous steps to group the Contact List View data.
Note
Before you proceed, take a moment to review the following lesson:
Step-by-Step Instructions
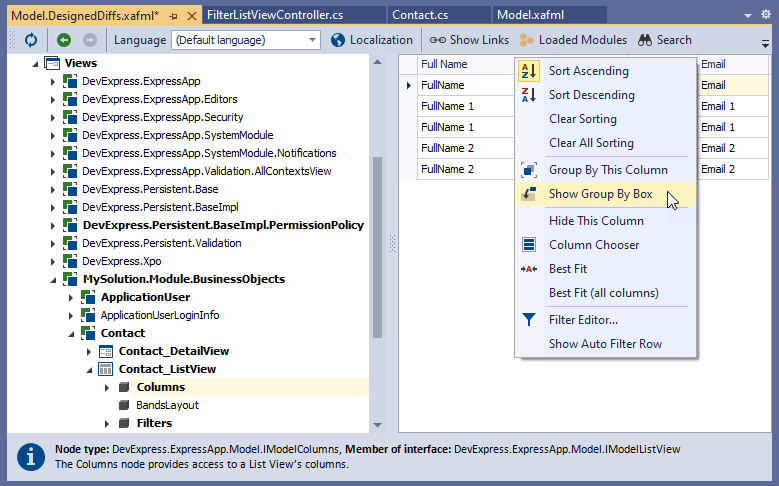
In the MySolution.Module project, open the Model.DesignedDiffs.xafml file in the Model Editor.
Click the Views | MySolution.Module.BusinessObjects | Contact_ListView | Columns node to open the Grid List Editor Designer. Right-click the table header and select the Show Group By Box item.
The Group Panel is displayed.
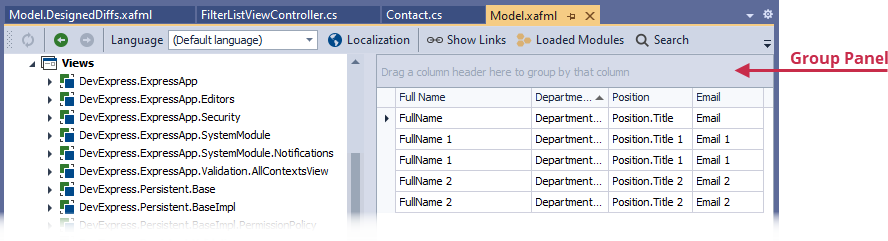
Drag the column’s header to the Group Panel to group data by the corresponding field. You can add multiple columns to the group area to create nested groups. Drag the Department and Position columns to the Group Panel.
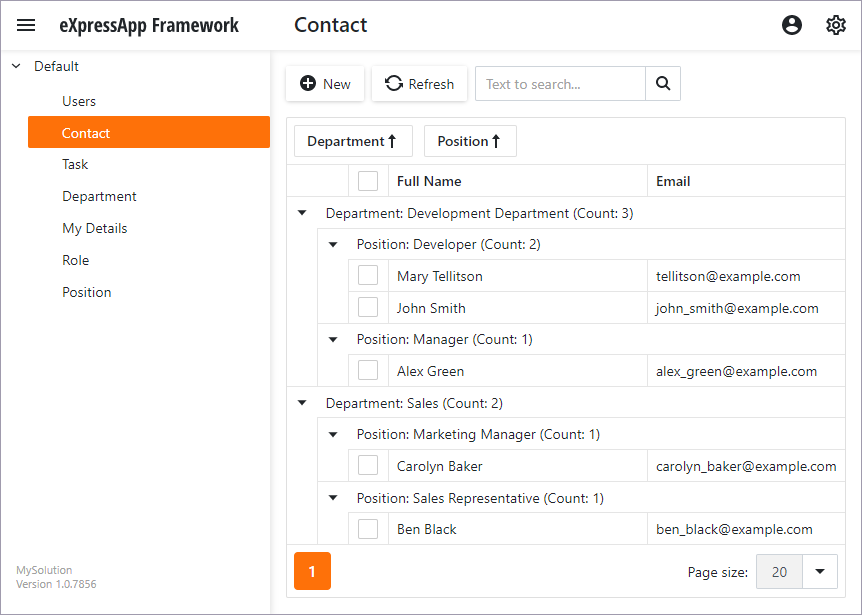
Run the application. The Contact List View is grouped by the Department and Position fields and the Group Panel is displayed.
Users also can drag columns to and from the Group Panel to group and ungroup List View Data.
Detailed Explanation
Use Column’s GroupIndex to Group Data
When you add a column to the Group Panel the column’s GroupIndex property changes. You can directly specify the column’s GroupIndex property to group List View data. See the following topic for more information: List View Columns Customization.
Prevent Users from Changing Groups
You can hide the Group Panel to prevent users from changing groups. Navigate to the Views | MySolution.Module.BusinessObjects | Contact_ListView node and set its IsGroupPanelVisible property to False.