Label
- 4 minutes to read
This document describes the XRLabel control’s main features.
Label Overview
The XRLabel control displays plain text in a report. You can add this control by dragging the XRLabel item from the DX:18.2: Report Controls Toolbox tab onto the report.

Use the XRControl.Text property to specify the label’s text. You can double-click the label to invoke its in-place editor and enter the desired text.

Press CTRL+Enter to submit text changes and exit the label’s in-place editing mode.
Data Binding
Display Field Values
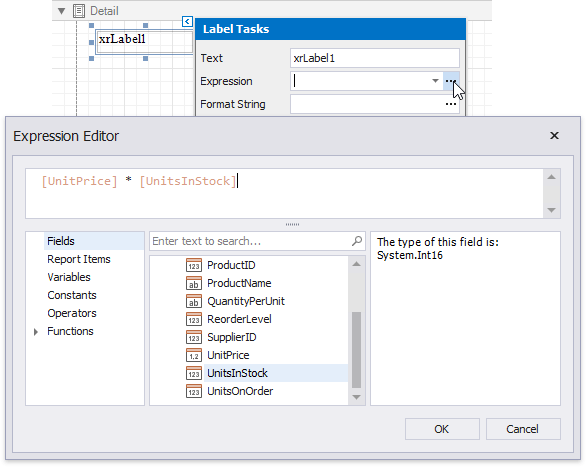
You can bind the label’s Text property to a data field obtained from a report’s data source. Click the control’s smart tag, expand the Expression drop-down list and select the required data field.

Clicking the Expression option’s ellipsis button invokes the Expression Editor. You can use this editor to construct a complex binding expression involving two or more data fields.
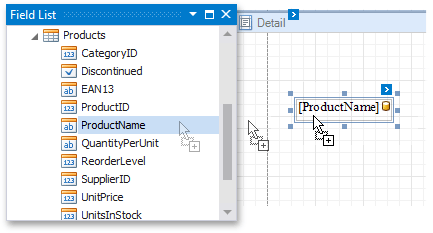
You can also drag and drop a numeric or text field from the Field List to create a new label bound to this field.
See the Bind Report Controls to Data topic to learn more about the available data binding modes and creating data-aware controls.
The XRLabel.ProcessDuplicatesMode, XRLabel.ProcessDuplicatesTarget, and XRLabel.ProcessNullValues options enable you to hide a control when a duplicated or null value appears in an assigned data source.
You can also specify output values’ format using the XRLabel.TextFormatString property.
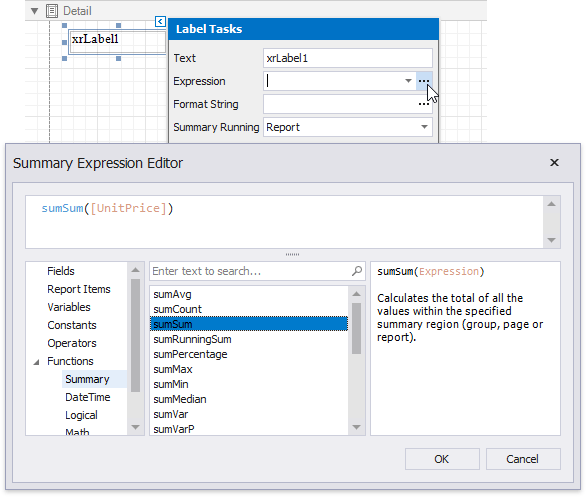
Display Summaries
You can make the label display a summary function’s result by setting the XRSummary.Running property to the required range and selecting the summary function in the Summary Expression Editor.
Adjusting the Label Size and Content
Static Content
At design time, you can change a label’s size to fit its static text (XRControl.Text) by right-clicking the label and selecting the Fit Bounds To Text command in the context menu:
If the XRControl.WordWrap option is enabled, the command displays control content in multiple lines. It decreases the control’s height and adjusts the width to fit this content.
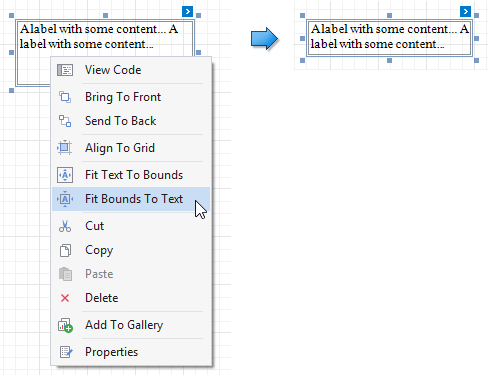
If the XRControl.WordWrap option is disabled and the control’s content is partially visible, the command adjusts the control’s size to display this content.
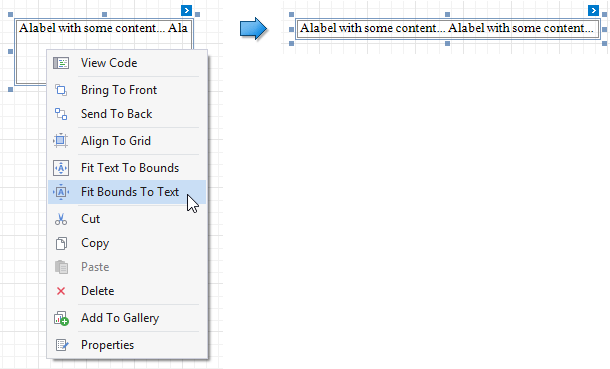
This command’s result also depends on the control’s XRControl.TextAlignment and XRControl.RightToLeft settings.
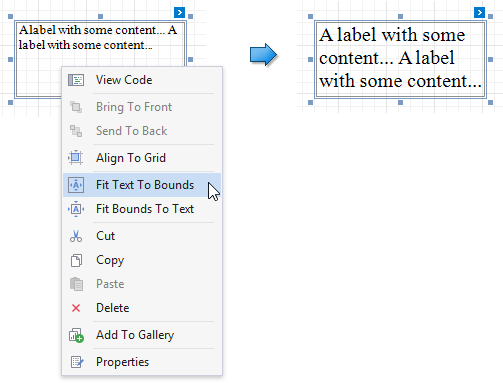
Use the Fit Text To Bounds command to adjust the control’s font size to fit its area. The XRControl.WordWrap option defines whether the resulting text can occupy multiple lines or should be in a single line.
These commands are not available in the following cases:
- A control’s XRControl.Text property is set to an empty string;
- A control’s XRLabel.Angle property is specified;
- The XRControl.Text property is bound to data (expression or legacy data binding is assigned, or mail merge is used).
You can also perform similar operations at runtime using the BestSizeEstimator class methods.
Data-Bound Labels
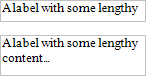
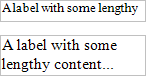
The XRLabel.CanGrow and XRLabel.CanShrink properties allow you to increase or decrease the control’s height according to its content in Print Preview.
| CanGrow = true | CanGrow = false |
|---|---|
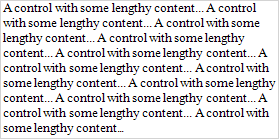 |
 |
| CanShrink = true | CanShrink = false |
|---|---|
 |
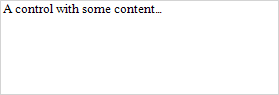 |
The XRLabel.AutoWidth property specifies whether to adjust a data-bound label’s width to its content automatically.
You can also use the opposite XRLabel.TextFitMode property to adjust a control’s font size to fit its boundaries in Print Preview.
| TextFitMode = None | TextFitMode = GrowOnly | TextFitMode = ShrinkOnly | TextFitMode = ShrinkAndGrow |
|---|---|---|---|
 |
 |
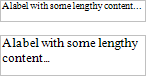 |
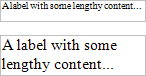 |
See the Lay out Dynamic Report Contents topic for more information on these options.
When you need to fit dynamic data at runtime, use the BestSizeEstimator class methods.
Interactivity
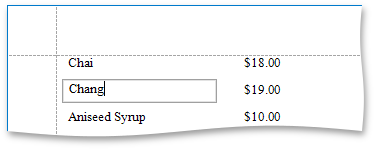
You can enable editing a label’s content in Print Preview by setting the EditOptions.Enabled option to true.
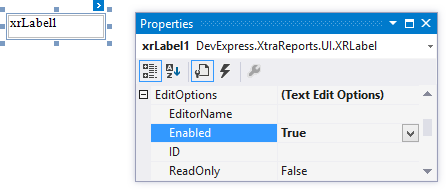
Clicking this label in a previewed document invokes the appropriate editor.
Use the label’s XRLabel.InteractiveSorting option to enable sorting report data by clicking this label in Print Preview. Set the SortingOptions.TargetBand property to the required Group Header or Detail band, and the SortingOptions.FieldName property to the corresponding data field.

Refer to Sort a Report in Print Preview for a step-by-step tutorial.