Use DevExpress Visual Studio Templates to Create an ASP.NET Web Forms Reporting App with a Document Viewer
- 2 minutes to read
This tutorial describes how to use the DevExpress Template Gallery to generate a basic ASP.NET Web Forms application that contains a Document Viewer.
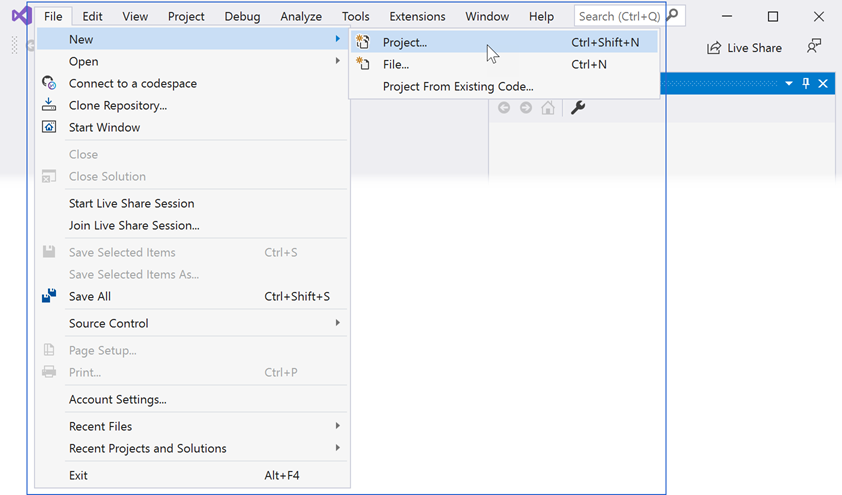
Select FILE | New | Project in the main menu or press Ctrl+ Shift+N to create a new project:
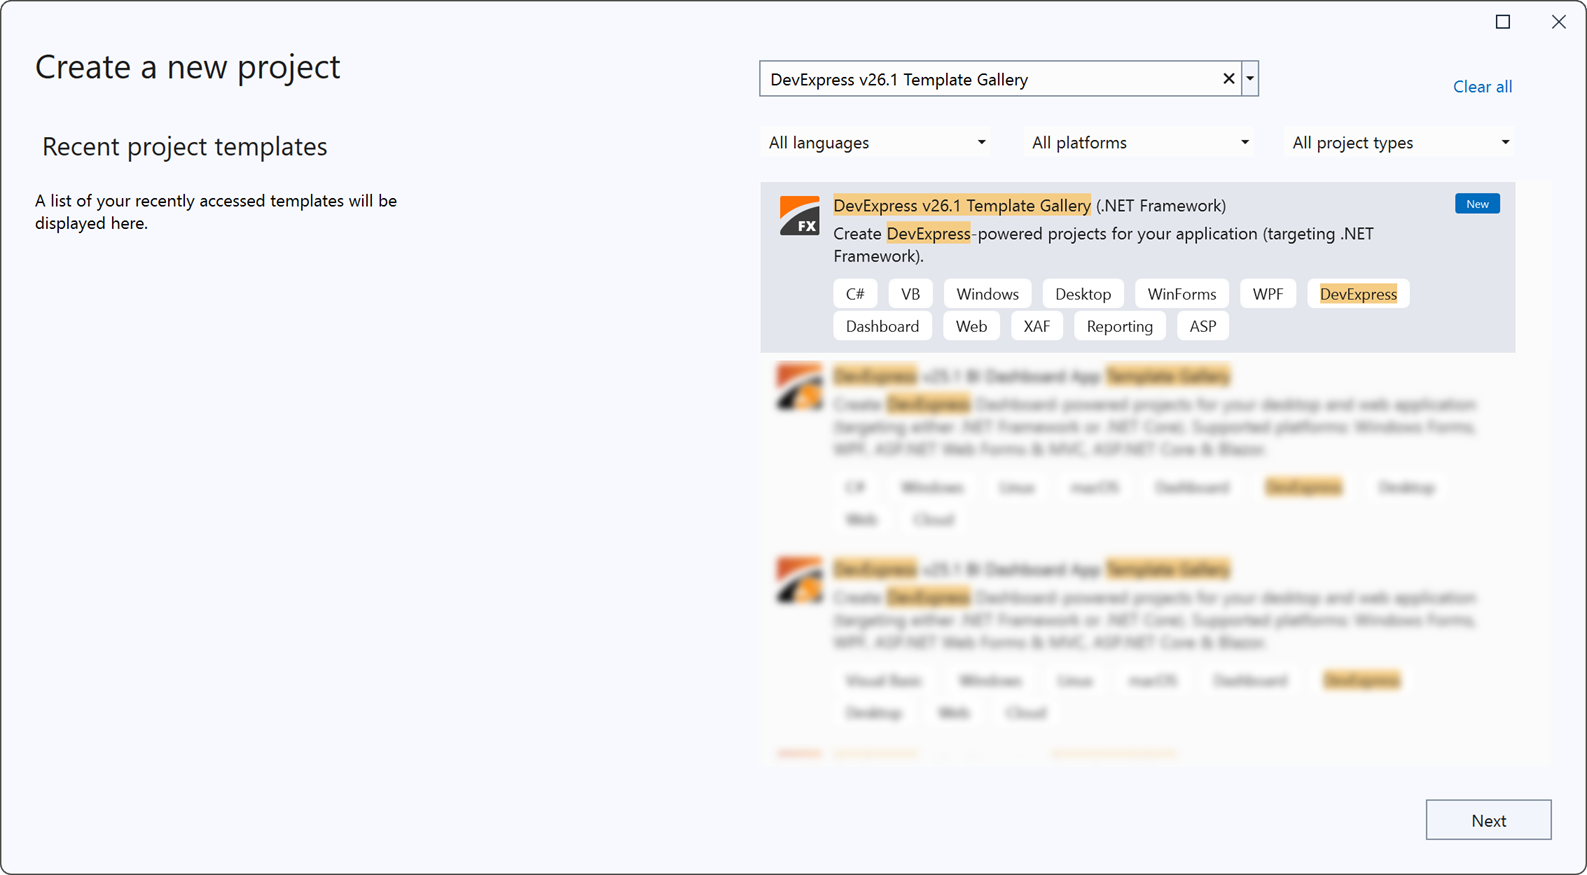
Select the DevExpress v26.1 Template Gallery (.NET Framework), and click Next:
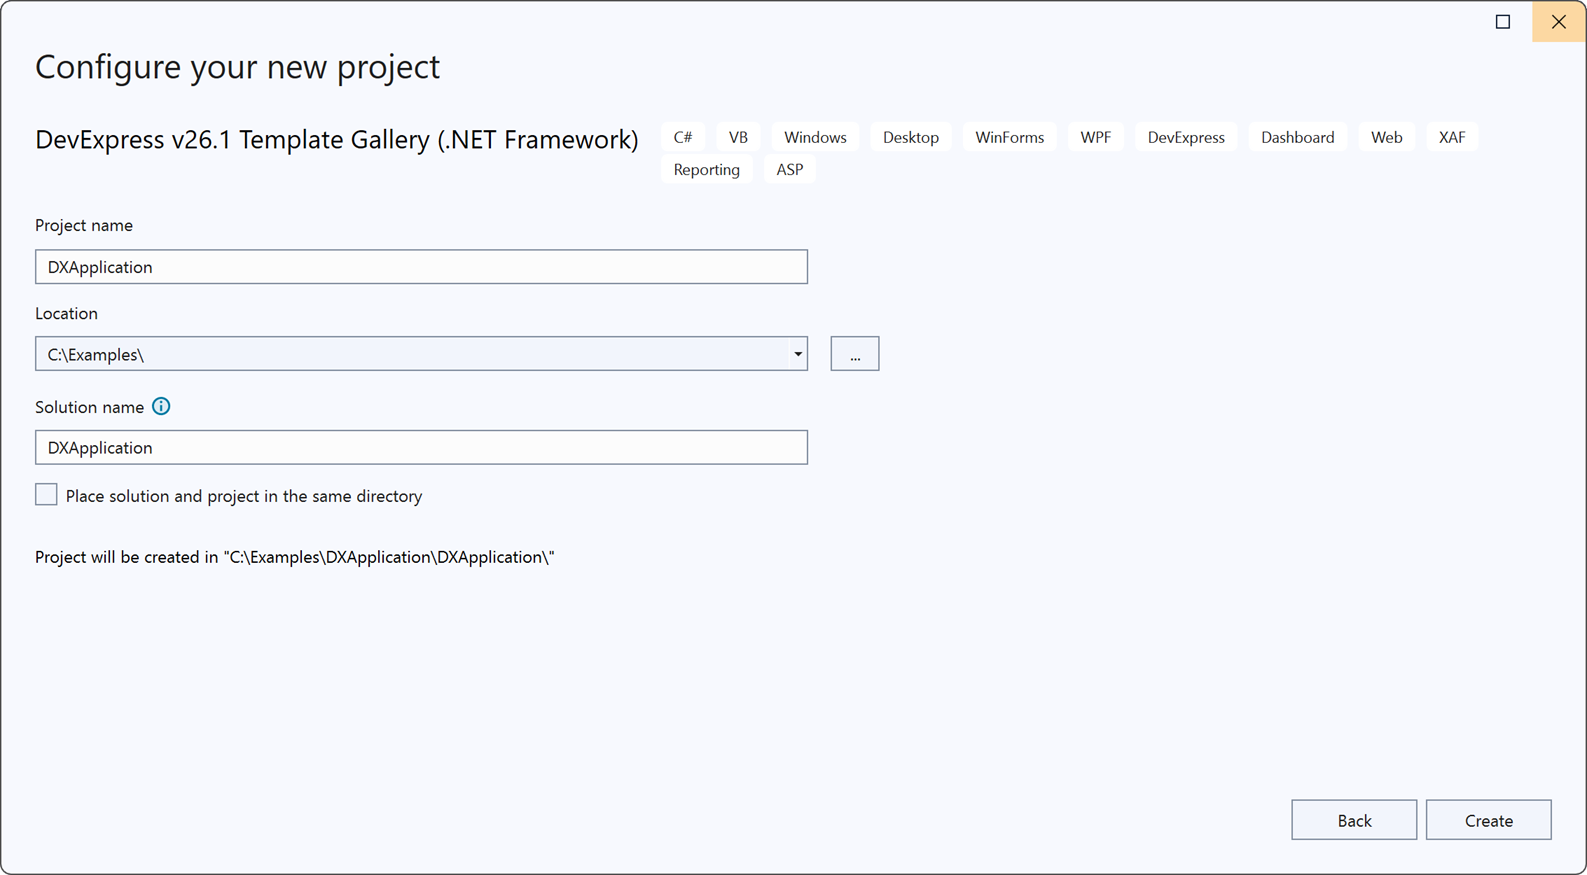
Specify a project name and location, and click Create:
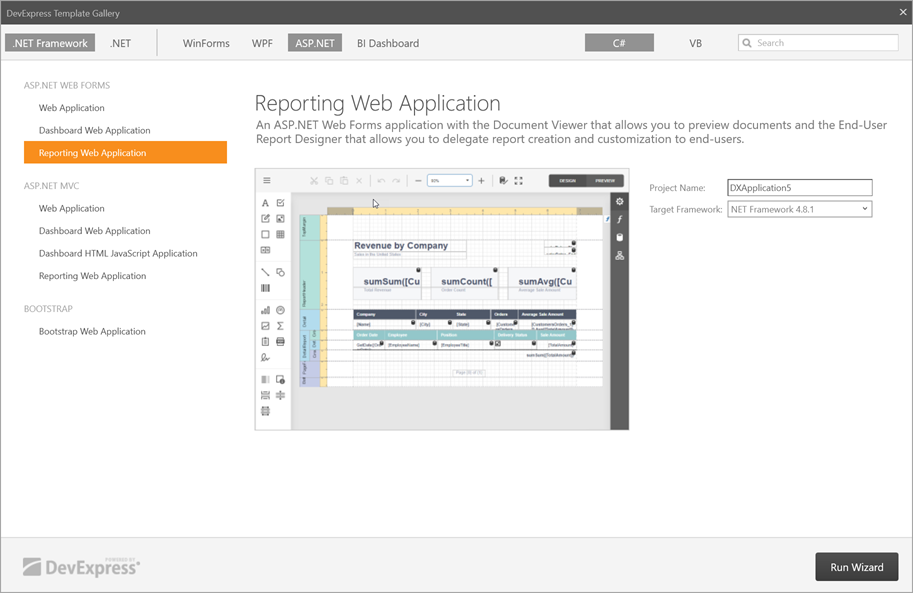
In the invoked DevExpress Template Gallery, select Reporting Web Application from the ASP.NET Web Forms category and click Run Wizard.
Set Add Viewer Page to true to add the Document Viewer (the
Viewer.aspxpage) to the application.Tip
You can add both a Web Document Viewer and a Report Designer to the application.

Use the following Document Viewer settings:
Add Report Storage
Specifies whether to create a sample server-side report storage. This storage allows users to open report layout files (REPX) from the Reports folder and instances of report types predefined in the assembly.
Report Storage Name
Specifies the report storage class name.
Session State
Specifies the type of session support to handle requests. Choose Required to enable the Document Viewer to access values stored in HttpContext.Session.
Click Create Project to apply these settings to the project.
For information on how to create an ASP.NET Web Forms application with a Report Designer, review the following topic: Use DevExpress Visual Studio Templates to Create an ASP.NET Web Forms Reporting App with a Report Designer.